In this part of the tutorial we’ll add a simple battery measurement with the internal Analog-to-Digital Converter (ADC) of nRF52832. Final code of this blog post can be downloaded at Ruuvi GitHub in the ruuviblog-branch, tag 3.7.0-alpha.
Please follow part 1 of the series for details on how to clone the repository and compile the code. Final hex of this tutorial can be downloaded from the Ruuvi Jenkins.
Battery Measurement — The Simple Way
Simplest way to estimate the remaining battery capacity is to measure the voltage our tag runs at. However, this approach has several issues:
- It does not account for the temperature
- It does not account for the internal resistance of the battery
- It does not account for non-linear curve of the battery capacity and remaining charge
- Standalone voltage measurement may or may not tell us about the voltage droop when something power intensive, such as BLE transmission, occurs.
We’ll use the nRF52 ADC to measure the battery for now regardless of these limitations.
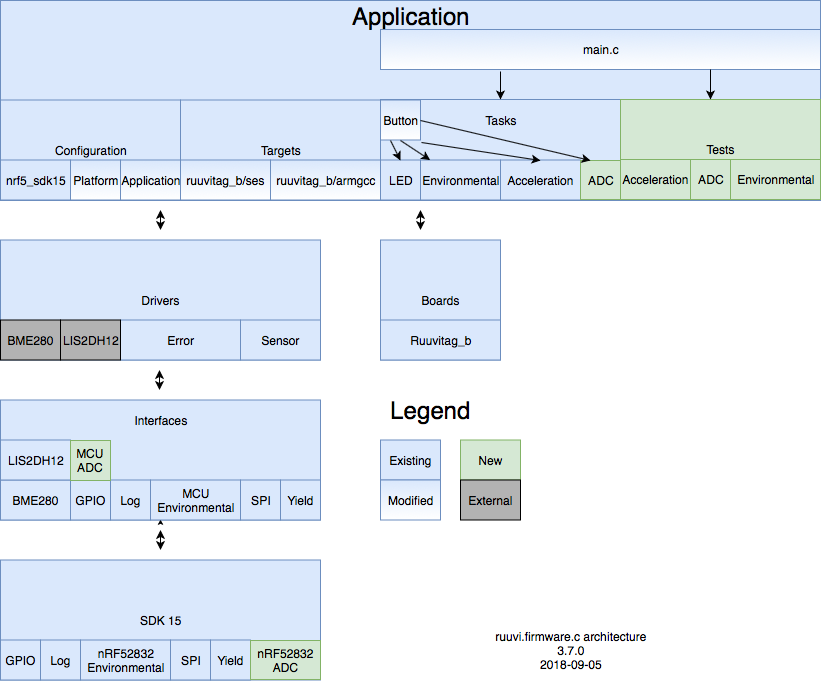
ADC interface
While the previously defined sensor interface might be a bit overkill for the use case of reading a single voltage out of internal ADC of the nRF52, it’s already used for reading the temperature out of nRF52. Let’s keep using it to avoid any unnecessary special cases in our data handling. We can use the handle of a sensor to represent a channel of the ADC just as we use it to represent GPIO pin on the SPI bus.
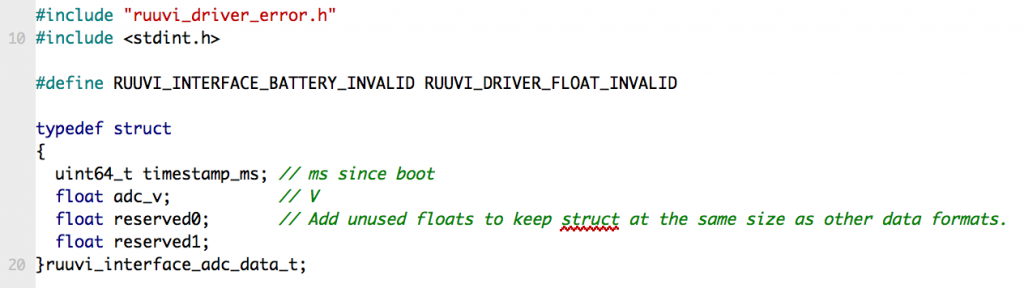
To stay as compatible as possible with the other sensors we add two reserved floats to our ADC data structure.
Our sensor interface does not have a proper support of making instances of the sensor, so we won’t be having a multichannel support for the ADC. Since we don’t need more than just the battery voltage at this point we won’t append the interface to accomodate several instances of ADC. If the need arises maybe we’ll look into doing the entire interface with C++.
ADC Driver
Resolution
The ADC has support for 8-, 10-, 12- and 14-bit resolutions. We’ll support them all, and pick 10 bits as the default resolution as it’s the same as Nordic Semiconductor example uses.
Scaling
The absolute scale of our ADC depends on the voltage reference and gain factor of the ADC. For the reference we can use internal 600 mV or supply voltage (VDD) / 4. Because our device is battery-powered we opt for known internal reference. The gain factor can be anything from 1/6 to 4/1, however the analog voltage input must not exceed the VDD which gives us upper limit of 3.6 V for the scale. Lower limit would be the reference / maximum gain, or 150 mV. However, since we’re going to support only single-ended mode and the maximum resolution of 14 bits provides millivolt accuracy which is enough for our use case we’ll fix the scale to internal reference / minimum gain, 3600 mV. On scale_get function we return 3 to stay in line with the principle of parameters being “at least”.
DSP
The ADC has support for oversampling, up to 256x. Since our configuration data format supports values only up to 200, we’ll limit the maximum oversampling to 128 which is one step below the max supported by the hardware.
Mode
Theoretically we could support continuous sampling with nRF52 timers and Peripheral-Peripheral Interconnects (PPI), however let’s once again keep things simple and support only single samples and take a new sample on data_get call to emulate continuous mode.
Adding ADC to the Program
The ADC task is almost exactly the same as environmental task. We initialize and configure the ADC and print out the samples on button press.
Our main and button task require small adjustments of adding the ADC initialization to main and calling ADC logging on button task. Let’s give it a go!
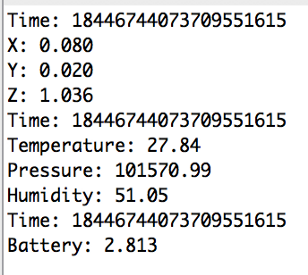
My cheap-o multimeter gives 2.79 V as the voltage, so it seems that the ADC is producing reasonable results. It’s time to check the power profile.
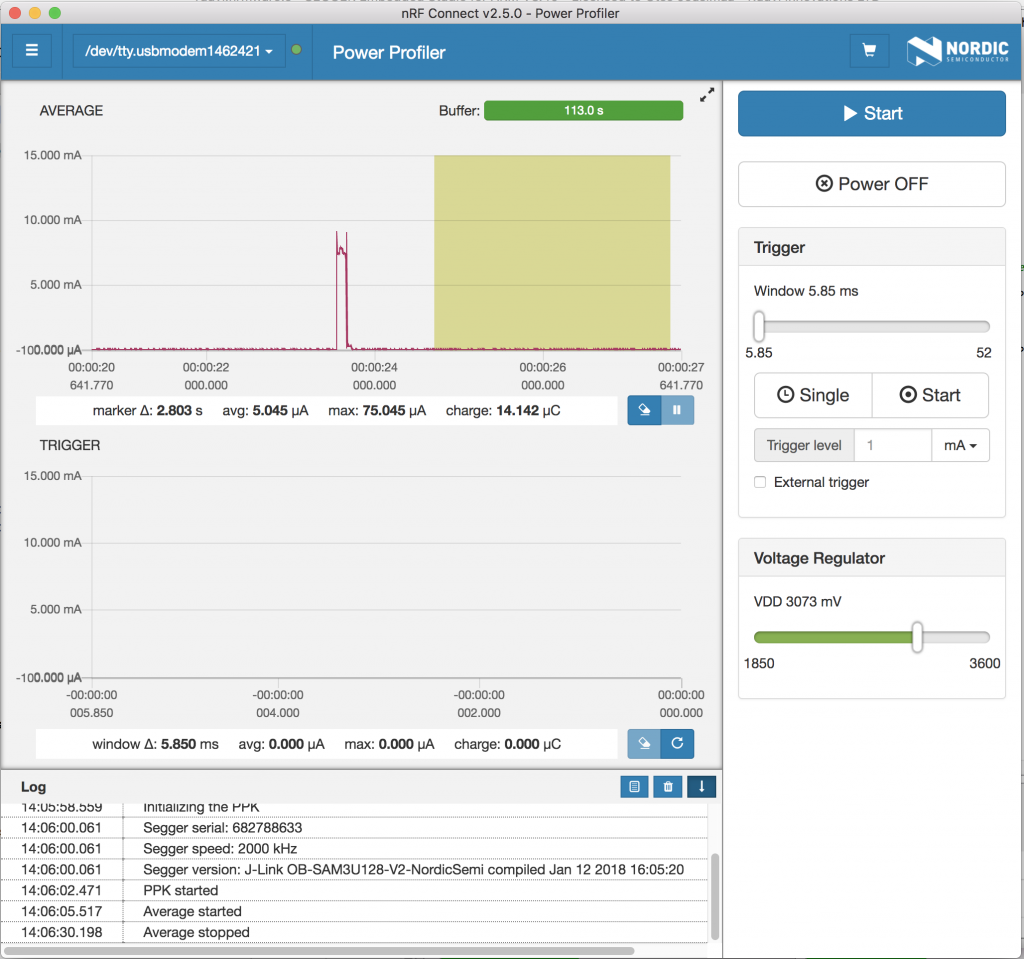
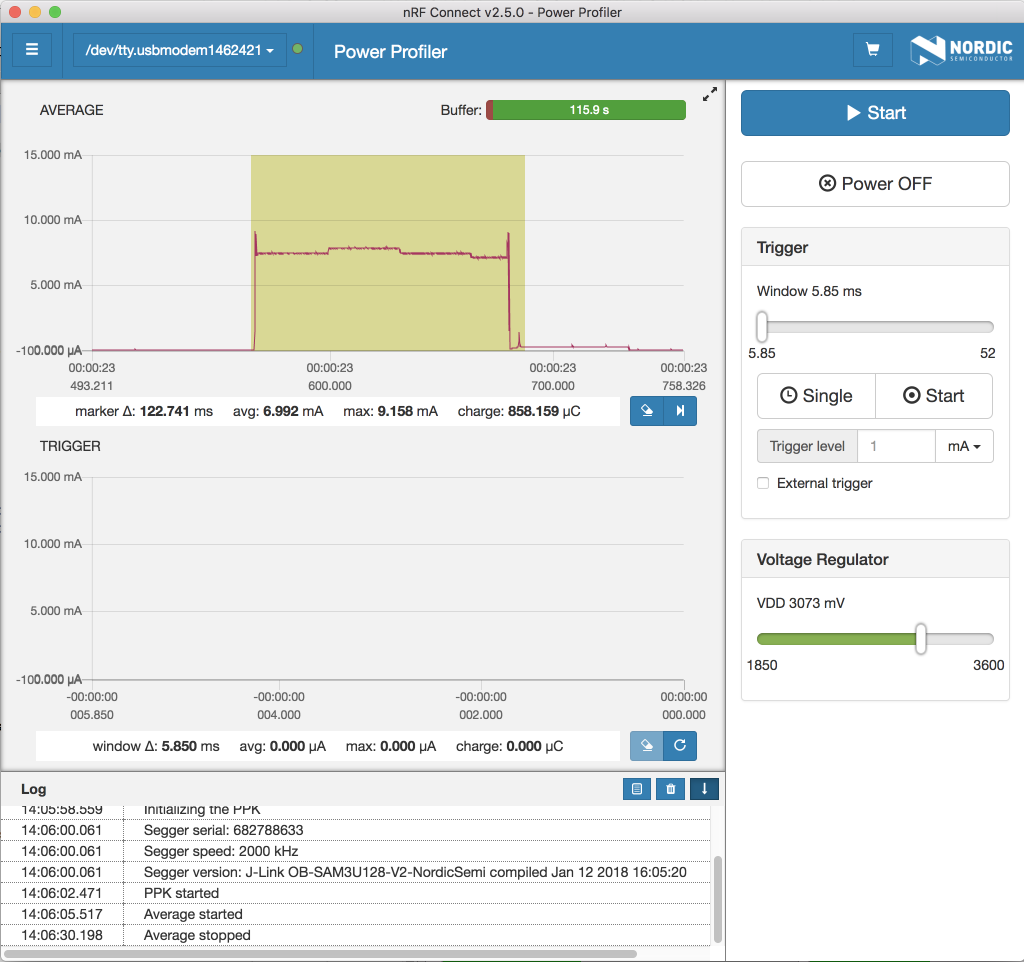
Curiously our current consumption is now down to 5.0 μA at idle, down from 5.4 μA in our previous post. This could be a temperature effect, or maybe it is a matter of repeatibility of the measurements on Nordic Power Profiler Kit. In any case, we can be happy with the current consumption level.
Testing
As previously hinted, building a better test environment is on our agenda. We should test that the drivers we write work as expected and handle any corner cases graciously. The tests also give us well-defined behaviour for versioning: any published test which used to pass must pass in the future unless we bump up the major version number of Ruuvi Firmware.
We’ll create a new folder for the tests, since we want to keep the tests separate from the releases which the end-users will run. This is another place where the sensor interface comes in handy: We can run the exact same set of tests on each implementation and check that the behaviour is same on all of them.
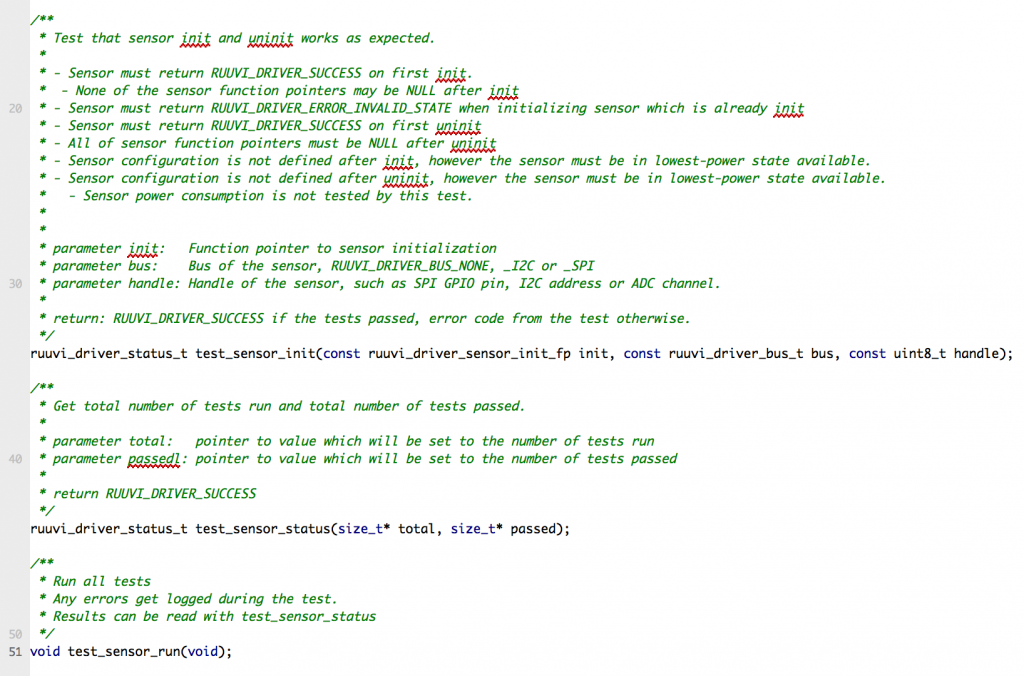
Let’s start with initialization and uninitialization behaviour of each sensor. Initialization should not return any error on valid configuration, unless sensor was already initialized. Uninitialization should always succeed. Function pointers of the sensor should be configured after initialization and NULLed after uninitialization. If NULL is passed to either of the functions, they should return an error.
We’ll also define a helper function to check how many tests were run and how many passed as well as a single function to run all the tests.
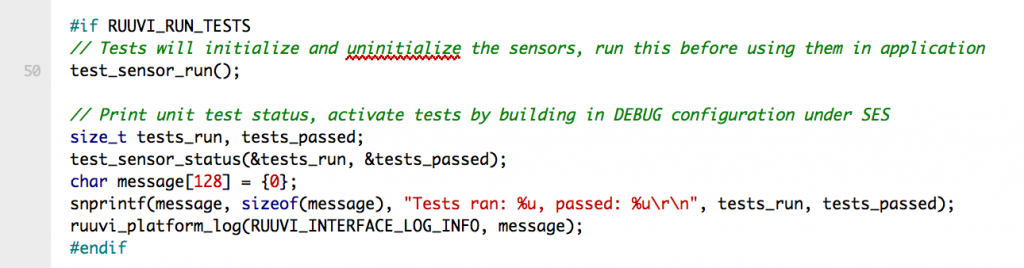
We’ll use the SES build configurations here, and define RUUVI_RUN_TESTS on debug configuration. Then we add the tests to main.c
Let’s see how it goes on the code we used to sample ADC and power profile the tag with!
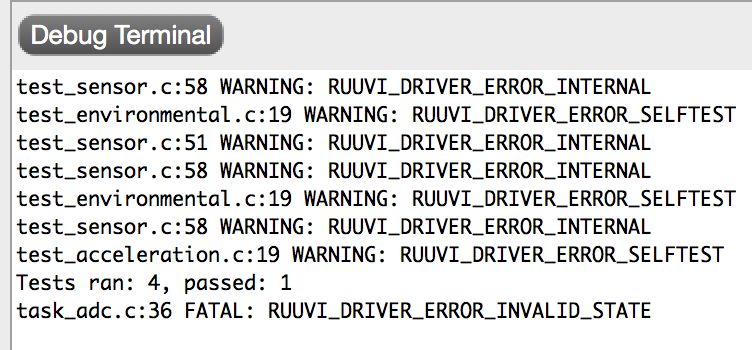
Our tests are already paying off, as they reveal that our initialization does not work as expected. After some digging we find that:
- ADC does not uninitialize properly
- Accelerometer, BME280 and nRF52 temperature sensors allow re-initialization without uninitialization
- nRF52 temperature sensor does not return error if given NULL as initialization pointer
- Function pointer samplerate_get does not get set propertly on nRF52 environmental sensor initialization, as getter overwrites setter.
After fixing these issues, let’s rerun the program:
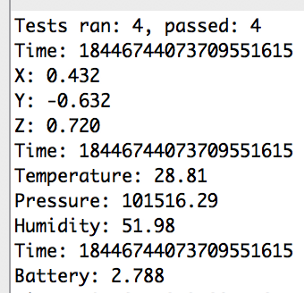
Conclusion
We have now added support for measuring the device voltage using the internal ADC of nRF52. Our testing has taken another step forward with basic unit tests being run on the implementations of the sensor interface functions.
We’ll keep on expanding the tests built here to cover other functions of the interface and finally add timestamping of the sensor data to our drivers in the next part of Firmware Friday series.
Stay tuned and follow @ojousima and @ruuvicom on Twitter for #FirmwareFriday posts!