When NFC is supported on both your device and your mobile device is NFC-enabled, you can use NFC to add a new sensor or view sensor information if the sensor was already added to the Ruuvi Station app.
The capability to scan a sensor through Near-Field Communication is enabled on the Add a New Sensor page, the Dashboard, and on any Sensor Card page (full image view) in Ruuvi Station mobile application.
On Android,
On iOS, tap on Add with NFC button to use NFC feature, then
Touch the top of the RuuviTag sensor, or touch the Ruuvi logo of the Ruuvi Air sensor with your mobile device.
NFC antenna location on your mobile device varies by the manufacturer, so it may require moving your device to the correct position against the Ruuvi sensor in order to get the near-field communication to trigger.
Next,
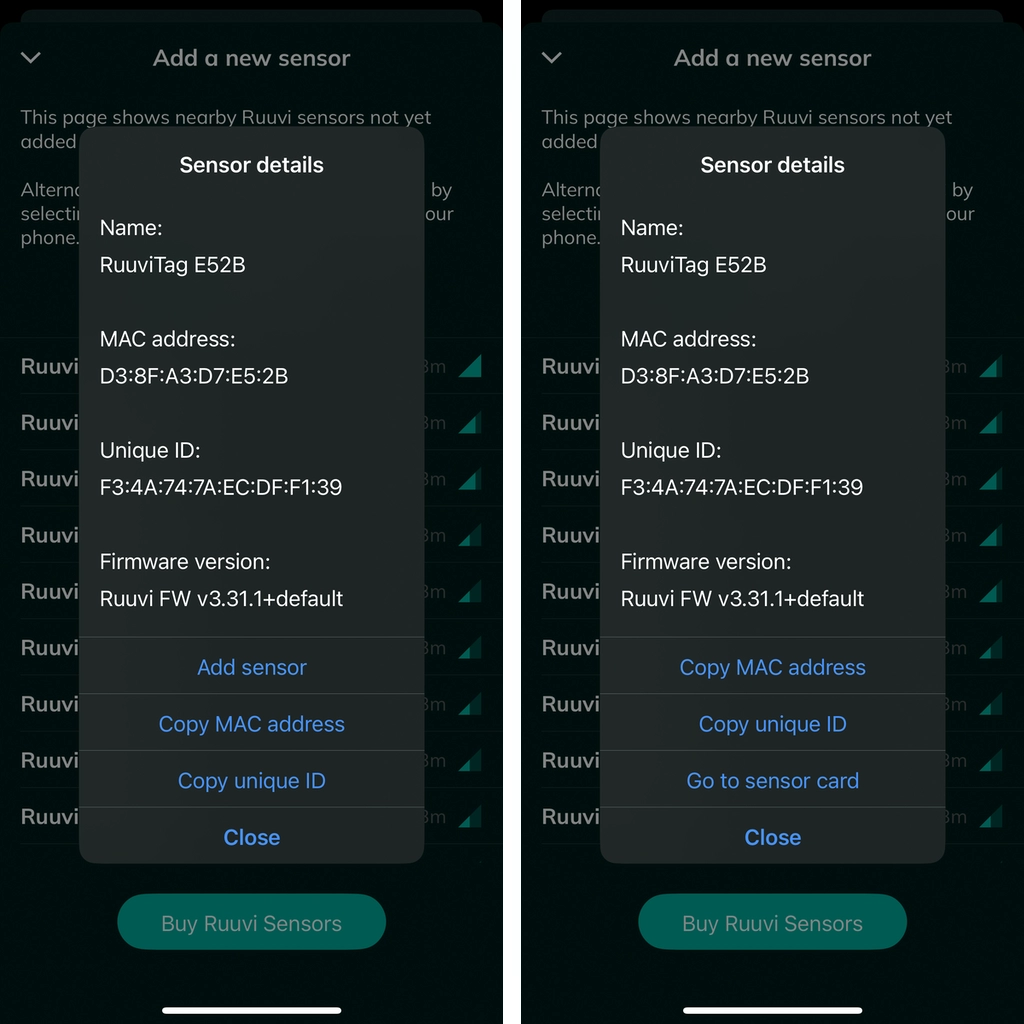
- When a new sensor is scanned with NFC on the Add a New Sensor page, the sensor will be added to the application and a new Sensor Card will be created.
- When a new sensor is scanned with NFC on the Dashboard or Sensor Card page, a popup showing sensor details is displayed including an Add Sensor button, which will enable the user to add the sensor to the application.
- When an existing sensor is scanned with NFC on the Add a New Sensor page, you will be moved to the existing Sensor Card page (full image view).
- When an existing sensor is scanned with NFC on the Dashboard or on the Sensor Card page (full image view), a popup showing sensor details is displayed.
Notice: When NFC is not supported or is disabled on your device, or when the Ruuvi Station application is minimized in the background, trying to scan a Ruuvi sensor with the device does nothing.