When you power on the Ruuvi Gateway for the first time, it’s ready for Wi-Fi connection right out of the box, with a simple push of a button.
Ruuvi Gateway has built-in support for WPS (Wi-Fi Protected Setup), a network security standard that simplifies the process of connecting devices to a Wi-Fi network by allowing users to connect with a push of a button or a PIN, without needing to manually enter the network password.
This support article will guide you through the simple steps to set up your Ruuvi Gateway for Wi-Fi connection using WPS.
How to Enable and Activate WPS on Your Wi-Fi Router
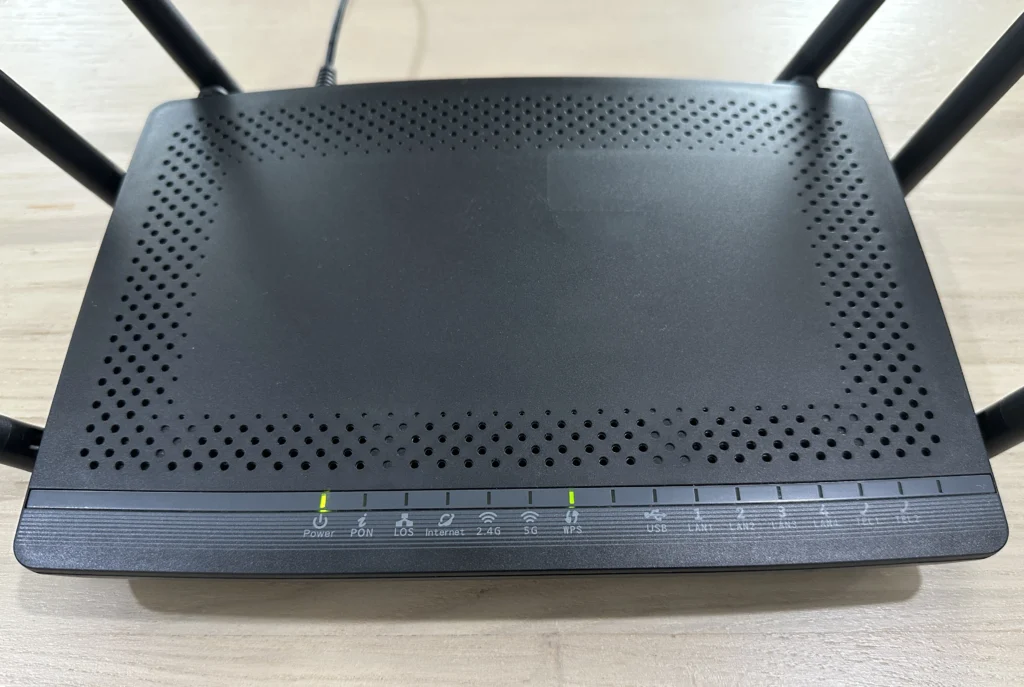
First, you need to check if your Wi-Fi router supports WPS. You can usually find this information in the manufacturer’s support documentation, or more easily by looking for a dedicated WPS button and possibly an accompanying LED indicator on your device.
In most cases, your Wi-Fi router already supports it and all you need to do is push the button on your device to activate WPS.
In certain Wi-Fi routers, WPS needs to be enabled separately for 2.4GHz and 5GHz bands. If the connection doesn’t succeed on the first attempt, you may need to enable WPS for the 2.4GHz band in your Wi-Fi settings before pressing the WPS button to activate it.
Connect your new Ruuvi Gateway to power and see the magic happen
Once WPS is activated on your Wi-Fi router, simply connect the Ruuvi Gateway to a power source and wait for a few moments.

The indicator LED on your Ruuvi Gateway will signal when it’s ready to connect via WPS. Located beneath the power connector, the LED will display the light sequence RRRRRRRRGRGGGGGGGGGG to indicate readiness.
Within a few seconds, the Ruuvi Gateway will connect to your Wi-Fi network and confirm the connection by switching the LED to solid green.
Configure Wi-Fi connection using WPS in Ruuvi Gateway Setup Wizard
If you already had Ruuvi Gateway configured previously but want to use WPS to reconfigure it to connect to your Wi-Fi, this is also possible. There are 2 possible scenarios:
1. You want to factory reset your Ruuvi Gateway and connect it to your Wi-Fi with WPS
Warning! All previously configured settings on your Ruuvi Gateway will be lost.
In this case, you can simply activate WPS on your router and proceed to locate the keyhole button at the back of your Ruuvi Gateway router and hold it down for 10 seconds. Release the button after the LED indicator shows RR–RR– and wait for WPS to complete the connection to your Wi-Fi network.
2. You want to reconfigure your Ruuvi Gateway and connect to Wi-Fi via WPS using the setup wizard
Start by activating the Ruuvi Gateway hotspot by briefly pressing the keyhole button on your Gateway. Then, connect to it by selecting the “Configure Ruuvi Gateway XXXX” network from your device’s Wi-Fi connections. The setup wizard should open automatically, but if not, you can manually access it by opening your web browser and entering the address 10.10.0.1.
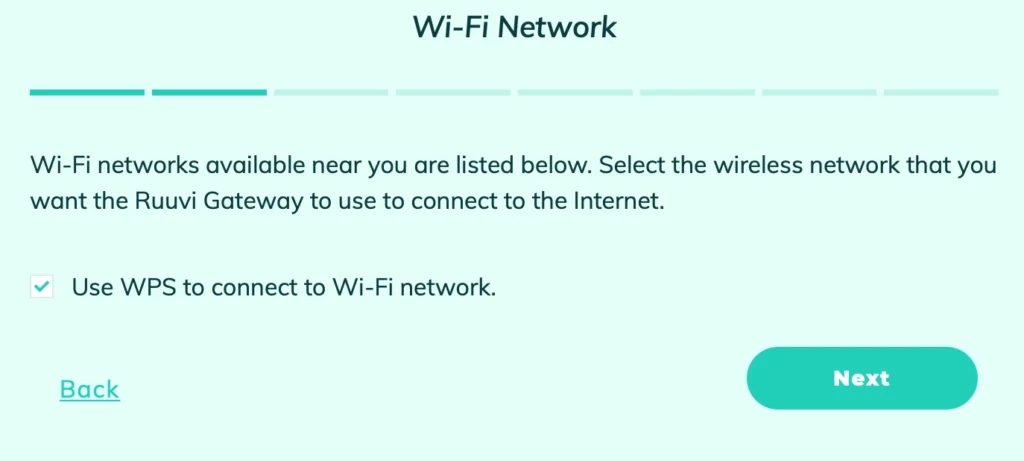
In the Ruuvi Gateway setup wizard, select “Wi-Fi” as the connection type and proceed to the configuration page. First, press the WPS button on your Wi-Fi router, then activate the “Use WPS to connect to Wi-Fi network” option on the page and select “Next”. WPS will complete the Wi-Fi connection automatically. Press “Next” until the setup wizard has finished and configuration has been saved.
Conclusion
Connecting to a Wi-Fi network using WPS is as easy as pressing a button on your router. Simply follow the steps above to use the WPS functionality to connect your Ruuvi Gateway to Wi-Fi.