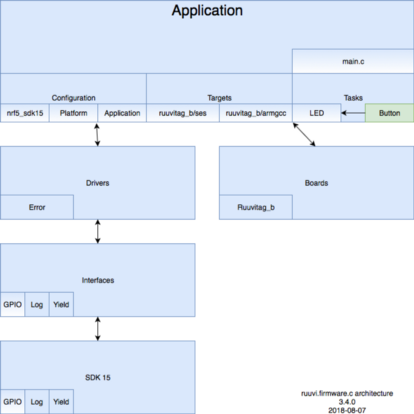
In this part of the tutorial we’ll extend the GPIO drivers to wake RuuviTag up from yield made in part 1 and trigger LED cycling task implemented in part 3. Final code of this blog post can be downloaded at Ruuvi GitHub in the ruuviblog-branch, tag 3.4.2-alpha.
Please follow part 1 of the series for details on how to clone the repository and compile the code. Final hex of this tutorial can be downloaded from the Ruuvi Jenkins.
Baby’s First Input
In the last part of our series, we were left with a problem: Our tag had no input from the external world or internal peripherals, so we could not go to sleep and wait for something to happen, but rather had to loop over fixed delay which required our tag to stay awake and burn through the battery. We’ll fix this with interrupt from the buttons.
GPIO Interrupt
Interface
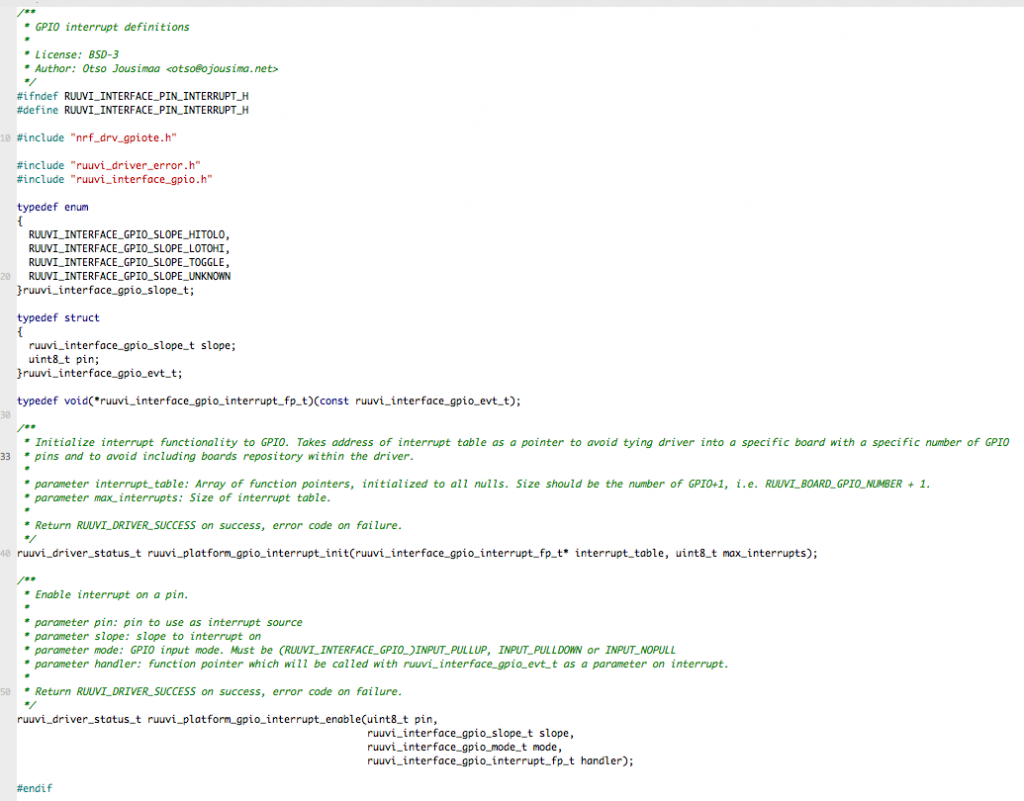
Our interface defines possible slopes for the GPIO interrupt: high-to-low, low-to-high and toggle. Additionally we’ll define unknown just in case. Interrupt event type with the source pin and slope is defined, we’ll pass this event to our pin interrupt function.
We have two initialization functions: One for the gpio module and one is for the specific interrupt. Module initialization takes address to an array of function pointers as a parameter, this is to avoid tying driver module to a board module which would have the number of GPIO pins defined.
Implementation
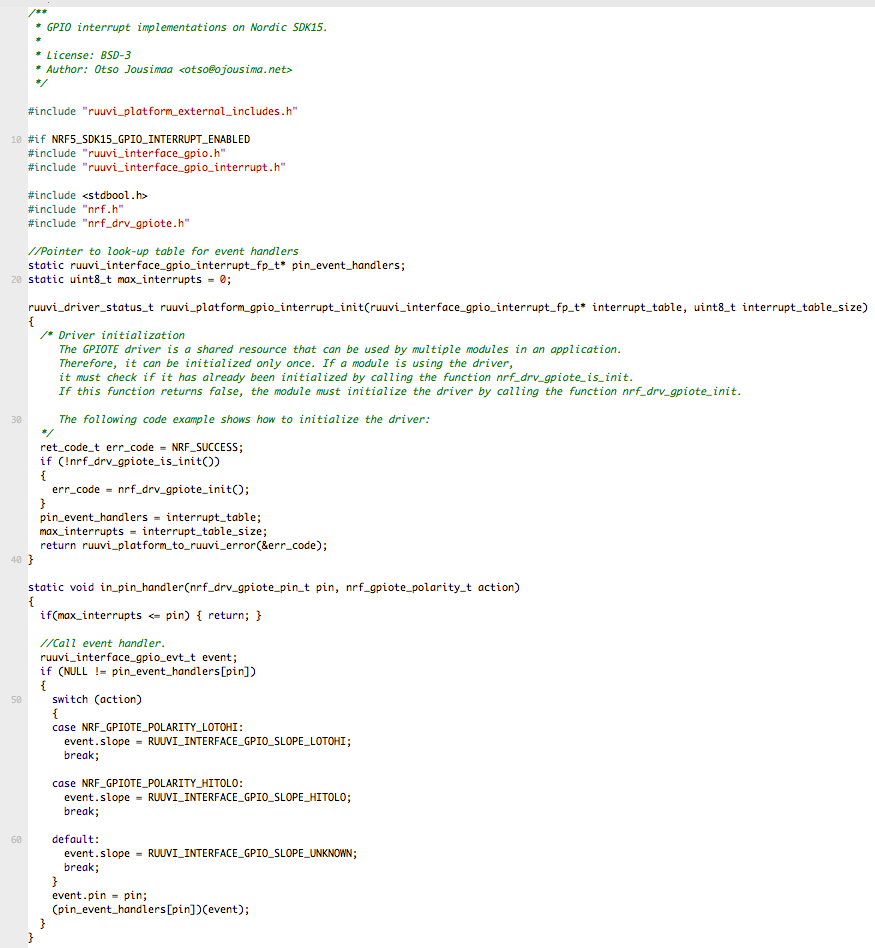
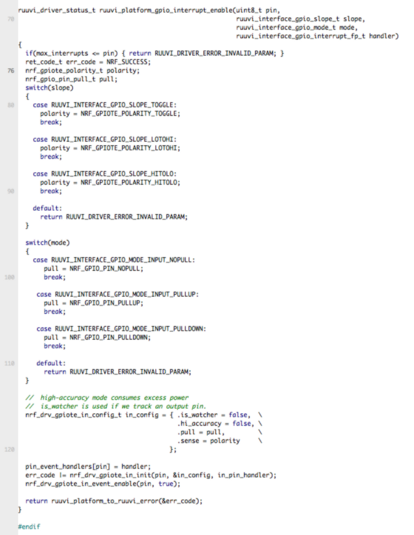
As before, we’ll implement the functionality by passing calls to the Nordic SDK. We’ll also store a look-up table of pointers to interrupt functions and pass interrupts to the given function once interrupt occurs.
Adding Button Task
We’ll want to trigger the task_led_cycle() on a button press, so we’ll start by defining a function pointer with a matching signature for the task. Our task initialization then takes slope and function pointer as parameter.
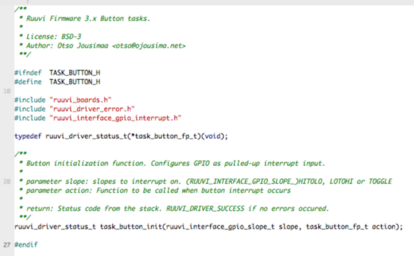
Our button task implementation wraps the task_button_fp_t inside ruuvi_interface_gpio_interrupt_fp_t and calls the GPIO interrupt initialization. Here we can include the GPIO number definition from the ruuvi.boards.c
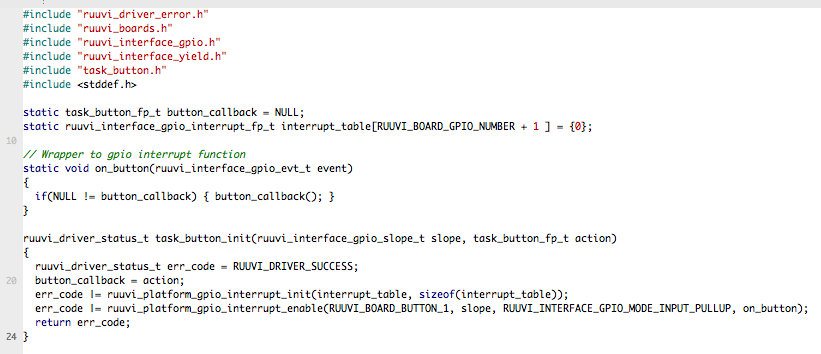
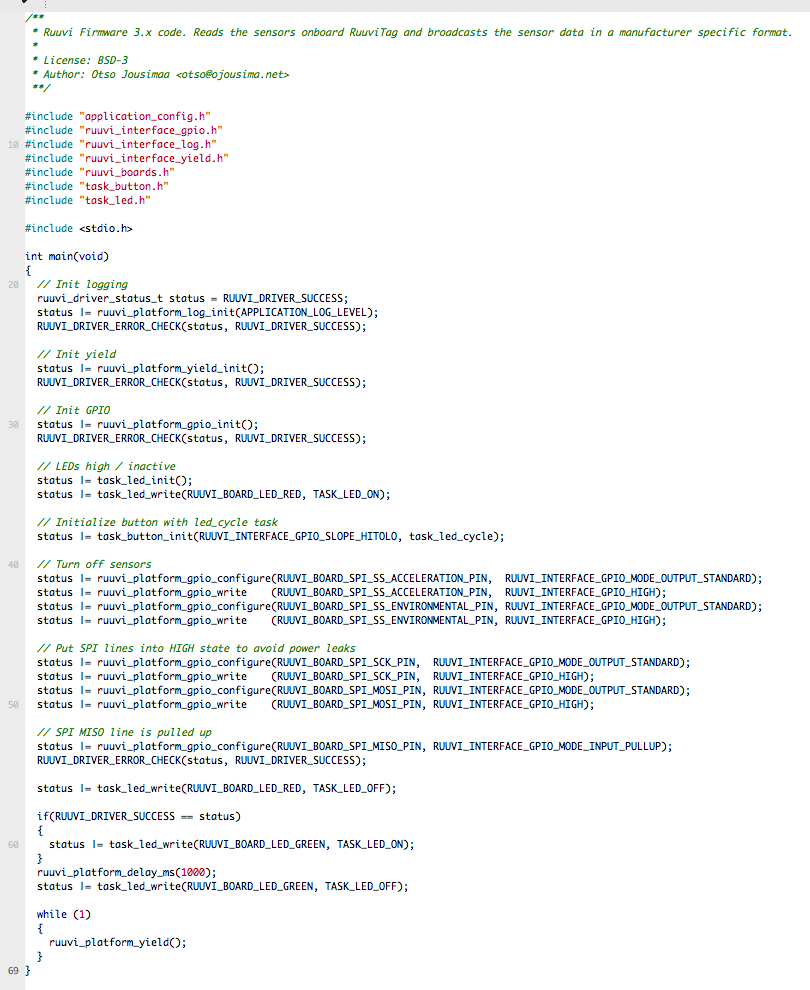
Our main function then calls task_button_init with a fixed slope and task_led_cycle as the function to call on button press. We could also #define the slope and action in the application configuration header file, but since this is just a demonstration on how to use interrupts we’ll settle for the hardcoded values for now.
Power Consumption
We started this part of blog series with catastrophic power consumption with the goal of fixing it, let’s see how we managed!
If you run the program, you’ll notice one issue. There is no debouncing on the button code, so one button press might get registered as two or even three presses. Later on we might add a RTC to the button to keep track of the last time when interrupt occurred and discard the events occuring too soon after the last action.

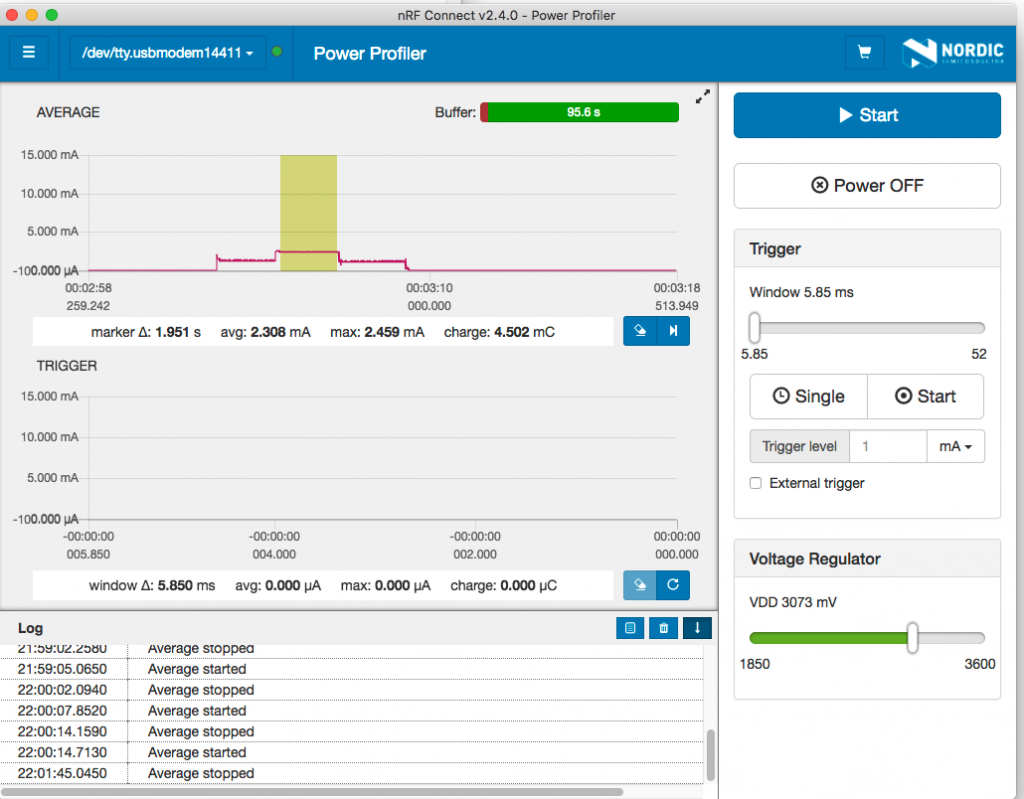
Now we’re back in the good values for the sleep current, 4.1 μA. While we have improved on LED consumption because the CPU can sleep, keeping the LEDs on still does consume excess current for battery powered operation.
Stay tuned and follow @ojousima and @ruuvicom on Twitter for #FirmwareFriday posts!