The Ruuvi Gateway features an integrated capability to transmit your sensor data to an external HTTPS and/or MQTTS server. For secure connections using SSL, you have the option to obtain SSL certificates from a Certificate Authority (CA) or create your own self-signed certificates.
This support guide will walk you through the process of creating self-signed client and server certificates for use with your Ruuvi Gateway configuration when using HTTPS or MQTTS targets.
The difference between CA and self-signed certificates
Before you begin, it’s important to understand that CA-issued SSL certificates are validated and issued by trusted Certificate Authorities, providing assurance of a website’s identity and encryption for public-facing websites, while self-signed SSL certificates, created by individuals or organizations for their own use, lack external validation and are typically used in internal, development, or testing environments due to web browsers not inherently trusting them.
As a general guideline, when you’re incorporating the Ruuvi Gateway into your public-facing IT infrastructure, it’s advisable to always choose SSL certificates issued by a Certificate Authority and only use self-signed certificates in your local network and in testing environments.
Purchase SSL certificates from CA authorities
A Certificate Authority (CA) is an organization that manages, signs, and distributes digital certificates. These certificates confirm the association of a public key with the entity named in the certificate, enabling third parties to trust signatures or claims made with the matching private key. The CA serves as a trusted intermediary, whose reliability is recognized by both the certificate holder and those who depend on the certificate.
The largest and most globally trusted Certificate Authorities currently in the market are IdenTrust, DigiCert Group, Sectigo (Comodo Cybersecurity), GlobalSign, Let’s Encrypt and GoDaddy Group. Among these, Let’s Encrypt stands out as a non-profit certificate authority that provides certificates for free, contributing to its widespread popularity.
Generate your own self-signed SSL certificates on a Mac computer
For Mac OS users, the OpenSSL command will be used in the Terminal window, given that OpenSSL is conveniently pre-installed and does not require any further installation.
Notice that the certificate files will be generated in the folder where my Terminal is currently pointing. In my case this is the folder User/username/Downloads/Ruuvi/
In order to generate certificates, we will need to first know the hostname and the client name.
To find these, let’s do the following
In Mac OS Terminal, type
hostnameIn my case hostname is `markos-MacBook-Pro.local`
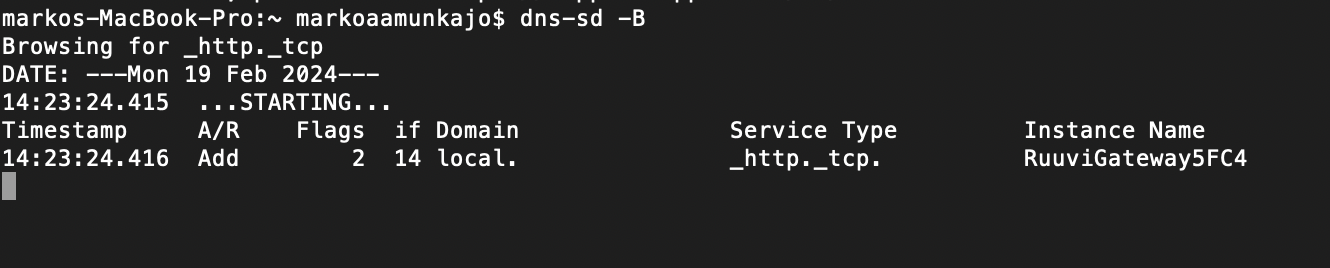
Client name, which is your Ruuvi Gateway router’s local network name used in Mac OS can be found as follows:
In Mac OS Terminal, type
dns-sd -BIn my case the instance name is RuuviGateway5FC4.local
Next, we can proceed to generate the self-signed SSL certificates to be used on both client and server side.
Go to the Ruuvi folder in Terminal
cd /Users/[yourusername]/Downloads/Ruuvi/Generate server certificates (SSL)
First, let’s generate 2048-bit self-signed server certificates. Follow the below steps in order.
Generate a private key
openssl genrsa -out server_key.pem 2048Create a Certificate Signing Request (CSR)
openssl req -new -key server_key.pem -out server_csr.pemGenerate the client self-signed certificate
openssl x509 -req -in server_csr.pem -signkey server_key.pem -out server_cert.pem -days 365In order to generate the certificate in step 3, a few additional questions will be asked and required. Others can be skipped. I filled in:
Country name (2 letter code): `FI`
Common name: `markos-MacBook-Pro.local`
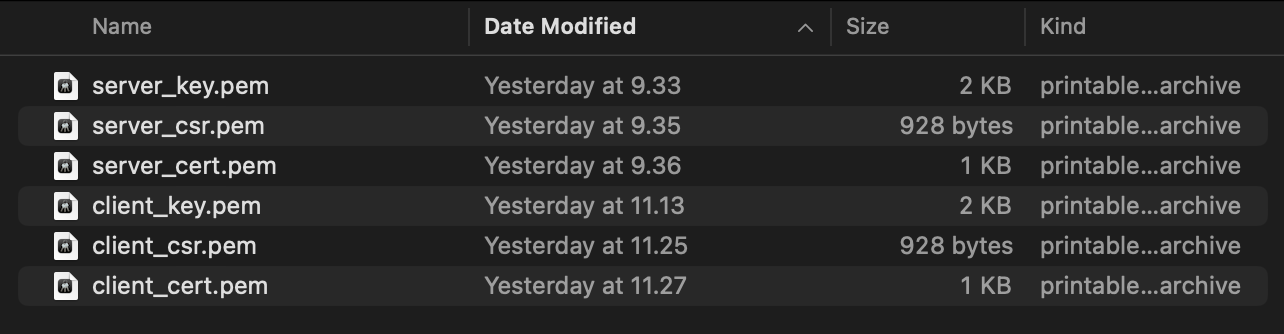
After these steps are completed, the server side certificate files are found in the Ruuvi folder.
Generate client certificates (SSL)
Next, generate a certificate and a private key for the client (2048-bit RSA key). Follow the below steps in order.
Generate a private key
Create a Certificate Signing Request (CSR)
openssl genrsa -out client_key.pem 2048openssl req -new -key client_key.pem -out client_csr.pemGenerate the client certificate
openssl x509 -req -in client_csr.pem -signkey client_key.pem -out client_cert.pem -days 365In order to generate the certificate in step 3, a few additional questions will be asked and required. Others can be skipped. I filled in:
Country name (2 letter code): `FI`
Common name: `RuuviGateway5FC4.local`
After these steps are completed, the client side certificate files are found in the Ruuvi folder.
Generate your own self-signed SSL certificates on a Windows computer
Windows users do not share the benefit of having OpenSSL pre-installed on their computers. Thus, one needs to download and install it. You can get the latest version of OpenSSL from here.
Notice that the certificate files will be generated in the folder where the terminal is currently pointing. In my case this is the folder C:Users\username\Ruuvi\. You can navigate between folders with the command
cdIn order to generate certificates, we will need to first know the hostname and the client name.
To find these, let’s do the following:
In Windows command prompt, type:
hostnameIn this case the hostname is ´LAPTOP-89EJ98FL´
Client name, which is your Ruuvi Gateway router’s local network name used in WIndows OS can be found as follows:
In Windows command prompt, type
dns-sd -BIn this case, the instance name is RuuviGateway3087

Next, we can proceed to generate the self-signed SSL certificates to be used on both client and server side.
Go to the Ruuvi folder in Command Prompt.
cd RuuviYou can also generate these certificates wherever you like, just make sure you know the depository to which you are generating the certificates at the moment.
Generate server certificates (SSL)
In my case, I opened the Win64 OpenSSL Command Prompt from the OpenSSL downloaded folder. Open ´start.bat´ to open the command prompt The next steps are performed in this Command Prompt.
First, let’s generate 2048-bit self-signed server certificates. Follow the below steps in order.
Generate a private key
openssl genrsa -out server_key.pem 2048Create a Certificate Signing Request (CSR)
openssl req -new -key server_key.pem -out server_csr.pemGenerate the client self-signed certificate
openssl x509 -req -in server_csr.pem -signkey server_key.pem -out server_cert.pem -days 365In order to generate the certificate in step 3, a few additional questions will be asked and required. Others can be skipped. I filled in:
Country name (2 letter code): `FI`
Common name: `LAPTOP-89EJ98FL.local`
After these steps are completed, the server side certificate files are found in the Ruuvi folder.
Generate client certificates (SSL)
Next, generate a certificate and a private key for the client (2048-bit RSA key). Follow the below steps in order.
Generate a private key
openssl genrsa -out client_key.pem 2048Create a Certificate Signing Request (CSR)
openssl req -new -key client_key.pem -out client_csr.pemGenerate the client certificate
openssl x509 -req -in client_csr.pem -signkey client_key.pem -out client_cert.pem -days 365In order to generate the certificate in step 3, a few additional questions will be asked and required. Others can be skipped. I filled in:
Country name (2 letter code): `FI`
Common name: `RuuviGateway3087.local`
After these steps are completed, the client side certificate files are found in the Ruuvi folder.

Conclusion
In conclusion, using SSL certificates with Ruuvi Gateway ensures secure data transmission, offering options for obtaining certificates from a Certificate Authority or creating self-signed certificates. This guide covers the process for both macOS and Windows users, emphasizing the importance of using CA-issued certificates for public-facing IT infrastructures and self-signed certificates for local or testing environments.