
One of the most critical aspects of programming battery powered devices is controlling the power consumption of the device. It’s not enough to have a program working well while connected to development platform, most users expect at least one year+ battery life time and requests for 5–10 years are common.
Before we release our application to the wide audience, it’s very important measure how much current the application uses. Worst case scenario is that device does not enter deep sleep at all and will consume the battery in matter of a week or two.
Measuring power profile and average current consumption used to be relatively high-effort task requiring special, high-end equipment with costs of thousands of dollars. Nordic Semiconductor has lowered the barrier to verify current consumption with their power profiler kit which costs less than hundred dollars and conveniently sits on top of a nRF52 development board.
To start profiling, we first modify RuuviTag a little bit to connect the tag to power profiler. Wires are soldered to battery terminals, and absolutely no other electrical connections are made to the Device Under Test (DUT).
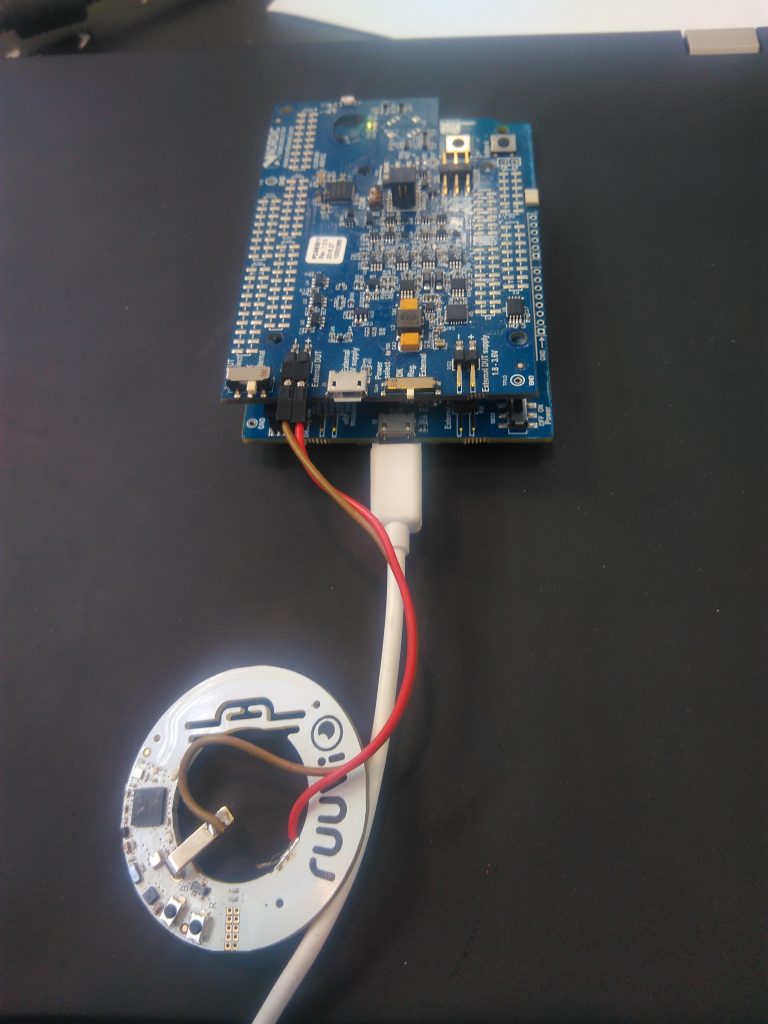
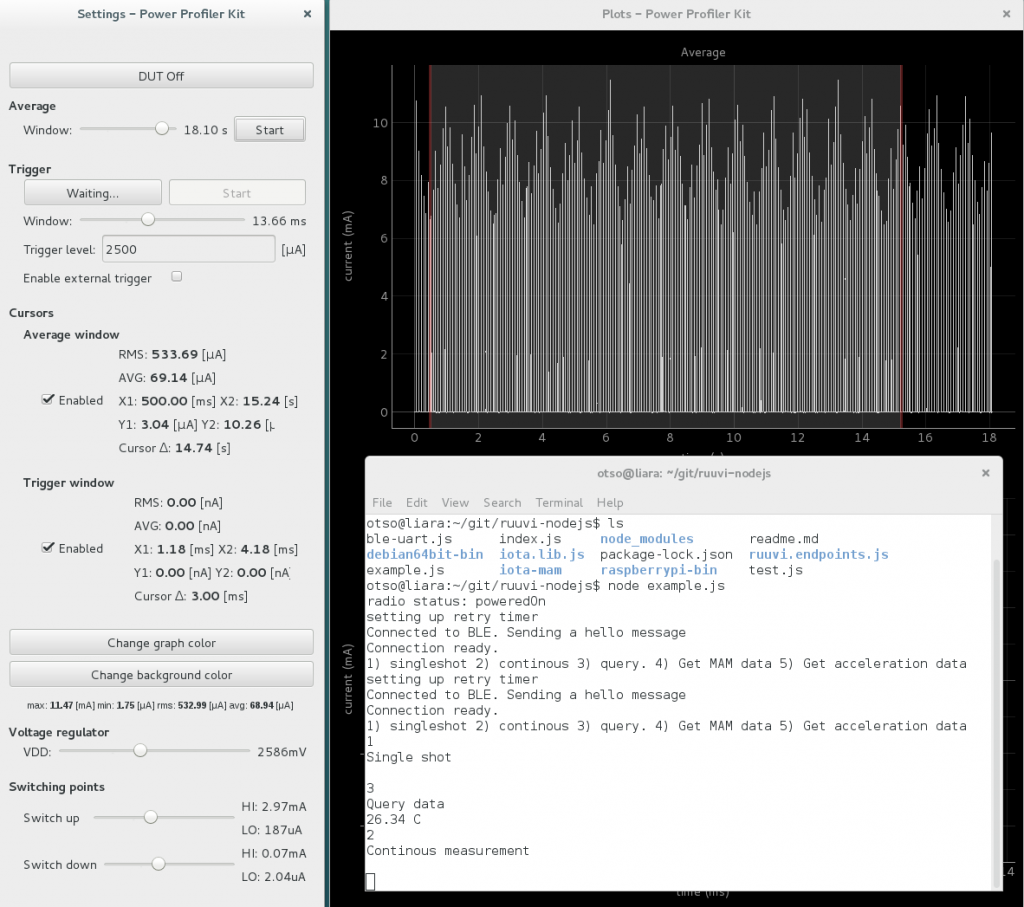
I generally upload the program to be tested to DUT using DFU bootloader. This allows me to not connect any wires to DUT and also ensures that the program I’m testing has same conditions as end users who will DFU the image in. The program we test here is a Work-in-Progress version of GATT profile for RuuviTag.
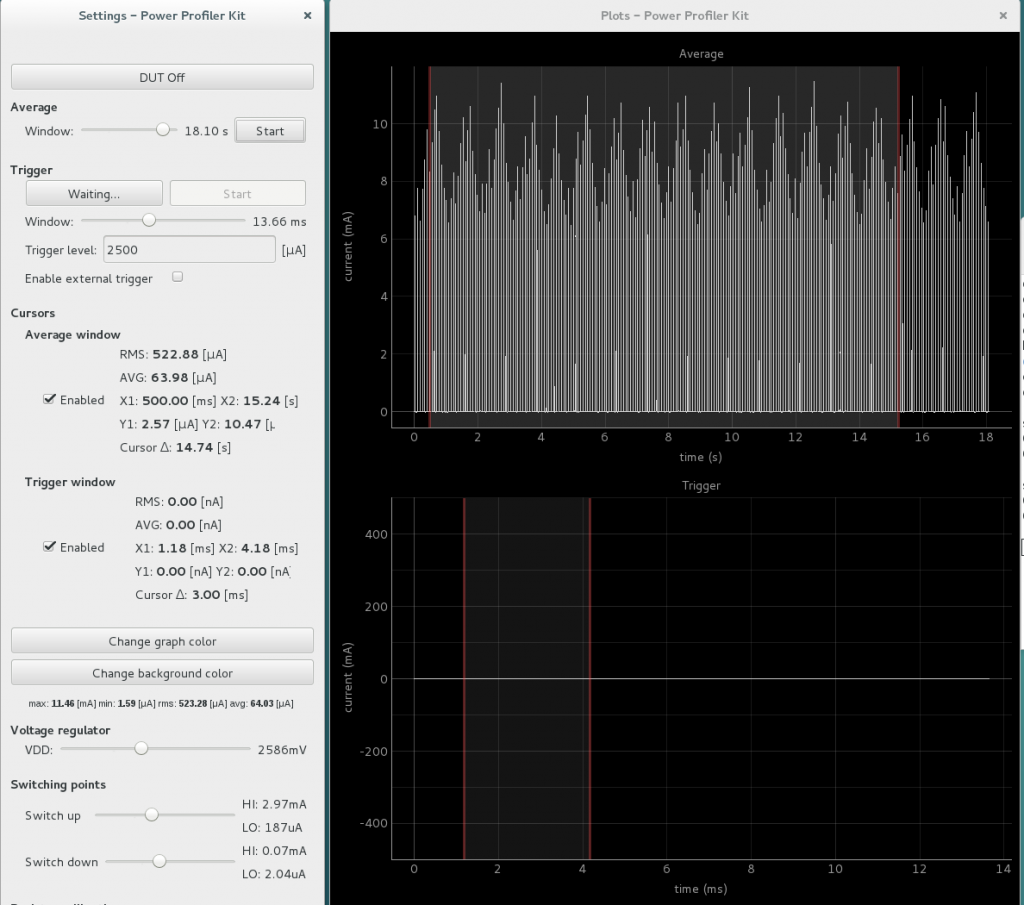
Power profiler kit runs both on Windows and Linux, probably also on Mac OSX. You should note that the 1.1.0 update does not work on Linux, use 1.0.0 instead. Let’s take a look how the power consumption looks like at boot.
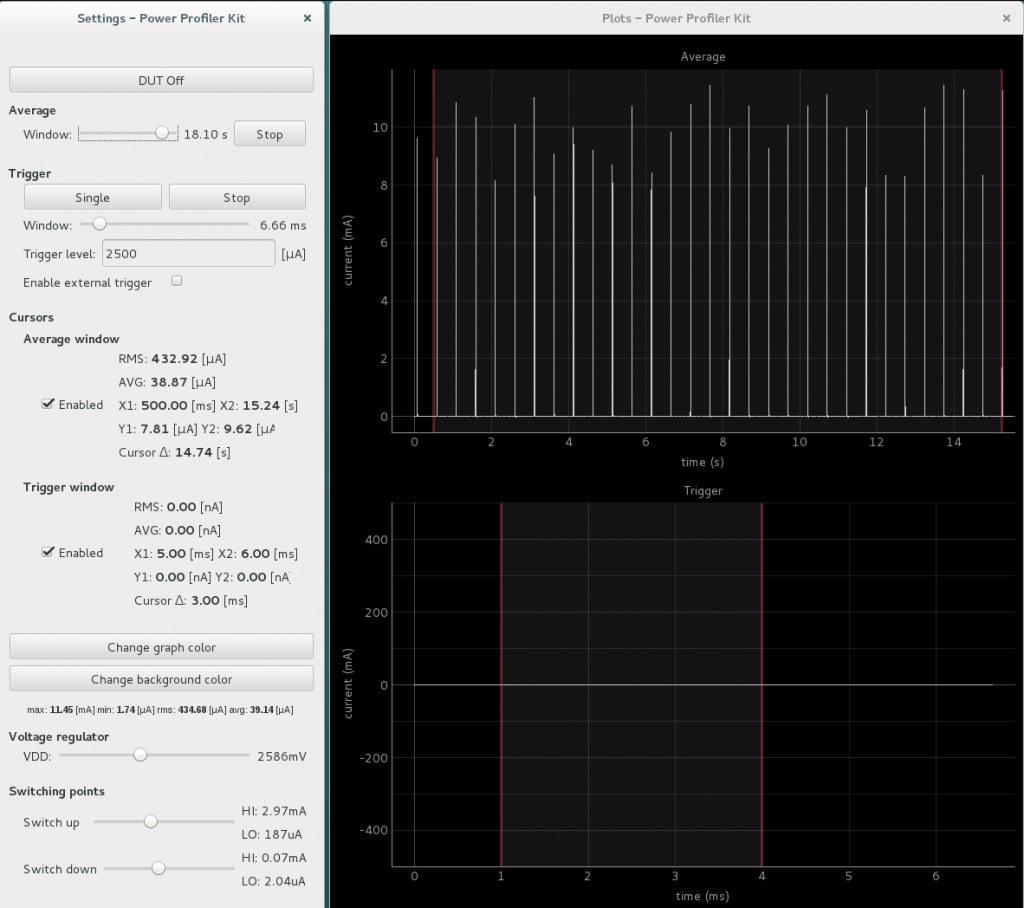
We can see that there is a current spike roughly at 500 ms intervals. This is our beacon advertising it’s name and waiting for connection. So far, so good. Let’s zoom in to the floor level and check how efficient our sleep is.
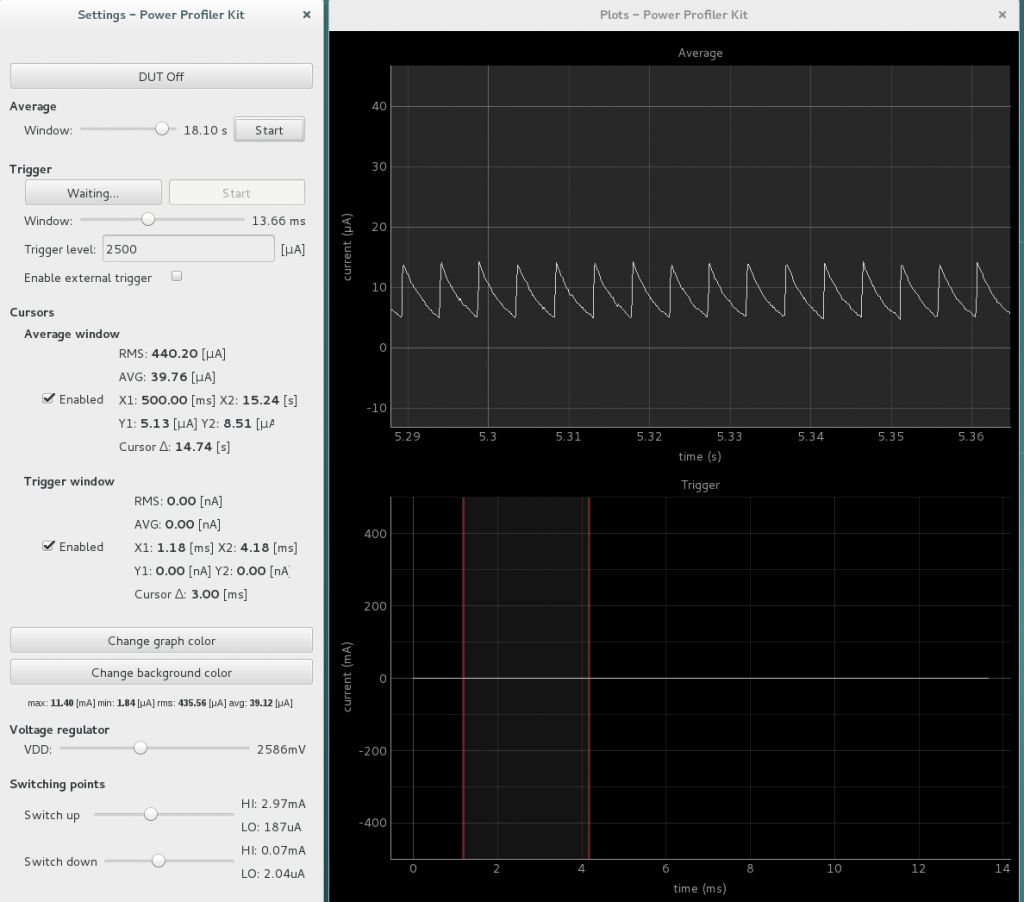
Here we can see that something is not 100% optimal. Sleep current is maybe 10 µA, which is a lot higher than what we’d expect from the device while everything is sleeping. The sleep current can probably be shaved down to less than 3 µA. However, optimizing the current consumption is a subject of another blog post.
Next, we’ll want to check how the current consumption is affected by establishing the BLE connection.
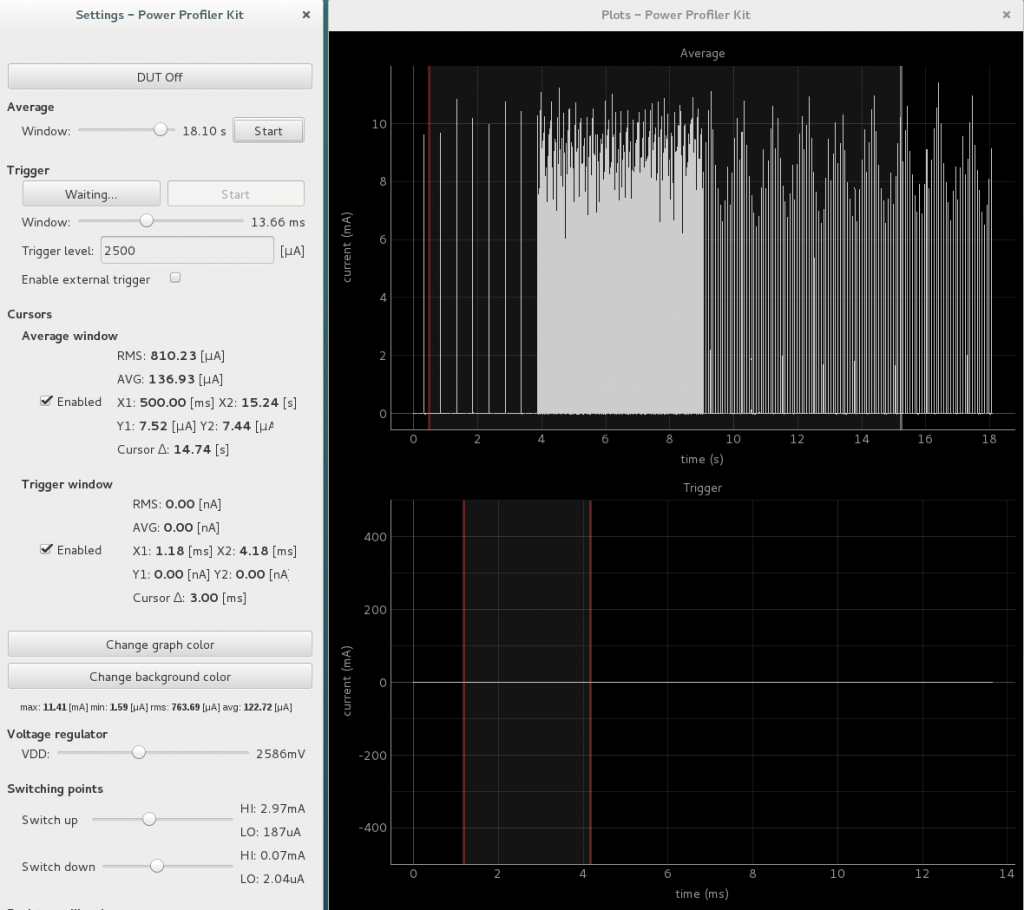
We can see that there is a brief period of very dense current spikes while the connection is established, and parameters are being negotiated. This firmware has very short connection interval settings, so there is a lot of traffic going on once the connection is established.
Once the connection is established, we can see the current consumption has risen to almost 64 µA from previous 39 µA. The change was roughly 25 µA. Next, let us turn on the environmental sensor BME280 and leave it on continuous mode at 1 second interval between samples.
The consumption has risen another 5 µA to 69 µA. Let’s check out how turning on the accelerometer LIS2DH12 at 10 Hz affects the consumption. We’ll use the internal First-in-First-out buffer of accelerometer to reduce the number of times MPU has to wake up to read the data.

Current consumption has grown another 7 µA to 76 µA. Finally, let us check how doing MPU intensive work affects the power consumption by doing IOTA MAM message creation.
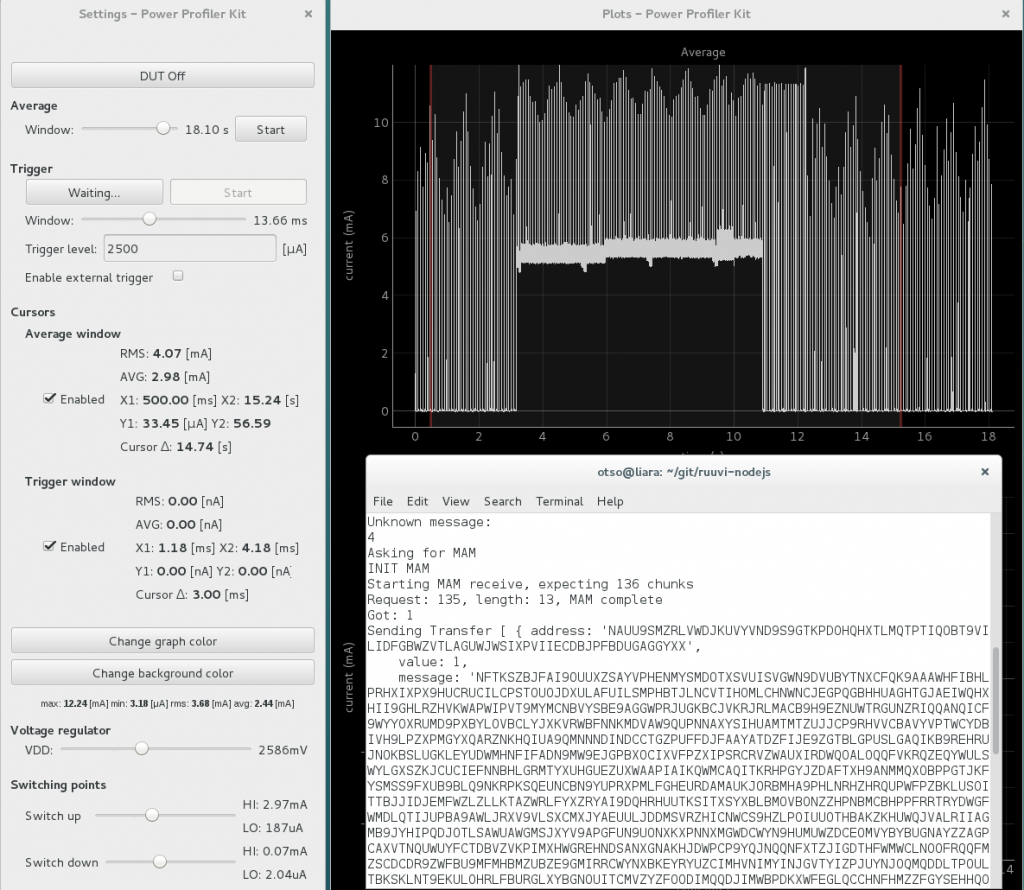
The IOTA MAM creation is clearly visible as a 5 mA spike during which the MPU does not sleep at all. It’s good to note that MPU itself consumes only ~4 mA, and the activity LED consumes another 1 mA. Since MAM creation is one-shot event, we cannot really calculate an average consumption for MAM. We could however express the cost of MAM in energy: 8 seconds * 5 mA is roughly 8 s * 5000 µA is 40000 µAs or 11 µAh. To put this in perspective, we just burned almost as much energy in 8 seconds as the accelerometer and environmental sensor are going to consume together in an hour.
Another noteworthy discovery is that sending out the data does not increase power consumption significantly: Tag is going to be connecting at the rate defined by the connection interval, no matter if there is data waiting to be sent or not.
Finally, let’s check how the base consumption of the tag looks now with the sensors running:
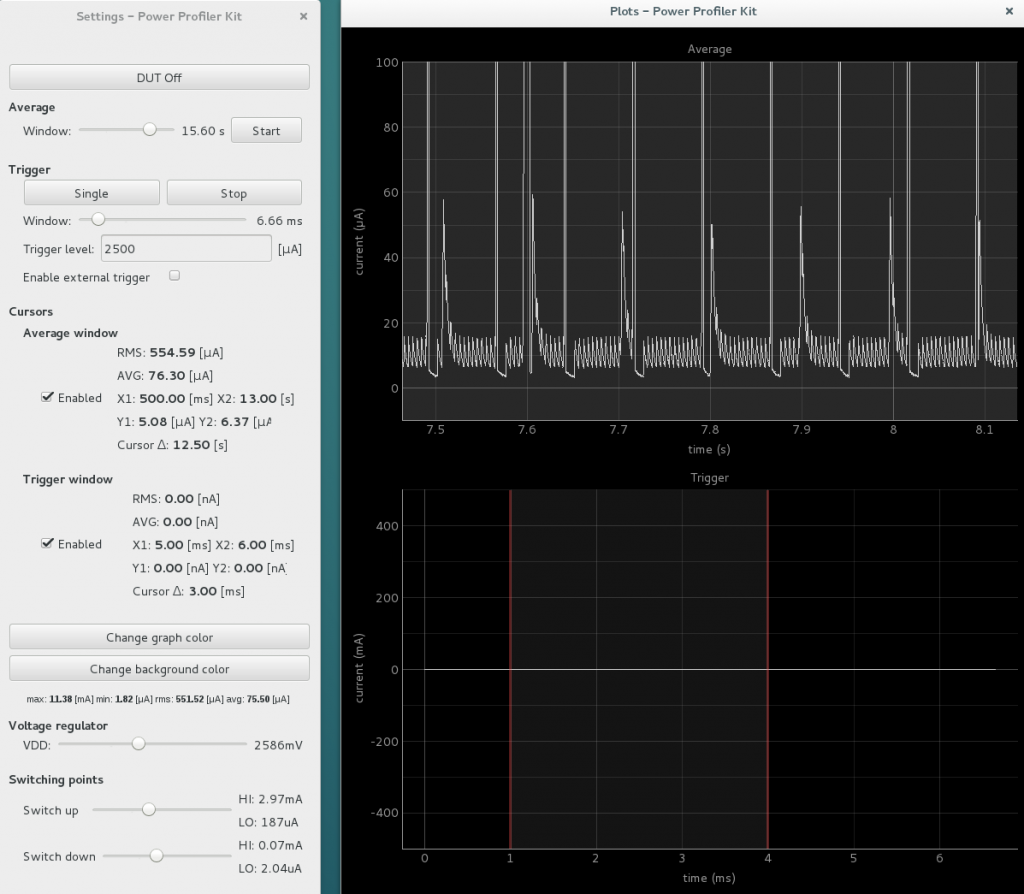
The base level is still somewhere near 10 µA, so no surprises there. We can now see spikes at roughly 100 ms intervals, which is the accelerometer running at 10 Hz.
To sum this all up:
- Base consumption 10 µA
- Advertising 28 µA
- Connection 25 µA (in addition to advertising)
- Environmental sensor 5 µA
- Accelerometer 7 µA
- Total 75 µA
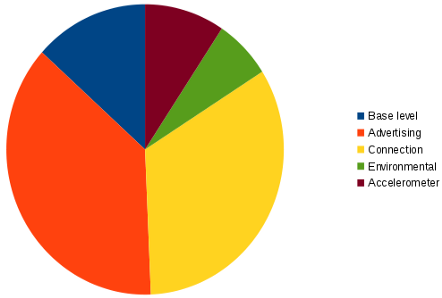
It’s obvious now that most of the current consumption in our application comes from BLE radio transmissions. Overall 75 µA is not too bad, however we can expect only a bit over one year of lifetime on CR2477 of RuuviTag unless we can bring the current consumption down. Stay tuned for the power optimization post.