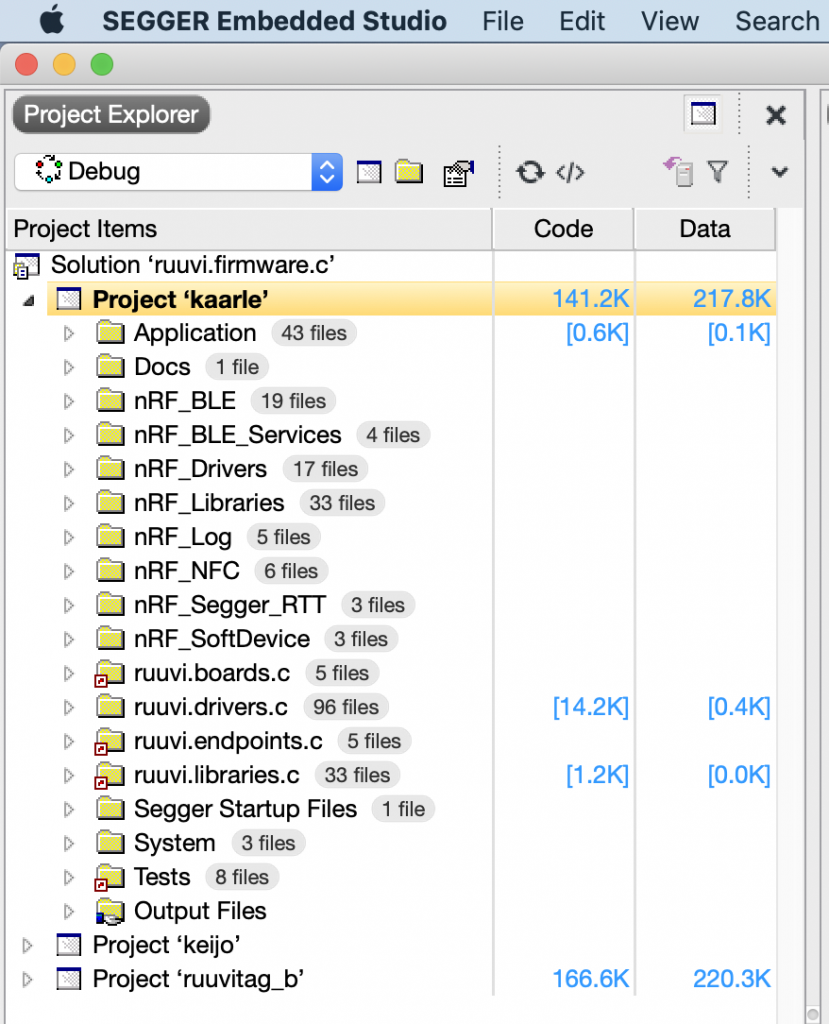
Today we’ll go through how to add a new sensor to Ruuvi Firmware. This post builds on top of RuuviFW version 3.28.0, available on GitHub. Project is compiled with Segger Embedded Studio Nordic Semiconductor version 4.18. nRF SDK version is nRF5_SDK_15.3.0_59ac345 . Detailed setup instructions are in Ruuvi Firmware — part 1 post.
Sensor
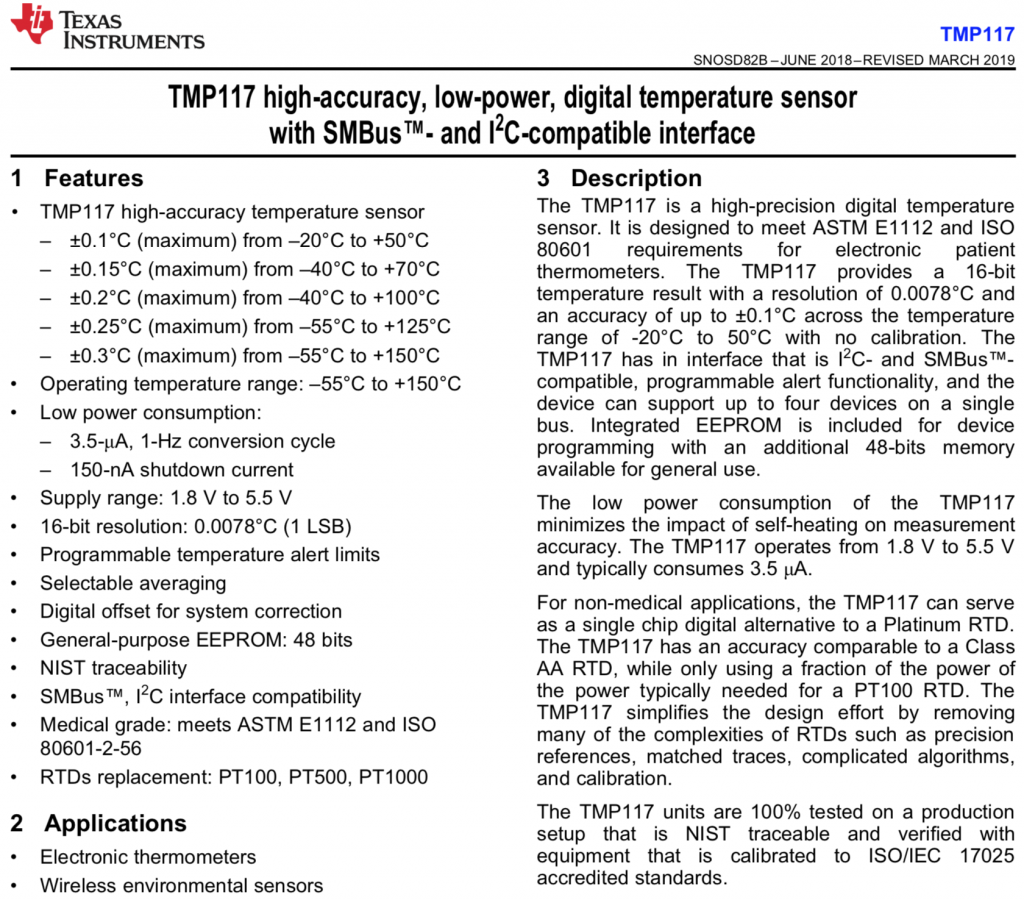
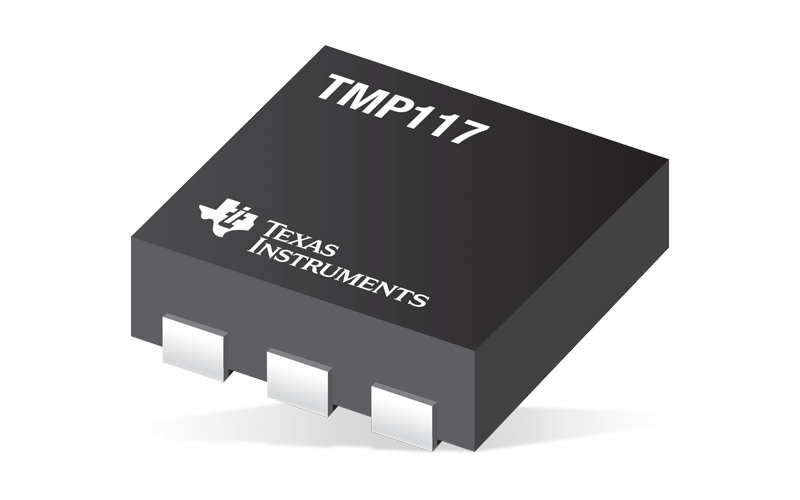
The sensor we’re adding is TMP117 by Texas Instruments, it’s a high-accuracy temperature sensor with ±0.1°C absolute accuracy from –20°C to +50°C.
Let’s Get Started
We’re working on not-yet public board codenamed “Kaarle” on this blog post.
Low-level interfacing: I2C bus
To actually get the data from sensor, we’ll need to implement the I2C write and read functions. Most of the heavy lifting is already done, we’ll simply add calls to Ruuvi I2C libraries which in turn will call the underlying Software Development Kit (SDK). The work even further simplified by the TMP117 register structure which has fixed size read/write commands.
To keep the project structure clean we’ll create new files:
ruuvi.drivers.c/interfaces/i2c/ruuvi_interface_i2c_tmp117.c
ruuvi.drivers.c/interfaces/i2c/ruuvi_interface_i2c_tmp117.h
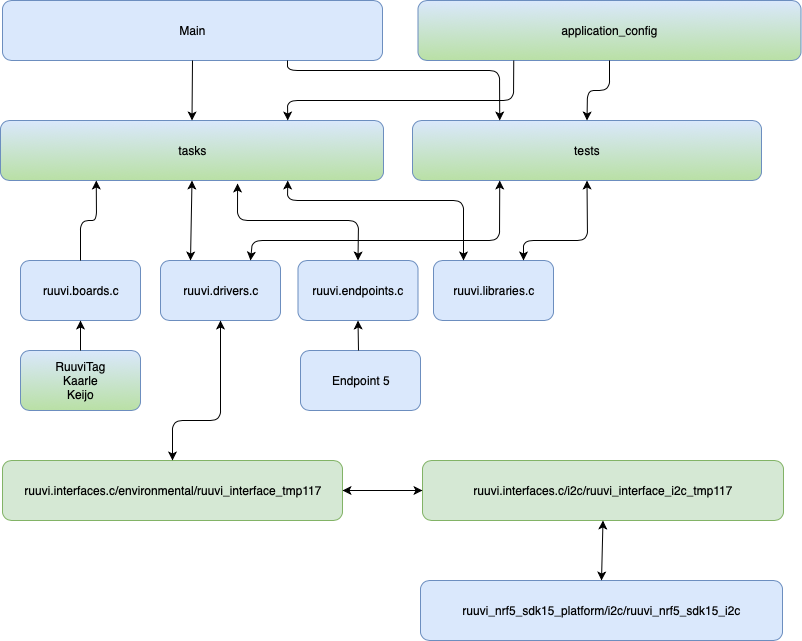
and place the functionality there. You’ll find the section in the rightmost green box of architecture diagram.
/**
 * @brief I2C write function for TMP117
 *
 *
 * @param[in] dev_id @ref I2C interface handle, i.e. I2C addess of TMP117
 * @param[in] reg_addr TMP117 register address to write.
 * @param[in] reg_val 16-bit value to be written
 * @return RUUVI_DRIVER_SUCCESS on success
 * @return RUUVI_DRIVER_ERROR_TIMEOUT if device does not respond on bus
 **/
ruuvi_driver_status_t ruuvi_interface_i2c_tmp117_write(const uint8_t dev_id, const uint8_t reg_addr,
                                                       const uint16_t reg_val)
{
  uint8_t command[3];
  command[0] = reg_addr;
  command[1] = reg_val >> 8;
  command[2] = reg_val & 0xFF
  return ruuvi_interface_i2c_write_blocking(dev_id, command, sizeof(command), true);
}

/**
 * @brief I2C Read function for TMP117
 *
 * Binds Ruuvi Interface I2C functions for TMP117
 *
 * @param[in] dev_id @ref I2C interface handle, i.e. I2C addess of TMP117.
 * @param[in] reg_addr TMP117 register address to read.
 * @param[in] reg_val pointer to 16-bit data to be received.
 * @return RUUVI_DRIVER_SUCCESS on success
 * @return RUUVI_DRIVER_ERROR_TIMEOUT if device does not respond on bus
 **/
ruuvi_driver_status_t ruuvi_interface_i2c_tmp117_read(const uint8_t dev_id, const uint8_t reg_addr,
                                                      uint16_t* const reg_val)
{
  if(NULL == p_reg_data) { return RUUVI_DRIVER_ERROR_NULL; }
  ruuvi_driver_status_t err_code = RUUVI_DRIVER_SUCCESS;

  uint8_t command[3] = {0};
  command[0] = reg_addr;

  err_code |= ruuvi_interface_i2c_write_blocking(dev_id, command, 1, false);
  err_code |= ruuvi_interface_i2c_read_blocking(dev_id, &(command[1]), len);
  reg_val = (command[1] << 8) + command[2];
  return err_code;
}The I2C pins are already defined in ruuvi_board_kaarle.h for SHTC3 support. We’ll add the I2C address of TMP117 with ADD0 pin tied to ground to the header file:
#define RUUVI_BOARD_TMP117_I2C_ADDRESS 0x48The board definitions are in middle left in the application diagram.
TMP117 interface
We’ll split the logic of accessing TMP117 away from the actual traffic on the I2C bus and create new files for controlling the sensor:
ruuvi.drivers.c/interfaces/environmental/ruuvi_interface_tmp117.c
ruuvi.drivers.c/interfaces/environmental/ruuvi_interface_tmp117.c
These files are in leftmost green section of architecture diagram. We could write a driver which is entirely decoupled from Ruuvi drivers and takes the I2C-interface as function pointers, but that wouldn’t really add value from Ruuvi driver point of view so we’ll simply hardcode the I2C access functions in.
Register access of TMP117
With the I2C communication figured out, let’s write out the register map and functions to access the registers. Register map itself is really simple with only 10 16-bit registers.
ADDRESS TYPE RESET ACRONYM       REGISTER NAME
00h     R    8000h Temp_Result   Temperature result register
01h     R/W  0220h Configuration Configuration register
02h     R/W  6000h THigh_Limit   Temperature high limit register
03h     R/W  8000h TLow_Limit    Temperature low limit register
04h     R/W  0000h EEPROM_UL     EEPROM unlock register
05h     R/W  xxxxh EEPROM1       EEPROM1 register
06h     R/W  xxxxh EEPROM2       EEPROM2 register
07h     R/W  0000h Temp_Offset   Temperature offset register
08h     R/W  xxxxh EEPROM3       EEPROM3 register
0Fh     R    0117h Device_ID     Device ID register
Then we’ll implement least required configuration for checking the ID over I2C, doing a soft reset, configuring the oversampling ratio, configuring conversion interval, triggering single and continuous measurements and reading out the temperature value.
#include "ruuvi_driver_error.h"
#include "ruuvi_driver_sensor.h"
#include "ruuvi_interface_tmp117.h"
#include "ruuvi_interface_i2c_tmp117.h"
static uint8_t m_address;
static uint16_t ms_per_sample;
static ruuvi_driver_status_t tmp117_soft_reset(void)
{
uint16_t reset = TMP117_MASK_RESET & 0xFFFF;
return ruuvi_interface_i2c_tmp117_write(m_address, TMP117_REG_CONFIGURATION, reset);
}
static ruuvi_driver_status_t tmp117_validate_id(void)
{
uint16_t id;
ruuvi_interface_i2c_tmp117_read(m_address, TMP117_REG_DEVICE_ID, &id);
id &= TMP117_MASK_ID;
return (TMP117_VALUE_ID == id)? RUUVI_DRIVER_SUCCESS : RUUVI_DRIVER_ERROR_NOT_FOUND;
}
static ruuvi_driver_status_t tmp117_oversampling_set(const uint8_t num_os)
{
uint16_t reg_val;
ruuvi_driver_status_t err_code;
err_code = ruuvi_interface_i2c_tmp117_read(m_address, TMP117_REG_CONFIGURATION, ®_val);
reg_val &= ~TMP117_MASK_OS;
switch(num_os)
{
case 1:
reg_val |= TMP117_VALUE_OS_1;
ms_per_sample = 16;
break;
case 8:
reg_val |= TMP117_VALUE_OS_8;
ms_per_sample = 125;
break;
case 32:
reg_val |= TMP117_VALUE_OS_32;
ms_per_sample = 500;
break;
case 64:
reg_val |= TMP117_VALUE_OS_64;
ms_per_sample = 1000;
break;
default:
return RUUVI_DRIVER_ERROR_INVALID_PARAM;
}
err_code |= ruuvi_interface_i2c_tmp117_write(m_address, TMP117_REG_CONFIGURATION, reg_val);
return err_code;
}
static ruuvi_driver_status_t tmp117_sleep(void)
{
uint16_t reg_val;
ruuvi_driver_status_t err_code;
err_code = ruuvi_interface_i2c_tmp117_read(m_address, TMP117_REG_CONFIGURATION, ®_val);
reg_val &= ~TMP117_MASK_MODE;
reg_val |= TMP117_VALUE_MODE_SLEEP;
err_code |= ruuvi_interface_i2c_tmp117_write(m_address, TMP117_REG_CONFIGURATION, reg_val);
return err_code;
}
static ruuvi_driver_status_t tmp117_sample(void)
{
uint16_t reg_val;
ruuvi_driver_status_t err_code;
err_code = ruuvi_interface_i2c_tmp117_read(m_address, TMP117_REG_CONFIGURATION, ®_val);
reg_val &= ~TMP117_MASK_MODE;
reg_val |= TMP117_VALUE_MODE_SINGLE;
err_code |= ruuvi_interface_i2c_tmp117_write(m_address, TMP117_REG_CONFIGURATION, reg_val);
return err_code;
}
static ruuvi_driver_status_t tmp117_continuous(void)
{
uint16_t reg_val;
ruuvi_driver_status_t err_code;
err_code = ruuvi_interface_i2c_tmp117_read(m_address, TMP117_REG_CONFIGURATION, ®_val);
reg_val &= ~TMP117_MASK_MODE;
reg_val |= TMP117_VALUE_MODE_CONT;
err_code |= ruuvi_interface_i2c_tmp117_write(m_address, TMP117_REG_CONFIGURATION, reg_val);
return err_code;
}
static float tmp117_read(void)
{
uint16_t reg_val;
ruuvi_driver_status_t err_code;
err_code = ruuvi_interface_i2c_tmp117_read(m_address, TMP117_REG_TEMP_RESULT, ®_val);
int16_t temperature = (reg_val > 32767)? reg_val - 65535 : reg_val;
float temperature = (0.0078125 * temperature);
if(TMP117_VALUE_TEMP_NA == reg_val || RUUVI_DRIVER_SUCCESS != err_code) { temperature = NAN; }
return temperature;
}High-level access of TMP117
Ruuvi firmware expects the drivers to provide unified interface to the drivers. This way we can swap out the backend providing data without reworking the application logic. Let’s implement the required features through low-level access functions.
Initialization
The initialization prepares sensor for use, runs any self tests and puts the sensor to the lowest-power state possible. Initialization also locks the sensor from other users until it has been uninitialized.
/**
 * @brief Initialize and uninitialize sensor.
 * Init and uninit will setup sensor with function pointers.
 * The sensor wil be initialized to lowest power state possible.
 *
 * @param[in,out] p_sensor pointer to sensor structure
 * @param[in] bus bus to use, i.r. I2C or SPI
 * @param[in] handle for the sensor, for example I2C address or SPI chip select pin
 * @return @c RUUVI_DRIVER_SUCCESS on success
 * @return @c RUUVI_DRIVER_ERROR_NULL if p_sensor is NULL
 * @return @c RUUVI_DRIVER_ERROR_NOT_FOUND if there is no response from sensor or if ID of
 *            a sensor read over bus does not match expected value
 * @return @c RUUVI_DRIVER_ERROR_SELFTEST if sensor is found but it does not pass selftest
 * @return @c RUUVI_DRIVER_ERROR_INVALID_STATE if trying to initialize sensor which
 *            already has been initialized.
 **/
typedef ruuvi_driver_status_t (*ruuvi_driver_sensor_init_fp)(ruuvi_driver_sensor_t* const
p_sensor, const ruuvi_driver_bus_t bus, const uint8_t handle);Implementation is straightforward. We check the inputs, read ID of TMP117 over I2C and then configure the function pointers, sensor name, provided data and enter sleep. Stored I2C address acts as the lock to sensor.
ruuvi_driver_status_t ruuvi_interface_tmp117_init(ruuvi_driver_sensor_t*
    environmental_sensor, ruuvi_driver_bus_t bus, uint8_t handle)
{
  if(NULL == environmental_sensor) { return RUUVI_DRIVER_ERROR_NULL; }
  if(m_address) { return RUUVI_DRIVER_ERROR_INVALID_STATE; }

  ruuvi_driver_sensor_initialize(environmental_sensor);
  ruuvi_driver_status_t err_code = RUUVI_DRIVER_SUCCESS;
  m_address = handle;
  size_t retries = 0;

  switch(bus)
  {
    case RUUVI_DRIVER_BUS_I2C:
      do{
      err_code |= tmp117_validate_id();
      retries++;
      }while(RUUVI_DRIVER_ERROR_TIMEOUT == err_code && retries < 5);
      break;

    default:
      return  RUUVI_DRIVER_ERROR_INVALID_PARAM;
  }
  if(RUUVI_DRIVER_SUCCESS != err_code) { err_code = RUUVI_DRIVER_ERROR_NOT_FOUND; }

  if(RUUVI_DRIVER_SUCCESS == err_code)
  {
    environmental_sensor->init              = ruuvi_interface_tmp117_init;
    environmental_sensor->uninit            = ruuvi_interface_tmp117_uninit;
    environmental_sensor->samplerate_set    = ruuvi_interface_tmp117_samplerate_set;
    environmental_sensor->samplerate_get    = ruuvi_interface_tmp117_samplerate_get;
    environmental_sensor->resolution_set    = ruuvi_interface_tmp117_resolution_set;
    environmental_sensor->resolution_get    = ruuvi_interface_tmp117_resolution_get;
    environmental_sensor->scale_set         = ruuvi_interface_tmp117_scale_set;
    environmental_sensor->scale_get         = ruuvi_interface_tmp117_scale_get;
    environmental_sensor->dsp_set           = ruuvi_interface_tmp117_dsp_set;
    environmental_sensor->dsp_get           = ruuvi_interface_tmp117_dsp_get;
    environmental_sensor->mode_set          = ruuvi_interface_tmp117_mode_set;
    environmental_sensor->mode_get          = ruuvi_interface_tmp117_mode_get;
    environmental_sensor->data_get          = ruuvi_interface_tmp117_data_get;
    environmental_sensor->configuration_set = ruuvi_driver_sensor_configuration_set;
    environmental_sensor->configuration_get = ruuvi_driver_sensor_configuration_get;
    environmental_sensor->name              = m_sensor_name;
    environmental_sensor->provides.datas.temperature_c = 1;
    m_timestamp = RUUVI_DRIVER_UINT64_INVALID;
    m_temperature = NAN;
    tmp117_sleep();
  }

  return err_code;
}

ruuvi_driver_status_t ruuvi_interface_tmp117_uninit(ruuvi_driver_sensor_t* sensor,
    ruuvi_driver_bus_t bus, uint8_t handle)
{
  if(NULL == sensor) { return RUUVI_DRIVER_ERROR_NULL; }

  ruuvi_driver_status_t err_code = RUUVI_DRIVER_SUCCESS;
  tmp117_sleep();

  ruuvi_driver_sensor_uninitialize(sensor);
  m_timestamp = RUUVI_DRIVER_UINT64_INVALID;
  m_temperature = NAN;
  m_address = 0;
  return err_code;
}Configuration
TMP117 has fixed resolution and scale. Sample rate can be configured through conversion cycle time in continuous mode. Only digital signal processing (DSP) supported by TMP117 is oversampling.
We’ll return a warning if the user tries to set the oversampling to higher ratio than what is supported by current sample rate or vice versa. Additionally the standard sensor configuration format supports only sample rates in range of 1 … 200 Hz, whereas TMP117 supports rates of 1/4, 1/8 and 1/16 Hz. We’ll implement those rates as custom values to the sensor.
The configuration function signatures are defined in ruuvi_driver_sensor.h, let’s implement them with the above low-level functions.
/**
 *  @brief Setup a parameter of a sensor.
 *  The function will modify the pointed data to the actual value which was written
 *
 *  @param[in,out] parameter value to write to sensor configuration. Actual value written to sensor as output
 *  @return RUUVI_DRIVER_SUCCESS on success
 *  @return RUUVI_DRIVER_ERROR_NULL if parameter is NULL
 *  @return RUUVI_DRIVER_ERROR_NOT_SUPPORTED if sensor cannot support given parameter
 *  @return RUUVI_DRIVER_ERROR_NOT_IMPLEMENTED if the sensor could support parameter, but it's not implemented in fw.
 **/
typedef ruuvi_driver_status_t (*ruuvi_driver_sensor_setup_fp)(uint8_t* parameter);

/**
 * @brief Configure sensor digital signal processing.
 * Takes DSP function and a DSP parameter as input, configured value or error code as output.
 * Modifies input parameters to actual values written on the sensor.
 * DSP functions are run on the sensor HW, not in the platform FW.
 *
 * @param[in,out] dsp_function. DSP function to run on sensor. Can be a combination of several functions.
 * @param[in,out] dsp_parameter. Parameter to DSP function(s)
 * @return RUUVI_DRIVER_SUCCESS on success
 * @return RUUVI_DRIVER_ERROR_NULL if either parameter is NULL
 * @return RUUVI_DRIVER_ERROR_NOT_SUPPORTED if sensor doesn't support given DSP
 * @return RUUVI_DRIVER_ERROR_NOT_IMPLEMENTED if sensor supports given DSP, but
 *         driver does not implement it
 * @return RUUVI_DRIVER_ERROR_INVALID_PARAM if parameter is invalid for any reason.
 **/
typedef ruuvi_driver_status_t (*ruuvi_driver_sensor_dsp_fp)(uint8_t* dsp_function,
uint8_t* dsp_parameter);Signature for configuration function
Sample rate
The sample rate given by user is understood as at least this much. Therefore we round up the sample rate requested by user.We’ll also consider 1 Hz as the default option.
ruuvi_driver_status_t ruuvi_interface_tmp117_samplerate_set(uint8_t* samplerate)
{
ruuvi_driver_status_t err_code = RUUVI_DRIVER_SUCCESS;
if(RUUVI_DRIVER_SENSOR_CFG_DEFAULT == *samplerate ||
1 >= *samplerate)
{
*samplerate = 1;
err_code |= tmp117_samplerate_set(TMP117_VALUE_CC_1000_MS);
}
else if(2 >= *samplerate)
{
*samplerate = 2;
err_code |= tmp117_samplerate_set(TMP117_VALUE_CC_500_MS);
}
else if(4 >= *samplerate)
{
*samplerate = 4;
err_code |= tmp117_samplerate_set(TMP117_VALUE_CC_250_MS);
}
else if(8 >= *samplerate)
{
*samplerate = 8;
err_code |= tmp117_samplerate_set(TMP117_VALUE_CC_125_MS);
}
else if(64 >= *samplerate)
{
*samplerate = 64;
err_code |= tmp117_samplerate_set(TMP117_VALUE_CC_16_MS);
}
else if (RUUVI_DRIVER_SENSOR_CFG_CUSTOM_1 == *samplerate)
{
err_code |= tmp117_samplerate_set(TMP117_VALUE_CC_4000_MS);
}
else if (RUUVI_DRIVER_SENSOR_CFG_CUSTOM_2 == *samplerate)
{
err_code |= tmp117_samplerate_set(TMP117_VALUE_CC_8000_MS);
}
else if (RUUVI_DRIVER_SENSOR_CFG_CUSTOM_3 == *samplerate)
{
err_code |= tmp117_samplerate_set(TMP117_VALUE_CC_16000_MS);
}
return err_code;
}
ruuvi_driver_status_t ruuvi_interface_tmp117_samplerate_get(uint8_t* samplerate)
{
ruuvi_driver_status_t err_code = RUUVI_DRIVER_SUCCESS;
uint16_t reg_val;
err_code = ruuvi_interface_i2c_tmp117_read(m_address, TMP117_REG_CONFIGURATION, ®_val);
reg_val &= TMP117_MASK_CC;
switch(reg_val)
{
case TMP117_VALUE_CC_16_MS:
*samplerate = 64;
break;
case TMP117_VALUE_CC_125_MS:
*samplerate = 8;
break;
case TMP117_VALUE_CC_250_MS:
*samplerate = 4;
break;
case TMP117_VALUE_CC_500_MS:
*samplerate = 2;
break;
case TMP117_VALUE_CC_1000_MS:
*samplerate = 1;
break;
case TMP117_VALUE_CC_4000_MS:
*samplerate = RUUVI_DRIVER_SENSOR_CFG_CUSTOM_1;
break;
case TMP117_VALUE_CC_8000_MS:
*samplerate = RUUVI_DRIVER_SENSOR_CFG_CUSTOM_2;
break;
case TMP117_VALUE_CC_16000_MS:
*samplerate = RUUVI_DRIVER_SENSOR_CFG_CUSTOM_3;
break;
default:
return RUUVI_DRIVER_ERROR_INTERNAL;
}
return err_code;
}Configuring sample rate ends up being simple but long switch-case statement
Resolution, scale
As the resolution and scale are fixed in TMP117 we just need to allow values for minimum, maximum, default and no change. Everything else can return not supported -error.
ruuvi_driver_status_t ruuvi_interface_tmp117_resolution_set(uint8_t* resolution)
{
  if(NULL == resolution) { return RUUVI_DRIVER_ERROR_NULL; }

  uint8_t original = *resolution;
  *resolution = RUUVI_DRIVER_SENSOR_CFG_DEFAULT;
  RETURN_SUCCESS_ON_VALID(original);
  return RUUVI_DRIVER_ERROR_NOT_SUPPORTED;
}

ruuvi_driver_status_t ruuvi_interface_tmp117_resolution_get(uint8_t* resolution)
{
  if(NULL == resolution) { return RUUVI_DRIVER_ERROR_NULL; }

  *resolution = RUUVI_DRIVER_SENSOR_CFG_DEFAULT;
  return RUUVI_DRIVER_SUCCESS;
}

ruuvi_driver_status_t ruuvi_interface_tmp117_scale_set(uint8_t* scale)
{
  if(NULL == scale) { return RUUVI_DRIVER_ERROR_NULL; }

  uint8_t original = *scale;
  *scale = RUUVI_DRIVER_SENSOR_CFG_DEFAULT;
  RETURN_SUCCESS_ON_VALID(original);
  return RUUVI_DRIVER_ERROR_NOT_SUPPORTED;
}

ruuvi_driver_status_t ruuvi_interface_tmp117_scale_get(uint8_t* scale)
{
  if(NULL == scale) { return RUUVI_DRIVER_ERROR_NULL; }

  *scale = RUUVI_DRIVER_SENSOR_CFG_DEFAULT;
  return RUUVI_DRIVER_SUCCESS;
}Easy enough boilerplate
Digital Signal Processing
TMP117 supports oversampling of the sensor, i.e. taking multiple samples and averaging them to reduce noise but add to power consumption. The DSP configuration signature is different from the other configuration functions, as it includes both the type of DSP and a parameter to configure the aggressiveness of DSP to apply.
/**
 * @brief Configure sensor digital signal processing.
 * Takes DSP function and a DSP parameter as input, configured value or error code as output.
 * Modifies input parameters to actual values written on the sensor.
 * DSP functions are run on the sensor HW, not in the platform FW.
 *
 * @param[in,out] dsp_function. DSP function to run on sensor. Can be a combination of several functions.
 * @param[in,out] dsp_parameter. Parameter to DSP function(s)
 * @return RUUVI_DRIVER_SUCCESS on success
 * @return RUUVI_DRIVER_ERROR_NULL if either parameter is NULL
 * @return RUUVI_DRIVER_ERROR_NOT_SUPPORTED if sensor doesn't support given DSP
 * @return RUUVI_DRIVER_ERROR_NOT_IMPLEMENTED if sensor supports given DSP, but
 *         driver does not implement it
 * @return RUUVI_DRIVER_ERROR_INVALID_PARAM if parameter is invalid for any reason.
 **/
typedef ruuvi_driver_status_t (*ruuvi_driver_sensor_dsp_fp)(uint8_t* dsp_function,
uint8_t* dsp_parameter);DSP configuration signature
Now the needed configuration functions are in place. Our sensor interface would support setting the interrupt, but we’ll omit the implementation for now.
Sampling: sleep, single, continuous
As in all battery operated devices, energy is the most precious resource in the system and it must be conserved as much as possible. The lowest power state of the sensor is in sleep. Single measurement wakes up the sensor for taking one sample, waits until sample is complete and then sleeps the sensor again. Continuous mode leaves the sensor in a free-running mode, sampling the data continuously.
Continuous mode is useful when samples are taken rapidly, when interrupts based on sensor reading are in use or when the sensor runs internal digital signal processing.
Generally single mode is best when samples are taken at sub-1 Hz frequency, but since TMP117 supports continuous sampling down to 1/16 Hz we can practically always use the continuous mode. Let’s implement the high-level calls to set the mode.
ruuvi_driver_status_t ruuvi_interface_tmp117_mode_set(uint8_t* mode)
{
  if(NULL == mode) { return RUUVI_DRIVER_ERROR_NULL; }
  ruuvi_driver_status_t err_code = RUUVI_DRIVER_SUCCESS;
  switch(*mode)
  {
    case RUUVI_DRIVER_SENSOR_CFG_CONTINUOUS:
      err_code |= tmp117_continuous();
      m_continuous = true;
      break;

    case RUUVI_DRIVER_SENSOR_CFG_SINGLE:
      if(m_continuous) { return RUUVI_DRIVER_ERROR_INVALID_STATE; }
      err_code |= tmp117_sample();
      ruuvi_interface_delay_ms(ms_per_sample);
      break;

    case RUUVI_DRIVER_SENSOR_CFG_SLEEP:
      err_code |= tmp117_sleep();
      m_continuous = false;
      break;

    default:
      err_code |= RUUVI_DRIVER_ERROR_INVALID_PARAM;
  }
  return err_code;
}

ruuvi_driver_status_t ruuvi_interface_tmp117_mode_get(uint8_t* mode)
{
  if(NULL == mode) { return RUUVI_DRIVER_ERROR_NULL; }
  *mode = m_continuous ? RUUVI_DRIVER_SENSOR_CFG_CONTINUOUS : RUUVI_DRIVER_SENSOR_CFG_SLEEP;
  return RUUVI_DRIVER_SUCCESS;
}Setting and getting the current mode
Reading data out
Next we get to the actual meat of our driver: reading data. The Ruuvi sensor data structure has changed in FW version 3.26.0, previous versions forced every sensor to fit their data into 3 floats where as new data format supports up to 32 fields per sensor. We’ll read the sensor value and populate the temperature data field.
/**
 * @brief Read latest data from sensor registers
 * Return latest data from sensor. Does not take a new sample, calling this function twice
 * in a row returns same data. Configure sensor in a single-shot mode to take a new sample
 * or leave sensor in a continuous mode to get updated data.
 *
 * @param [out] p_data Pointer to sensor data @ref ruuvi_driver_sensor_data_t .
 * @return RUUVI_DRIVER_SUCCESS on success
 * @return RUUVI_DRIVER_ERROR_NULL if p_data is @c NULL.
 *
 * @warning if sensor data is not valid for any reason, data is populated with
 *          @c RUUVI_DRIVER_FLOAT_INVALID.
 */
typedef ruuvi_driver_status_t (*ruuvi_driver_sensor_data_fp)(ruuvi_driver_sensor_data_t* const p_data);Sensor data get signature
ruuvi_driver_status_t ruuvi_interface_tmp117_mode_get(uint8_t* mode)
{
  if(NULL == mode) { return RUUVI_DRIVER_ERROR_NULL; }
  *mode = m_continuous ? RUUVI_DRIVER_SENSOR_CFG_CONTINUOUS : RUUVI_DRIVER_SENSOR_CFG_SLEEP;
  return RUUVI_DRIVER_SUCCESS;
}

ruuvi_driver_status_t ruuvi_interface_tmp117_data_get(ruuvi_driver_sensor_data_t* const  data)
{
  if(NULL == data) { return RUUVI_DRIVER_ERROR_NULL; }

  ruuvi_driver_status_t err_code = RUUVI_DRIVER_SUCCESS;
  if(m_continuous)
  {
    m_temperature = tmp117_read();
    m_timestamp = ruuvi_driver_sensor_timestamp_get();
  }

  if(RUUVI_DRIVER_SUCCESS == err_code && RUUVI_DRIVER_UINT64_INVALID != m_timestamp)
  {
    ruuvi_driver_sensor_data_fields_t env_fields = {.bitfield = 0};
    env_fields.datas.temperature_c = 1;
    ruuvi_driver_sensor_data_set(data,
                                 env_fields,
                                 m_temperature);
    data->timestamp_ms = m_timestamp;
  }

  return err_code;
}Data getter implementation
Testing it out
As this has been quite a bit of code, there’s bound to be bugs in the work we implemented. This is why we have the unit tests for sensor interface. We’ll run the same test battery for each implementation of sensor interfaces to make sure their behaviour is consistent. This lets us use different sensors on different boards without worrying about the details of the underlying implementation.
  #if RUUVI_BOARD_ENVIRONMENTAL_TMP117_PRESENT
    bus = RUUVI_DRIVER_BUS_I2C;
    handle = RUUVI_BOARD_TMP117_I2C_ADDRESS;
    err_code = test_run(ruuvi_interface_tmp117_init, bus, handle);
    RUUVI_DRIVER_ERROR_CHECK(err_code, RUUVI_DRIVER_ERROR_SELFTEST);
#endifWe added the code to run test battery to tests/test_environmental.c. The test section is in upper right corner of the application diagram.

For the sake of brevity we‘ll go through only the first bug in detail.
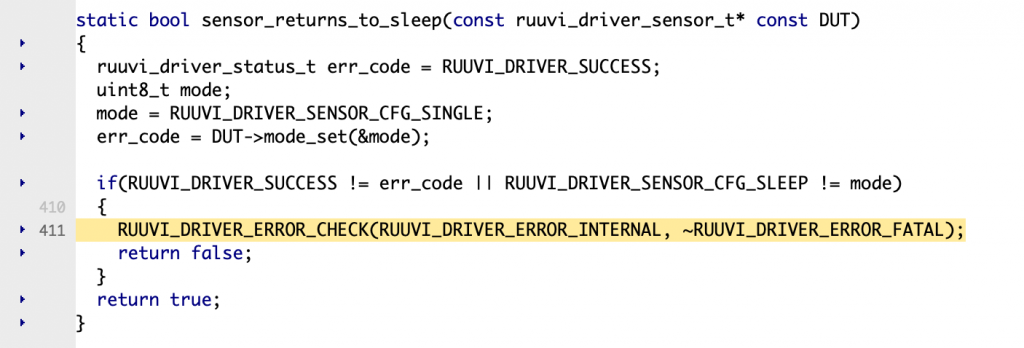
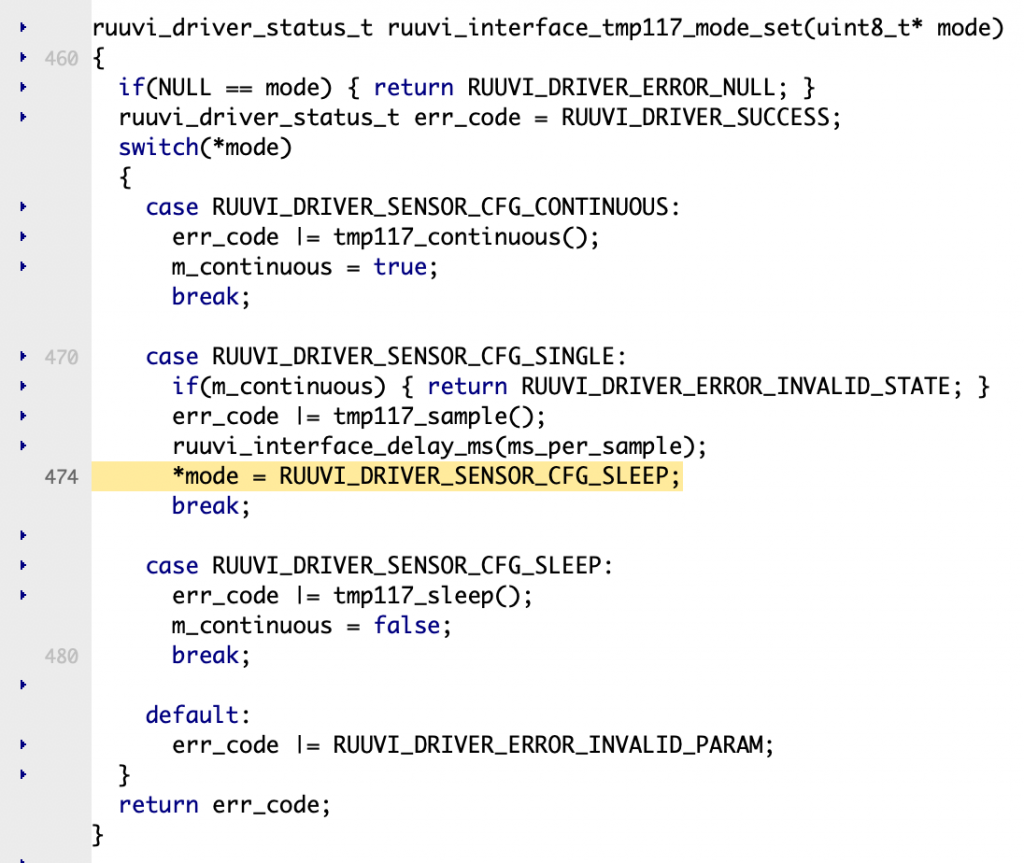
The bug at line test_sensor.c:433 was also related to taking single sample, the timestamp of sample didn’t get set.
Finally, bug at line test_sensor.c:490 was too related to configuring sensor to take a single sample. The sensor has to reject taking single sample while continuous and mark the mode as continuous after rejecting new mode. The code only rejected the change without updating the actual state to mode parameter.
Rest of the bugs weren’t flagged by the unit test suite, after adding a few more checks to the tests some bugs were found in input checking of the functions. Mainly the bugs involved allowing configuring the sensor while it wasn’t in sleep mode and a few bugs were related to configuring the sample rate.

Adding sensor to application
Environmental task
Now as we have the sensor ready to go, we’ll need to add it to the application. Logical place for the sensor is in task_environmental.c. The tasks are in upper left corner of the application diagram.
We add the sensor to enumeration of possible environmental sensors, so the space for sensor will only get reserved on boards which actually may have the TMP117.
The initialization function will check if there is a configuration for the sensor stored in flash, and if not it will use the defaults defined in application configuration.
// Do not compile space for unused sensor drivers.
// Define enum in order of default preference of sensor being used.
// Default sensor can be overridden by calling a backend_set function.
enum{
#if APPLICATION_ENVIRONMENTAL_TMP117_ENABLED
  ENV_TMP117_INDEX,
#endif
#if APPLICATION_ENVIRONMENTAL_SHTCX_ENABLED
  ENV_SHTCX_INDEX,
#endif
#if APPLICATION_ENVIRONMENTAL_BME280_ENABLED
  ENV_BME280_INDEX,
#endif
#if APPLICATION_ENVIRONMENTAL_NTC_ENABLED
  ENV_LIS2DH12_INDEX,
#endif
#if APPLICATION_ENVIRONMENTAL_MCU_ENABLED
  ENV_MCU_INDEX,
#endif
#if APPLICATION_ENVIRONMENTAL_LIS2DH12_ENABLED
  ENV_LIS2DH12_INDEX,
#endif
  ENV_SENSOR_COUNT
};
/** @brief Try to initialize TMP117 as environmental sensor
 *
 * Looks up appropriate pin definitions from ruuvi_boards.h
 * Tries to load driver configuration from flash. If flash configuration is not available,
 * uses application defaults from application_config.h.
 *
 * @return RUUVI_DRIVER_SUCCESS if TMP117 environmental is not enabled at compile time or if sensor is initialized.
 * @return RUUVI_DRIVER_ERROR_NOT_FOUND if TMP117 environmental does not reply on bus but it's expected to be available
 * @return RUUVI_DRIVER_ERROR_INVALID_STATE if some other user has already initialized the driver.
 */
static ruuvi_driver_status_t initialize_tmp117(void)
{
  #if APPLICATION_ENVIRONMENTAL_TMP117_ENABLED
  // Assume "Not found", gets set to "Success" if a usable sensor is present
  ruuvi_driver_status_t err_code = RUUVI_DRIVER_ERROR_NOT_FOUND;
  ruuvi_driver_bus_t bus = RUUVI_DRIVER_BUS_I2C;
  uint8_t handle = RUUVI_BOARD_TMP117_I2C_ADDRESS;
    // Initialize sensor.
  err_code = ruuvi_interface_tmp117_init(&(m_environmental_sensors[ENV_TMP117_INDEX]),
                                            bus, handle);
  // return if failed.
  if(RUUVI_DRIVER_SUCCESS != err_code) { return err_code; }
  // Wait for flash operation to finish
  while(task_flash_busy());
  ruuvi_driver_sensor_configuration_t config;
  err_code = task_flash_load(APPLICATION_FLASH_ENVIRONMENTAL_FILE,
                             APPLICATION_FLASH_ENVIRONMENTAL_TMP117_RECORD,
                             &config,
                             sizeof(config));
  // If there is no stored configuration, use defaults.
  if(RUUVI_DRIVER_SUCCESS != err_code)
  {
    LOG("LIS2DH12 temp config not found on flash, using defaults\r\n");
    config.dsp_function  = APPLICATION_ENVIRONMENTAL_TMP117_DSP_FUNC;
    config.dsp_parameter = APPLICATION_ENVIRONMENTAL_TMP117_DSP_PARAM;
    config.mode          = APPLICATION_ENVIRONMENTAL_TMP117_MODE;
    config.resolution    = APPLICATION_ENVIRONMENTAL_TMP117_RESOLUTION;
    config.samplerate    = APPLICATION_ENVIRONMENTAL_TMP117_SAMPLERATE;
    config.scale         = APPLICATION_ENVIRONMENTAL_TMP117_SCALE;
    // Store defaults to flash
    err_code = task_flash_store(APPLICATION_FLASH_ENVIRONMENTAL_FILE,
                                APPLICATION_FLASH_ENVIRONMENTAL_TMP117_RECORD,
                                &config,
                                sizeof(config));
  }
  // Check flash operation status, allow not supported in case we're on 811
  RUUVI_DRIVER_ERROR_CHECK(err_code, RUUVI_DRIVER_ERROR_NOT_SUPPORTED);
  // Wait for flash operation to finish
  while(task_flash_busy());
  // Configure sensor
  return task_sensor_configure(&(m_environmental_sensors[ENV_TMP117_INDEX]), &config, "");
  #else
  return RUUVI_DRIVER_SUCCESS;
  #endif
}The sensors are prioritized by the order in enum above. TMP117 is tried first, if the sensor cannot provide any data after initialization SHTC is tried, then BME280, etc. It’s also possible to pick a new sensor backend at runtime.
Configuration
We’ll need to add the default configuration and enable compiling the sensor to our application. For user configuration we’ll add
#define APPLICATION_ENVIRONMENTAL_TMP117_ENABLED (1 && RUUVI_BOARD_ENVIRONMENTAL_TMP117_PRESENT)to application_config.h
To let the ruuvi.drivers.c project compile only necessary components, we’ll add
#define RUUVI_INTERFACE_ENVIRONMENTAL_TMP117_ENABLED APPLICATION_ENVIRONMENTAL_TMP117_ENABLEDto application_driver_configuration.h. The configuration files are in upper right corner of the application diagram.
Finally we define default configuration to application_mode_default.h.
#ifndef APPLICATION_ENVIRONMENTAL_TMP117_DSP_FUNC
#define APPLICATION_ENVIRONMENTAL_TMP117_DSP_FUNC   APPLICATION_ENVIRONMENTAL_DSPFUNC
#endif

#ifndef APPLICATION_ENVIRONMENTAL_TMP117_DSP_PARAM
#define APPLICATION_ENVIRONMENTAL_TMP117_DSP_PARAM  APPLICATION_ENVIRONMENTAL_DSPPARAM
#endif

#ifndef APPLICATION_ENVIRONMENTAL_TMP117_MODE
#define APPLICATION_ENVIRONMENTAL_TMP117_MODE       APPLICATION_ENVIRONMENTAL_MODE
#endif

#ifndef APPLICATION_ENVIRONMENTAL_TMP117_RESOLUTION
#define APPLICATION_ENVIRONMENTAL_TMP117_RESOLUTION APPLICATION_ENVIRONMENTAL_RESOLUTION
#endif

#ifndef APPLICATION_ENVIRONMENTAL_TMP117_SAMPLERATE
#define APPLICATION_ENVIRONMENTAL_TMP117_SAMPLERATE RUUVI_DRIVER_SENSOR_CFG_DEFAULT
#endif

#ifndef APPLICATION_ENVIRONMENTAL_TMP117_SCALE
#define APPLICATION_ENVIRONMENTAL_TMP117_SCALE      APPLICATION_ENVIRONMENTAL_SCALE
#endifThese definitions can be overridden in different application mode configuration files.
Comparing sensors
This is where we branch off the master version of Ruuvi Firmware. The master firmware has a heartbeat which updates the sensor data to listeners. By default this heartbeat is BLE advertisement, but during GATT connection the data is sent over Nordic UART Service instead. We’ll create special logic to switch the sensor and change MAC address while broadcasting to get data from different sensors.
static void select_next_backend()
{
  static uint8_t index = 0;
  static const char list[5][9] = { "BME280",
                                   "LIS2DH12",
                                   "SHTCX",
                                   "nRF5TMP",
                                   "TMP117"};
  static uint8_t ids[] = {0x80, 0x12, 0xC3, 0x52, 0x17};
  uint8_t id;
  ruuvi_driver_status_t err_code = RUUVI_DRIVER_ERROR_NOT_FOUND;
  while(err_code == RUUVI_DRIVER_ERROR_NOT_FOUND)
  {
    err_code = task_environmental_backend_set(list[index]);
    id = ids[index++];
    index = index % sizeof(ids);
  }

  uint64_t address;
  uint64_t mask = 0xFFFFFFFFFFFFFF00;
  err_code |= ruuvi_interface_communication_radio_address_get(&address);
  address &= mask;
  address |= id;
  err_code |= task_advertisement_stop();
  err_code |= ruuvi_interface_communication_radio_address_set(address);
  RUUVI_DRIVER_ERROR_CHECK(err_code, ~RUUVI_DRIVER_ERROR_FATAL);
}

static void heartbeat_send(void* p_event_data, uint16_t event_size)
{
  select_next_backend();

  ruuvi_interface_communication_message_t msg = {0};
  task_sensor_encode_to_5((uint8_t*)&msg.data);
  msg.data_length = m_heartbeat_data_max_len;
  task_advertisement_start();
  ruuvi_driver_status_t err_code = RUUVI_DRIVER_ERROR_INTERNAL;
  if(NULL != heartbeat_target)
  {
    err_code = heartbeat_target(&msg);
  }
  if(RUUVI_DRIVER_SUCCESS == err_code) { ruuvi_interface_watchdog_feed(); }
  RUUVI_DRIVER_ERROR_CHECK(err_code, ~RUUVI_DRIVER_ERROR_FATAL);
}Sensors get cycled to get comparable data

Finishing touches
Merging the good stuff back to master
While developing the sensor comparison FW, I found a few bugs in the firmware. If the accelerometer cannot be initialized, error rises up from sensor data encoding and application considers it a fatal problem and reboots. However we want to be able to use the firmware without accelerometer, so we’ll just consider it as a warning and let the application continue.
The sensor data initialization for broadcasting used dummy values, we change the sensor data initialization to use the same logic as application broadcasting. This helps avoid issues with measurement sequence counter etc.
Let’s check the differences we have with git status:

We’ll commit the files in four groups: task_advertisement is one group, task_environmental and configuration is second and task_acceleration is third. We’ll want to leave the task_communication changes behind as they were only for this branch but we’ll commit them in the fourth group for future usage.

Our sensor comparison FW has been rebased on top of the master, so all the differences build on top of the up-to-date version of firmware. Now we’ll want to bring the 3 commits 086f0ce, 73738f9 and 98b07ca back to the master branch.
We run
git checkout master
git cherry-pick 086f0ce^..98b07ca
to get the commits, it turns out that last commit has nothing to add compared to the master branch. The accelerometer initialization was probably broken somewhere along the way.
Now our master looks like this:

Next we’ll rebase the sensor comparison branch on top of the master to keep it up to date.

Formatting the code and generating doxygen pages
To keep the project style consistent, we use Artistic Style to format the code into uniform style. It’s not perfectly what I’d like, as comments after the end of line are counted to line length and this practically forces me to not use comments on a line with code to avoid strange indentation but it’s definitely better than nothing. We go through submodules separately, starting with ruuvi.drivers.c
astyle --project=.astylerc --recursive "./interfaces/*.c"
astyle --project=.astylerc --recursive "./interfaces/*.h"
astyle --project=.astylerc --recursive "./nrf5_sdk15_platform/*.c"
astyle --project=.astylerc --recursive "./nrf5_sdk15_platform/*.h"
Next we check that the comments are comprehensive and up-to-date with Doxygen. Doxygen scans the source code for comments and generates HTML and PDF documentation of functions, structures, enumerations, macros and so on. The Doxygen generation is a simple matter of running
doxygenThe generation produces doxygen.error file which has 55 entries. We’ll clear up this tech debt a little bit today, and make sure that none of these errors are from TMP117 files and fix the first file with errors — ruuvi_interface_shtcx.c.
We repeat this process on the main project folder, although there isn’t doxygen support yet.
Sharing the work
As we’re still in alpha and there’s a lot of flashing disclaimers about the project being in development, we’ll just push straight to master and let Travis and Jenkins decide if the project is good to go.
Travis builds the Doxygen documentation for ruuvi.drivers.c and pushes the ready documents to gh-pages branch. Jenkins builds the firmware variants to boards and stores the built binaries online for everyone.
In this case Jenkins spots an error: we haven’t added the ruuvi_interface_tmp117.c to GCC sources in file gcc_sources.make. After adding the file we can try again.
Compiling file: ruuvi_interface_tmp117.c
../../../ruuvi.drivers.c/interfaces/environmental/ruuvi_interface_tmp117.c: In function 'ruuvi_interface_tmp117_dsp_get':
../../../ruuvi.drivers.c/interfaces/environmental/ruuvi_interface_tmp117.c:508:25: error: variable 'err_code' set but not used [-Werror=unused-but-set-variable]
   ruuvi_driver_status_t err_code;
                         ^~~~~~~~
../../../ruuvi.drivers.c/interfaces/environmental/ruuvi_interface_tmp117.c:534:1: error: control reaches end of non-void function [-Werror=return-type]
 }
 ^
At top level:
../../../ruuvi.drivers.c/interfaces/environmental/ruuvi_interface_tmp117.c:42:30: error: 'tmp117_soft_reset' defined but not used [-Werror=unused-function]
 static ruuvi_driver_status_t tmp117_soft_reset(void)
                              ^~~~~~~~~~~~~~~~~
cc1: all warnings being treated as errors
Here we can catch a few more errors found by static analysis of GCC. One of our functions neglected to actually return the error code and our initialization didn’t restore the TMP117 to a known state.
After the fixes documentation is automatically available at github.io and builds are available at jenkins.ruuvi.com.
Power consumption
This time we’re working on an experimental board and we won’t be verifying that the final power consumption is in acceptable range. However, before shipping the code to customers we’ll mind the environment and verify that power consumption is not excessive.
Conclusion
After a long post we have added a new sensor to Ruuvi Firmware. The most important thing in this post hasn’t been details on how to get something done however. The important takeaways are:
- Mind your architecture. While coding the driver had a lot of complexity, once the driver was complete we needed less than 100 lines of code to initialize sensor, load sensor configuration from flash or use default configuration if no configuration is available in flash and transmit the encoded data over Bluetooth advertisements or GATT depending on state of the program. And it works across 3 different boards, 2 different MCUs and can handle missing sensor gracefully with a fallback to the next sensor. The code also benefits from any future improvements and bugfixes to the shared logic.
- Automatic tests and re-usable interfaces can save your day. We had already defined the high-level access to sensor and automatic tests to verify the sensor driver through the interface. The automatic tests caught 7 bugs in the implementation and further static analysis by GCC spotted some corner cases such as the initialization not actually resetting the sensor to a known state. Automatic compilation spotted an issue where project wasn’t in a compilable state after being pushed.
That’s all for this time, if you’re wondering about what these mysterious Kaarle and Keijo boards are be sure to join Ruuvi mailing list at the bottom of homepage and be one of the first to know 😉
RuuviTags make also great Black Friday and Christmas presents and their sales support producing these posts, if you enjoy the content spread the Ruuvi to your family! Now go and Measure Your World.
