

In this part of the tutorial we’ll use GPIO drivers made in part 1 to finally make our RuuviTag blink LEDs. Final code of this blog post can be downloaded at Ruuvi GitHub in the ruuviblog-branch, tag 3.3.0-alpha. Please follow part 1 of the series for details on how to clone the repository and compile the code. If you want to download compiled hex, you can get it from http://jenkins.ruuvi.com/job/ruuvi.firmware.c/13/
Tasks
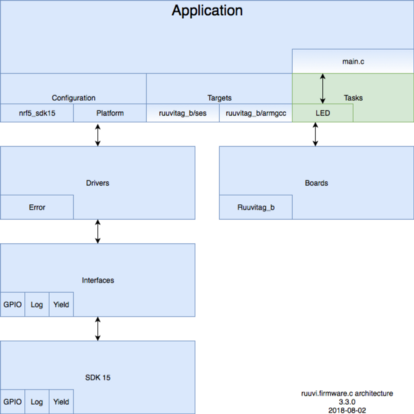
As our program becomes more complicated, we’ll split it into separate independent tasks rather than keep everything in main.c. As before, previously introduced parts are in blue, modified parts have gradient and new parts are in green.
We add 3 tasks for LEDs. Init configures the pins, write sets an LED to desired state and cycle goes through the LEDs turning them on and then off in sequence.
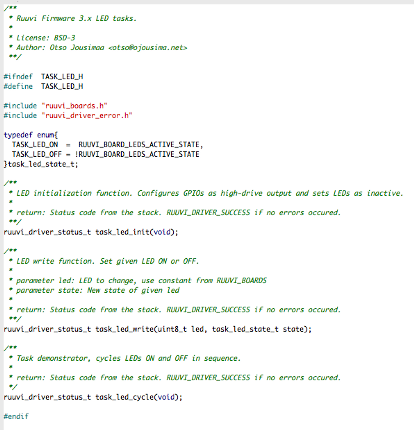
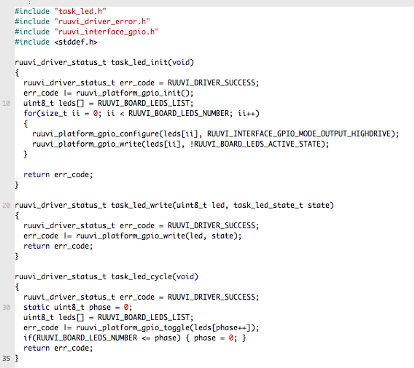
In addition to the function definitions we’ll add enum for the led state. We could use RUUVI_BOARD_LEDS_ACTIVE_STATE and !RUUVI_BOARD_LEDS_ACTIVE_STATE directly just as well. Actual implementation is extremely simple, we just call the GPIO driver implemented in part 1 of the posts:
Finally we’ll call these tasks in the main.c:
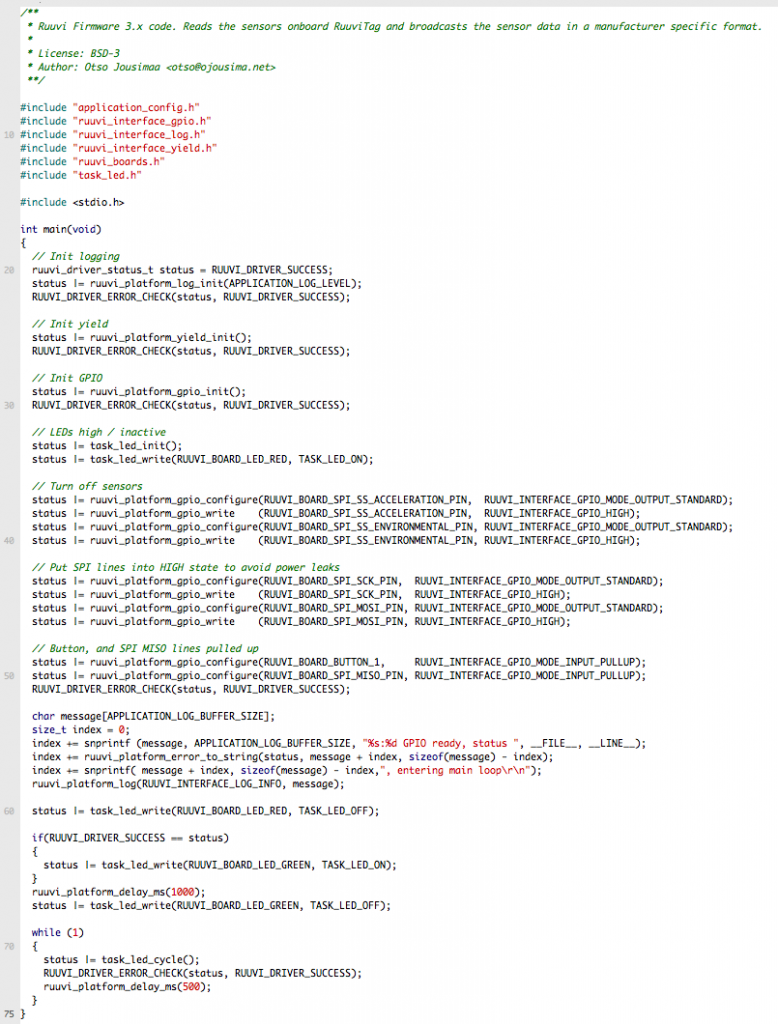
The flow of program is similar to the current official RuuviTag firmware. We’ll boot up logging and peripherals, and then turn the RED LED on. Once self-test has passed, we turn the RED LED off and turn GREEN LED on. After one second we start the main loop, LED blinking in this case.
Power Consumption
Our delay implementation does not sleep the tag, it rather keeps the MCU active until the timeout occurs. Therefore our power consumption is several milliamperes, absolutely not feasible for battery powered operation.
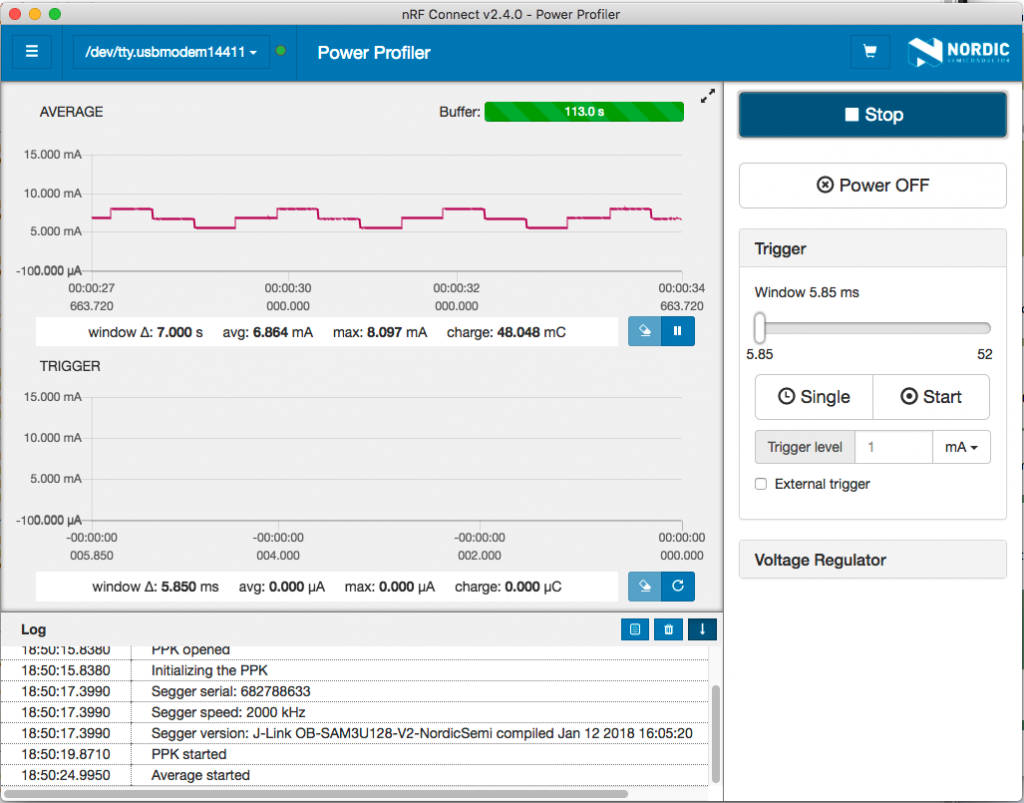
It is easy to see the LEDs turning on and off in the steps of the profile. Right now our power consumption is approximately 1750 times the consumption we had in previous post, so obviously this is not acceptable solution for the long run.
In the next part of Ruuvi Firmware blog we’ll add interrupts from the button to program flow, which will allow us to sleep until the next button press occurs.
Stay tuned and follow @ojousima and @ruuvicom on Twitter for #FirmwareFriday posts!