

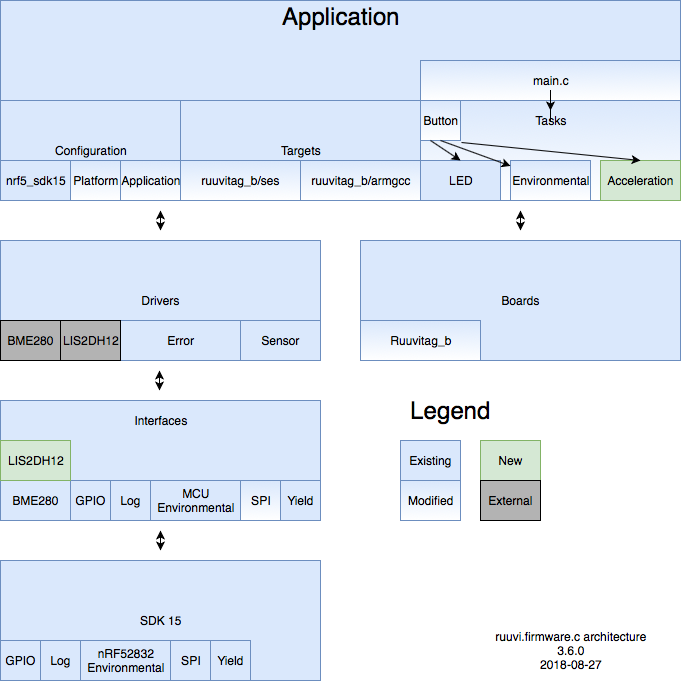
In this part of the tutorial we’ll build on part 5 of the tutorial and add support for the LIS2DH12 on board RuuviTag model +. Final code of this blog post can be downloaded at Ruuvi GitHub in the ruuviblog-branch, tag 3.6.0-alpha.
Please follow part 1 of the series for details on how to clone the repository and compile the code. Final hex of this tutorial can be downloaded from the Ruuvi Jenkins.
Adding LIS2DH12 drivers
SPI wrappers
STMicroelectonics provides C-drivers for some of their sensors, including LIS2DH12. We’ll add their Github project as a submodule to our project. Like Bosch BME280 driver, LIS2DH12 driver expects interface functions for write and read.
int32_t platform_write(void *handle, uint8_t Reg, uint8_t *Bufp, uint16_t len)int32_t platform_read(void *handle, uint8_t Reg, uint8_t *Bufp, uint16_t len)Let’s append our SPI interface with LIS2DH12 support:
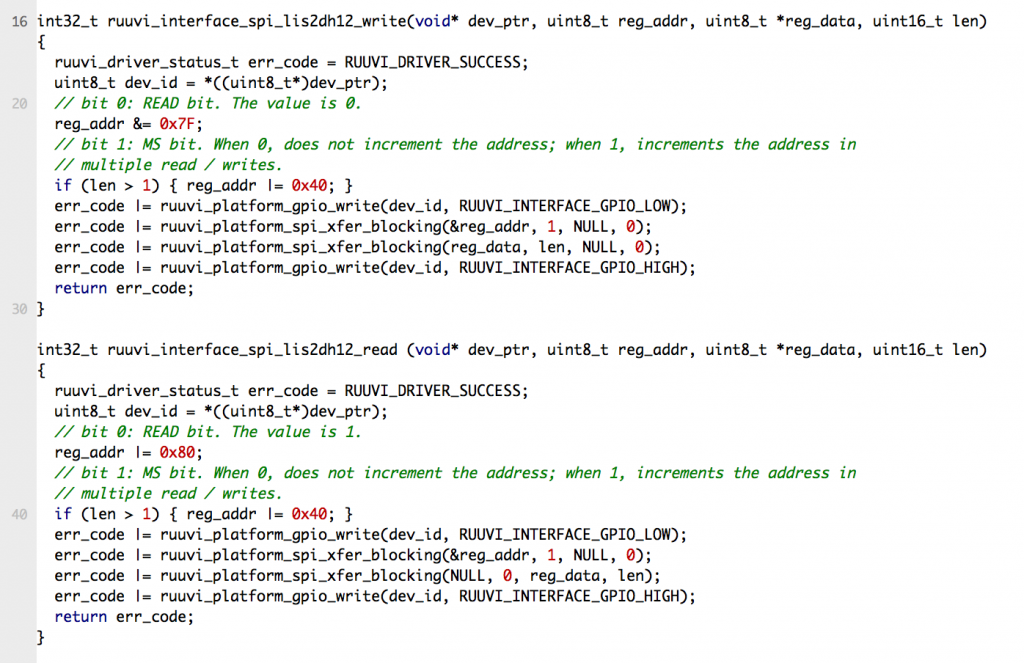
The functions are almost exactly same as with BME280, but our return value is of type int32_t and the handle is a void pointer. Additionally LIS2DH12 has a special handling of read/write over the SPI bus and multi-byte read/writes. Read/write mode is decided by the most significant bit of the register address and the second most significant bit of the reg_addr needs to be set if we want to transfer more than one byte at a time.
Implementing the sensor interface
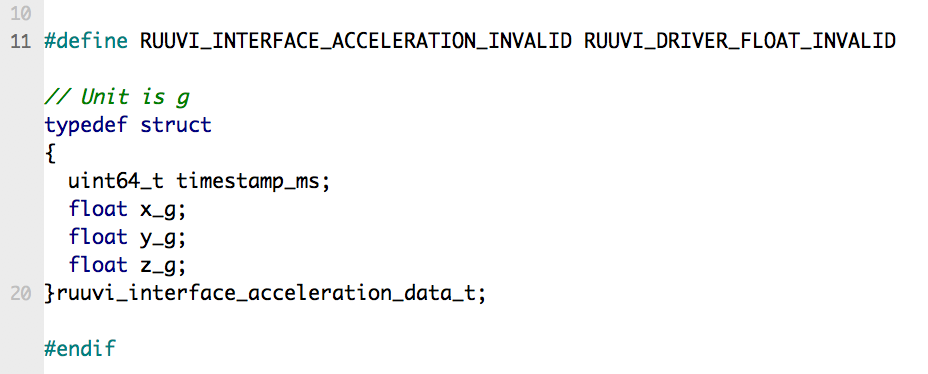
The sensor interface has exactly the same functions as our environmental sensor, only data_get sets different type of data to the void pointer. Strictly speaking we could pass accelerometer data to environmental sensor data type as both have uint64_t and three floats, but defining the unit in the data type clarifies the meaning of each float.
For now we won’t be implementing buffered reads from LIS2DH12 First-In-First-Out (FIFO) as it is not required for Ruuvi data formats. Maybe we’ll later append the interface or maybe we’ll consider FIFO to be another special case to be handled by the application.
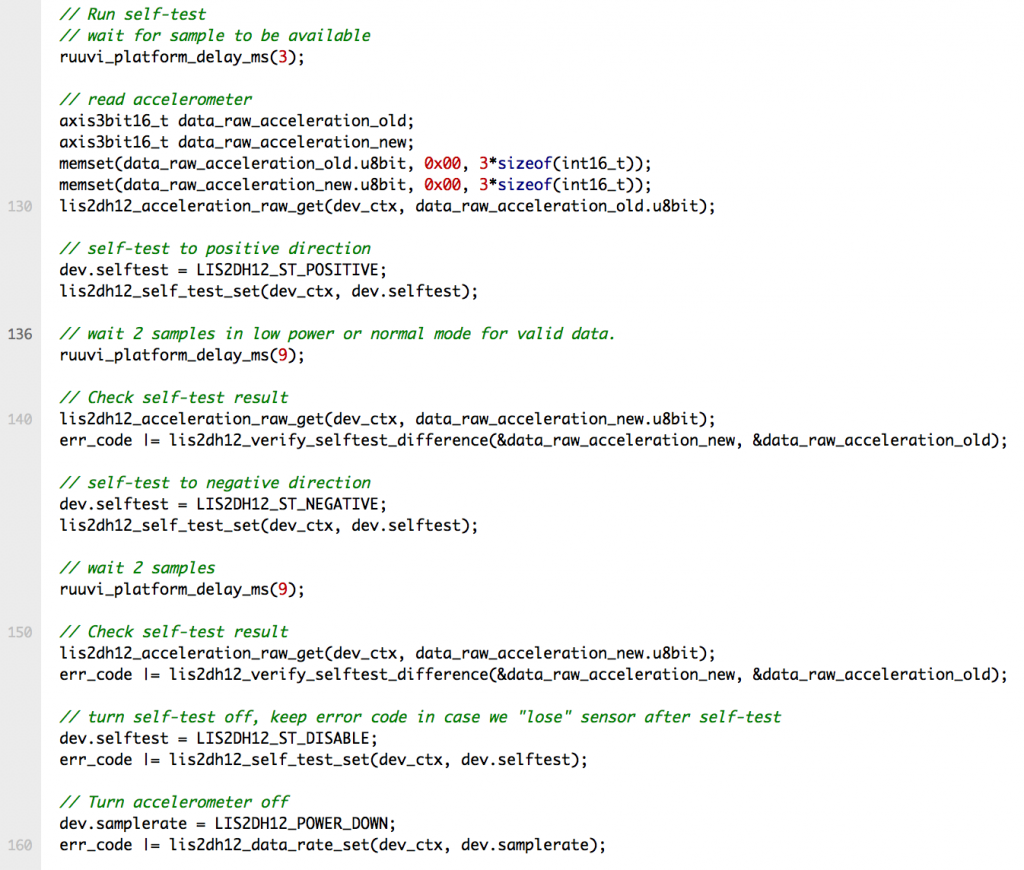
The implementation itself is some 600+ lines, most of it is input checking and switch-cases. Self-test has to sample the sensors and verify that the output of the axes changes as specified.
We run into the limits of our sensor configuration data format here. LIS2DH12 could reach up to 5 kHz in 8-bit mode, whereas our sensor sample rate value can represent only up to 200 Hz. Once again we keep things simple and limit our sensor to 200 Hz sampling. If someone wants to run vibration analysis on RuuviTag and requires higher sample rates they can use the LIS2DH12 driver directly rather than through this interface.
Digital Signal Processing (DSP) function is also a little tricky, as the LIS2DH12 datasheet does not really tell us what the high-pass cutoff frequency (HPCF) -register does. The ST driver has a bit more information, as there is enumeration lis2dh12_hpcf_t which names the settings with scale from LIGHT to AGGRESSIVE. We’ll accept the DSP parameter from 0 to 3 and define 0 as the least aggressive and 3 as the most aggressive setting. There is also a configuration option for using high-pass for interrupt functions, but we’ll ignore those for now.
Polling LIS2DH12 in the program
Now the driver is implemented, let’s test it by printing out the acceleration values alongside environmental values on a button press. Adjustment to the main function is simple:
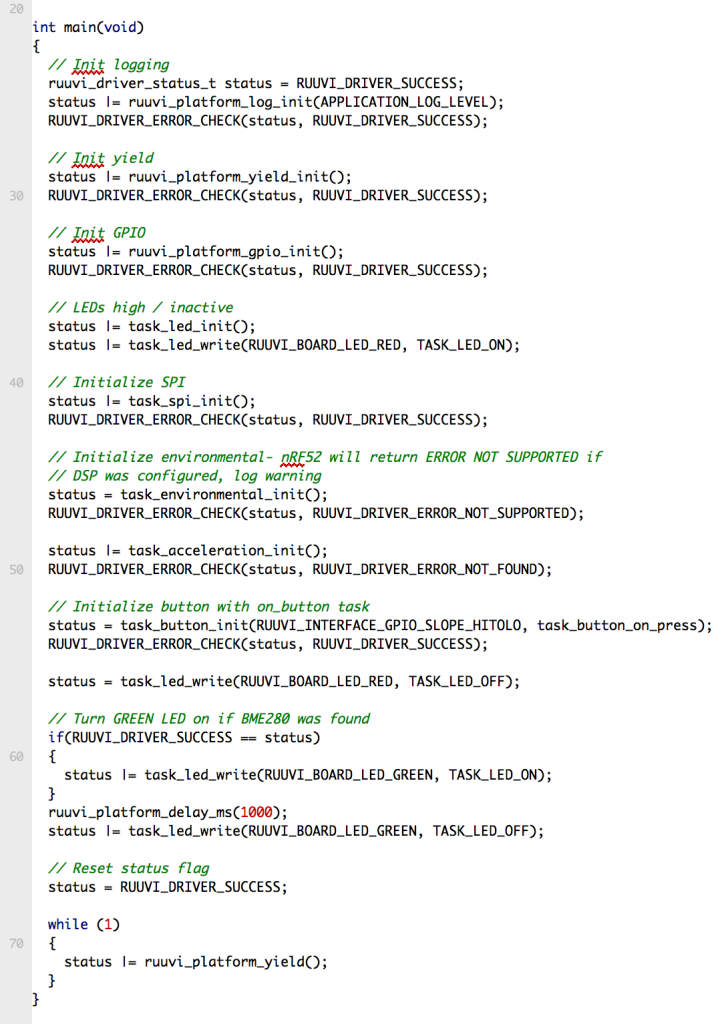
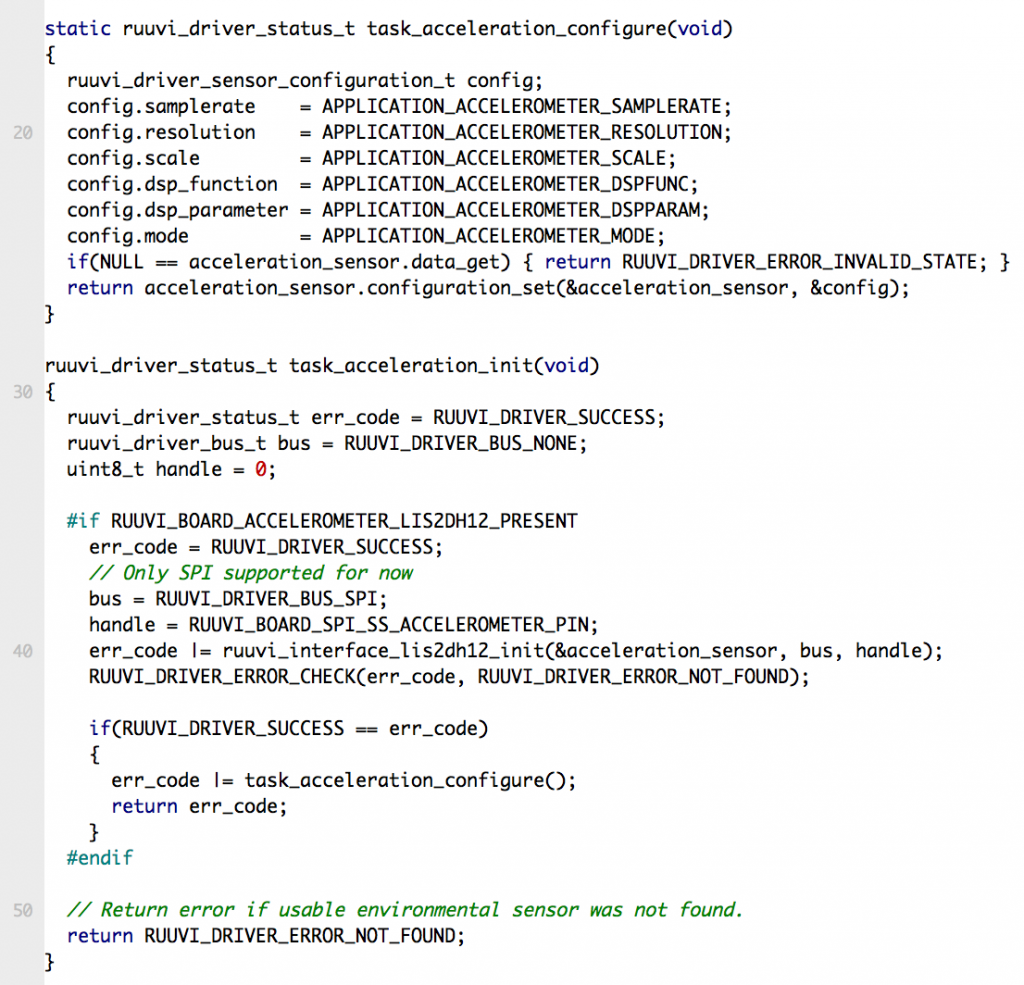
We have added initialization of accelerometer at line 49 and changed button task to task_button_on_press at line 53. Our button task calls the environmental and acceleration tasks as well as blinks the red led. The accelerometer initialization is similar to environmental sensor initialization, we load default configuration from application_config.h and write it to the sensor.
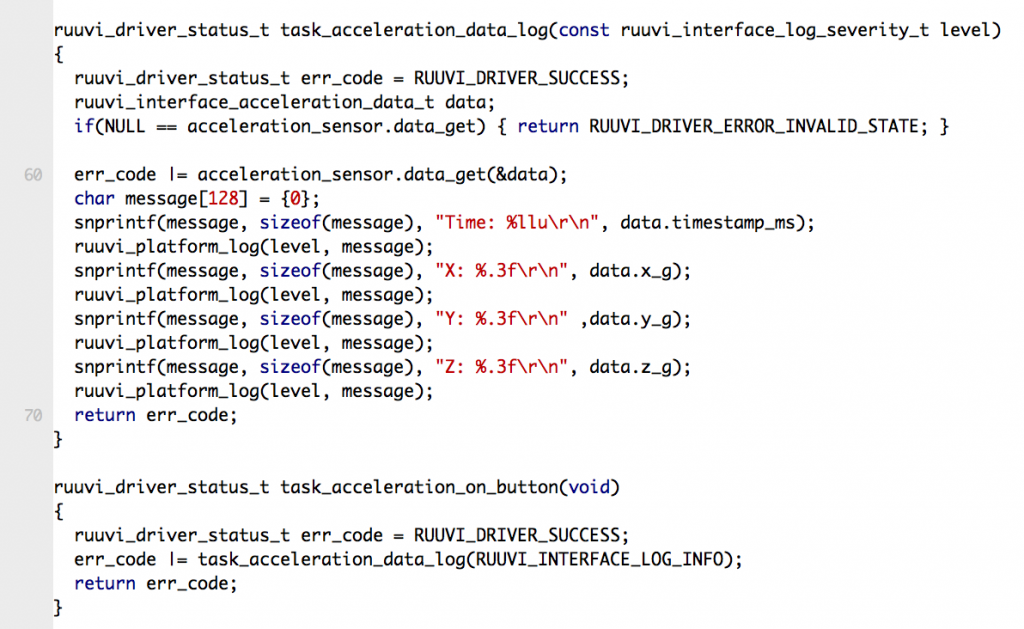
The data read task is also similar to the environmental sensor task. We read the data from the sensor and print it out to the console.

The accelerometer shows 1.068 G in total (square root of squares of X- Y- and Z-components), which is close enough to the 1.000 G one would expect. Environmental values are reasonable, the temperature is a bit high because the nRF52-DK under my Ruuvi devkit heats up the RuuviTag a bit.
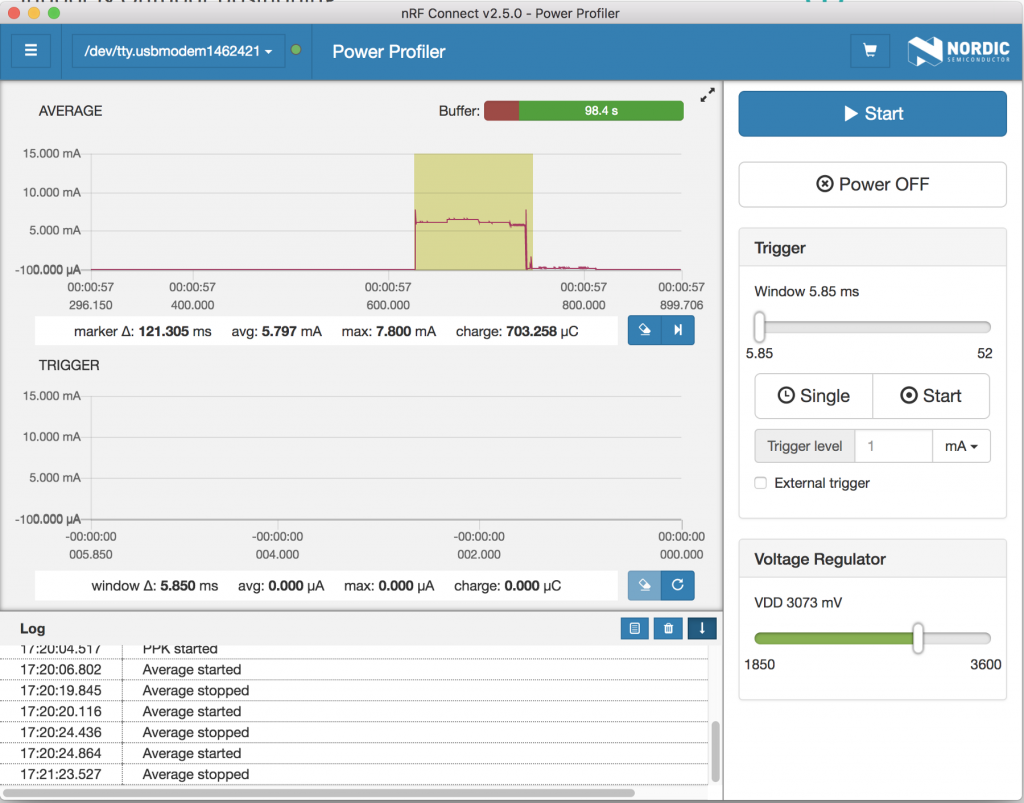
Let’s check the power consumption:
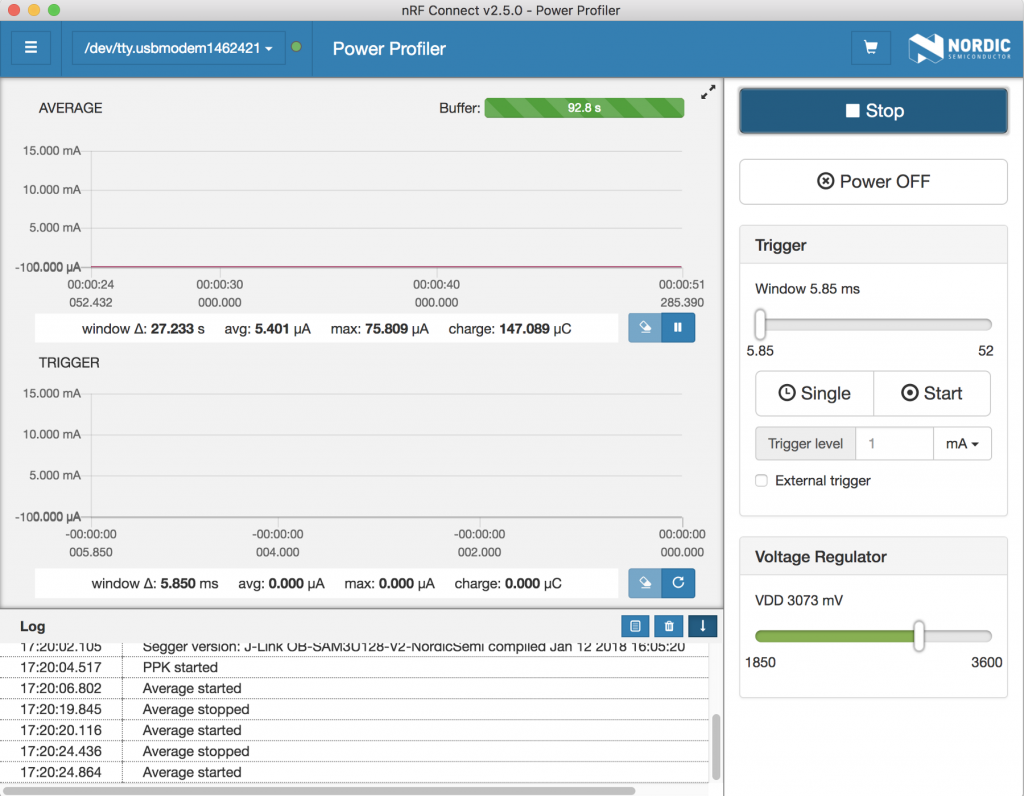
The power consumption is now 5.4 μA, up from 3.4 μA in the last part. This is expected behaviour as the LIS2DH12 is specified to consume 2 μA at1 Hz 10 bit resolution sampling. Reading the sample itself does not make a big difference compared to waiting for the BME280 finish the 16x oversampling process as seen below. The sampling can be compared to plain environmental sampling in the previous post.
Testing
Along the way of the blog series, some things have been left on the backburner. While we have support for both vanilla ARMGCC and Segger Embedded Studio (SES) builds, right now our Jenkins only tests that it can compile the program on ARMGCC. At least two problems are known:
- Our linker script is different between ARMGCC and SES builds.
- Our ARMGCC build does not support printing floats and 64-bit integers.
While SES does give out the generated linker script, linking the .hex with our ARMGCC version does not yield a running version of the .hex file. Maybe this could be fixed by updating our ARMGCC to version 7–2017-q4-major which is the same one as SES uses, but we’ll stick with the Nordic Semiconductor tested toolchain with 6–2017-q2-update. Therefore we’ll have to accept that the linker scripts are going to be different.
We need to modify the ARMGCC makefile a bit to print out the floats, adding
LDFLAGS += -u _printf_floattells the linker to add float support to our printf.
After flashing the ARMGCC-compiled hex we can verify that the LEDs blink in order RED–GREEN, so our program has booted up and considers the self-test successful. The Real Time Transfer (RTT) logs suggest that the sensors are being read and return reasonable values.
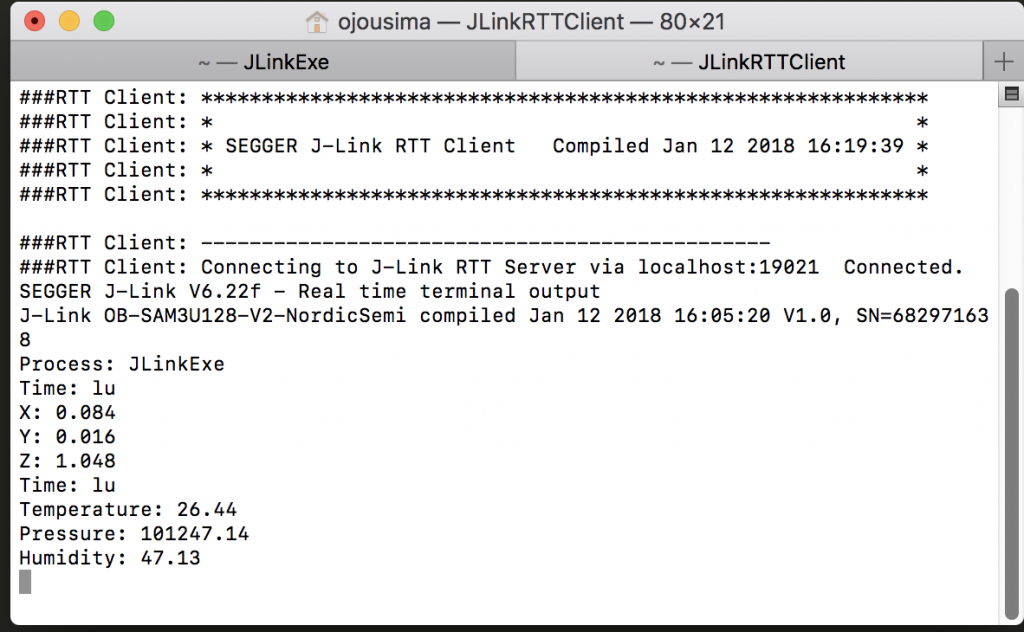
One issue is evident: Our print function does not print the 64-bit timestamp correctly. For now we’ll leave this issue on the backlog.
Conclusion
We now have a basic support for both of the external sensors onboard RuuviTag. We also have a generic interface to the sensors which allows us to make updates to the sensors onboard without breaking the application relying on getting the data.
Next few parts in the series will be adding the basic functionality of the remaining peripherals needed for current RuuviTag operation, such as Bluetooth Low Energy (BLE) broadcasting and Near-Field Communication (NFC) reading. Should the schedule permit, we’ll also develop automatic tests for the sensors and other peripherals.
Stay tuned and follow @ojousima and @ruuvicom on Twitter for #FirmwareFriday posts!