General information
Ruuvi Sensors have an excellent power consumption profile. When using the sensors with the included CR2477 battery, the sensors can run typically between 12-24 months under standard use and operating conditions.
How long will the battery last exactly?
RuuviTag comes with a CR2477 battery that theoretically lasts about 3 years.
However, in practice, battery lifetime will be somewhat shorter so to be safe, we tend to say it has a 12-24 months battery.
Battery life depends on temperature. In cold temperatures, the lifetime will be shorter due to battery and in really warm temperatures electronics consume a bit more power than at room temperatures. This can shorten the projected battery life.
In connected mode to iOS device will also shorten battery lifetime as well as history syncing from a RuuviTag.
How to Change the Battery in a white RuuviTag Sensor
See the video tutorial for changing the white RuuviTag Sensor’s battery. CR2477 sized battery can easily be replaced by the user.
Step 1: Open the Sensor Lid
- Open the top lid of the sensor device by lifting it up.
Step 2: Remove the Circuit Board
- Gently remove the circuit board from the bottom part of the sensor device by hand.
- If the circuit board is stuck, you can lightly tap the device with your hand to against another hand to release it.
- We don’t recommend to use tools, but f you decide to use for example flat head screwdriver, ensure that you don’t touch any electronic components.
Step 3: Replace the Battery
- Push downwards to remove empty battery out from the circuit board, and replace it with a new, compatible CR2477 3V coin cell type battery.
- Avoid touching battery surfaces directly; grease from hands can increase resistance between the battery and connector and lead to higher battery consumption.
Step 4: Reinsert the Circuit Board
- Place the circuit board back into the bottom part of the sensor device, positioning it the same way as it was before. Red LED will turn on for ~1 second until self-test is ready and green light will start to blink in 2,5 seconds interval.
Step 5: Ensure the Proper Sealing
- Check that the o-ring (sealing) is properly positioned in its groove. O-ring is lubricated with silicone but note that too strong lubrication can cause that top lid doesn’t stay closed.
Step 6: Close the Sensor Lid and Test
Close the top lid of the sensor device and verify that o-ring stays in its groove. The sensor will automatically start sending data again and is now ready for use.
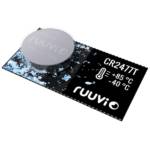
Important notice: If operating conditions exceed -20°C to +70°C temperature range, a battery designed to be used within an extended temperature range is recommended (not mandatory).
How to Change the Battery in a RuuviTag Pro Sensor
CR2477 sized battery can easily be replaced by the user. As a standard RuuviTag Pro has an extended range battery but it can be replaced with normal a battery.
Step 1: Open the Sensor Back Cover
- To open the sensor back cover, rotate it counter-clockwise until fully opened. Then, lift up the back cover from the enclosure. If it’s stuck, you can use a flat head screwdriver to gently lift up the back cover.
Step 2: Remove the Circuit Board
- Carefully lift up and remove the circuit board from the back cover.
Step 3: Replace the Battery
- Remove the old battery from the back cover, and replace it with a new, compatible 3V coin cell type battery. If the battery is hard to remove by hand, use a small flat head screwdriver to help lift it up.
- Avoid touching battery surfaces directly; grease from hands can increase resistance between the battery and connector and lead to higher battery consumption.
Step 4: Reinsert the Circuit Board
- Place the circuit board back into the bottom part, ensuring it’s aligned with the guidance pin on the bottom part. Red LED will turn on for ~1 second until self-test is ready and green light will start to blink in 2,5 seconds interval.
Step 5: Ensure Proper Sealing
- Check that the o-ring (sealing) is correctly positioned in its groove. If the sealing appears dry, apply some silicone grease. Other lubricants, such as a silicone oil or vaseline can also be used, but there’s a risk of them causing enclosure getting stuck over time.
Step 6: Close the Sensor Back Cover and Test
Install the back cover, ensuring it’s in the correct position by aligning the small and big “wings” on the back cover to enclosure top part. Turn the cover clockwise until it’s fully closed, with the arrows pointing towards each other. The sensor will automatically start sending data again and is now ready for use.
Caution! If the back cover is inserted 180 degrees in the wrong position and force is applied, it may cause components to tear off from the circuit board. In such cases, a red error light will be displayed.
Ruuvi Station app battery indicator
- If temp is less than -20C, low battery threshold = 2V
- If temp is less than 0C, low battery threshold = 2,3V
- Other temperatures, low battery threshold = 2,5V