A hobby I picked up during one of the Covid quarantines was sourdough baking. I received a sourdough starter from a friend of mine and became instantly interested in this unusual hobby. I soon started to experiment with different methods and ingredients. It has been rewarding to notice the development during this never-ending process.
Sourdough bread is very tasty, quite easy to make and healthy. It gets its rich flavour from natural yeasts and bacteria. Sourdough bread consists only of a few ingredients which makes it healthy and magnificent in its simplicity.
In this article, I will go through a step-by-step guide on how I make my sourdough bread. I will try to explain all of the steps involved in this process. We will begin with a sourdough starter, and end at the point where you can cut open a delicious crust and see the result of your own labour!
Where to start with sourdough bread?
In order to make sourdough bread at home, you need a sourdough starter. You can either make it yourself or ask a friend who already has an active sourdough starter.
Basically, you need to mix together an equal portion of water and rye flour. 50 grams of both should do the trick. Let the mixture sit for approximately 12 hours and then discard 90% of the starter. Use the remaining 10% of the starter to add to another mix of equal parts of water and rye flour. Repeat this in 12 hour cycles. After three to four days, you can start to blend in wheat flour. You must always have an equal amount of water and flour combined with a bit of the old starter to keep the yeast alive and well.
After a week or so you should start to see bubbles forming on the starter. The starter will also start to rise in its container. This is a sign of your starter becoming alive! Natural bacteria consume water and wheat molecule ingredients making a natural sour taste.
With an active starter, you are pretty much ready to start baking. In other words, there is not much else you need in terms of equipment. Regular oven, kitchen scales and a positive attitude are everything you need to bake sourdough bread!
Although this process will take a long time, remember that being patient during this process is crucial. Natural yeasts and bacteria need time to grow. In addition, gluten will need to strengthen. I will discuss these points in more detail in my guide, but remember not to hurry!
Day 1 – 21.00: Starting the process
I fed my starter the day before the baking day. As it was so cold in my apartment (roughly 19 °C) a 12-hour starter would work for me.
I used:
- 50 grams of whole grain wheat flour
- 50 grams of water
- 5 grams of previously discarded starter
After mixing the ingredients, I left the glass jar on my counter and left it as it was. By using whole wheat flour, I aimed to get a stronger flavour on the starter.
Day 2 – 09.00: Time to autolyse
I used autolyse in this bake to really strengthen the dough
What does an autolyse mean?
An autolyse means that you combine only water and flour. Gluten is what makes the dough strong. And, it develops in two ways: stretching and resting. By mixing flours with water beforehand, gluten will have time to develop into a more tangled and strong web.
I baked two loaves of bread. In the autolyse I used:
- 559 grams of water
- 589 grams of all purpose flour
- 211 grams of spelt whole grain flour
- 42 grams of whole wheat flour
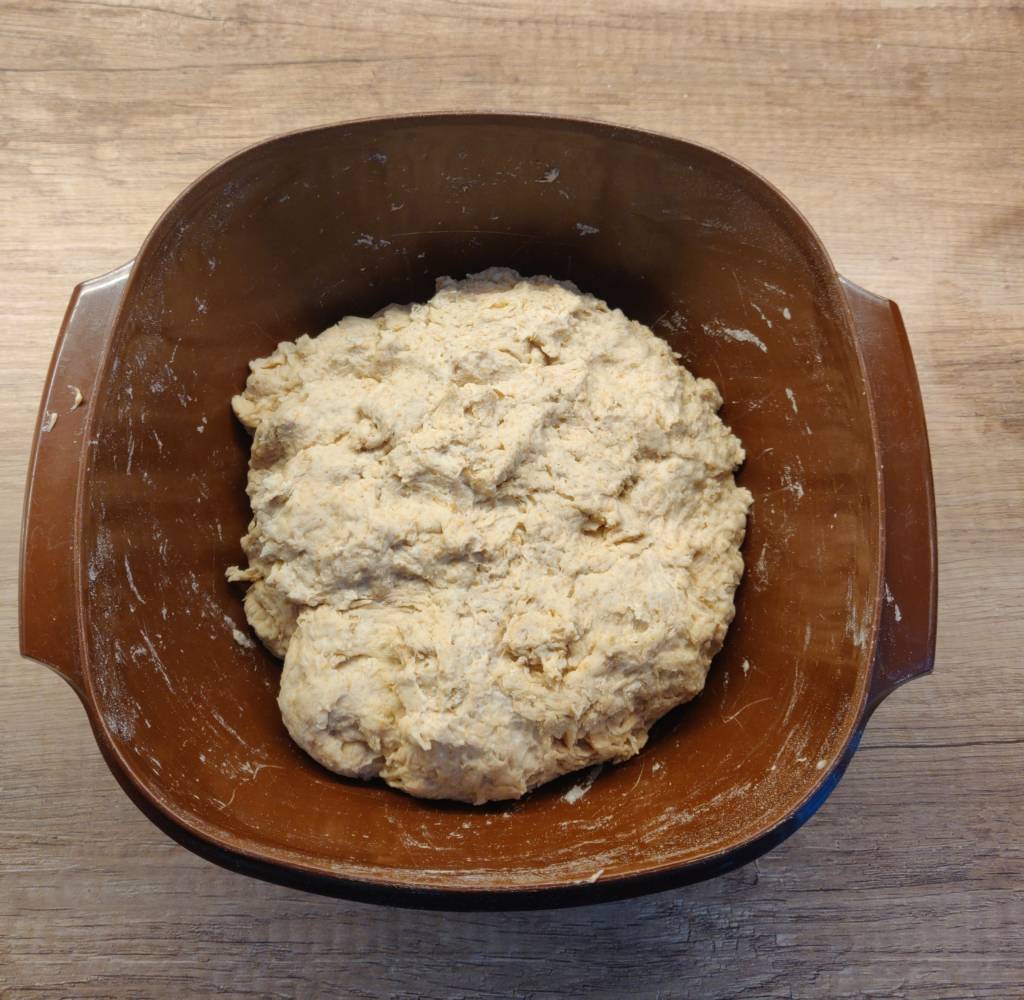
Combine those ingredients in a bowl to form a cohesive mixture. It does not have to be smooth. After combining, leave the mixture to rest in a bowl with either a damp kitchen towel or a lid on top. Covering your bowl prevents the dough from drying out. I let the dough autolyse for an hour.
Day 2 – 10.00: Mixing it all up
Once an hour has passed, I started to mix everything together. I added to the bowl:
- 101 grams of my sourdough starter (started yesterday evening)
- 17 grams of salt
- 30 grams of water
So in total, the whole dough contains:
- 842 grams of flour
- 589 grams of water
- 101 grams of sourdough starter
- 17 grams of salt
It produces two 800 gram loaves with baker’s percentage being 76%.
What is the baker’s percentage?
Baker’s percentage is the ratio of water to flour. If a dough contains 100 grams of flour and 100 grams of water, then the percentage would be 100%. On the other hand, if there is 50 grams of water in 100 grams of flour, then the percentage is 50%. This percentage allows for different sizes of loaves to be made with the same recipe. Hence, if you want smaller loaves, decrease the amounts of ingredients to match the same percentage.The larger the baker’s percentage, the wetter the dough. Handling over 80% dough is harder, but results in more open crumbs. Differentiating the baker’s percentage is one of the variables you can experiment with by yourself!
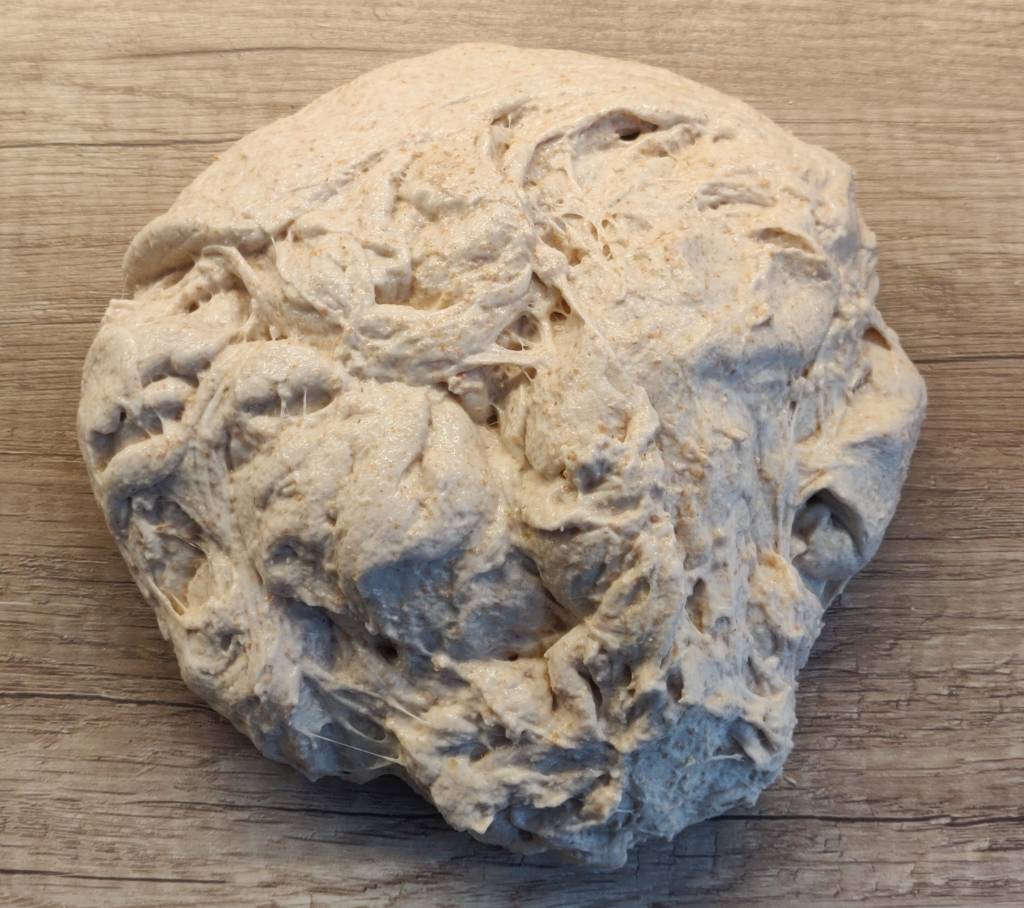
Mixing all the ingredients together will make a smoother dough. Mix them in a bowl with your hands. Once all the ingredients are mixed, place the dough on a counter. Then, start to knead the dough. Stretch it apart and pull it back together. Rotate it 90 degrees and repeat this stretching process until you have a smooth dough.
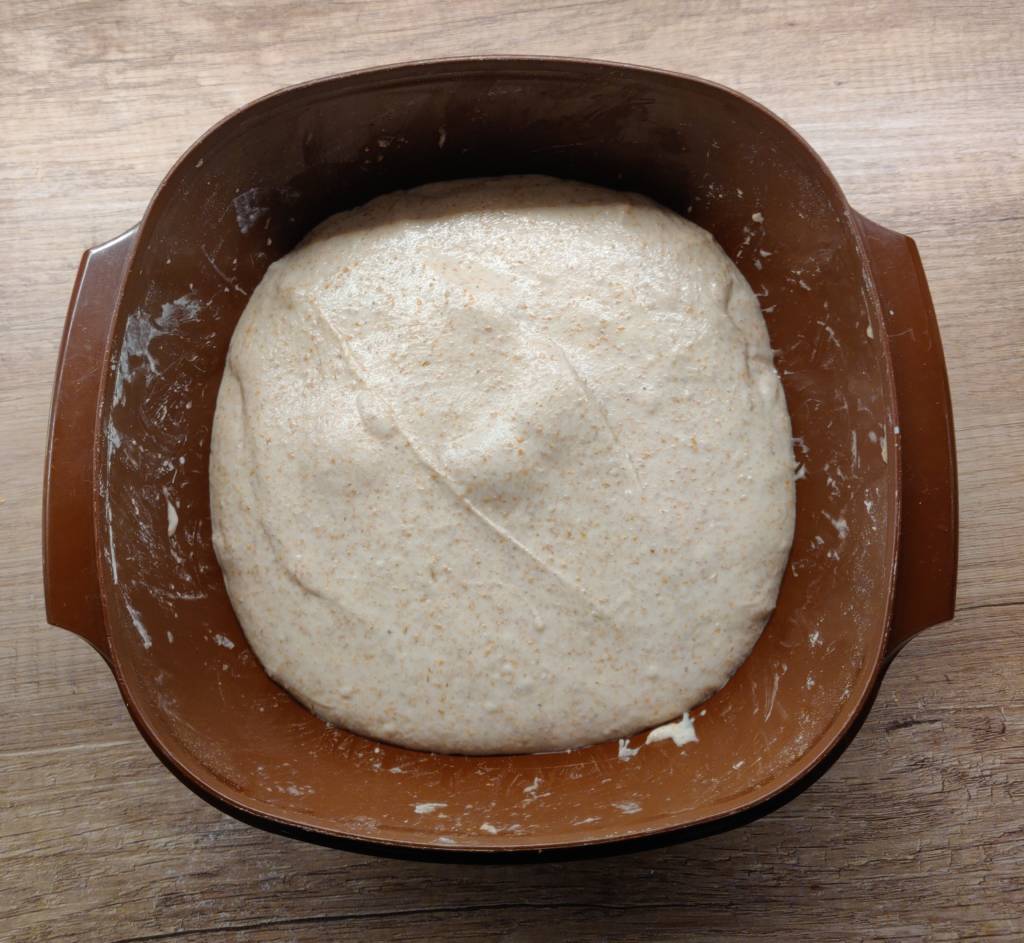
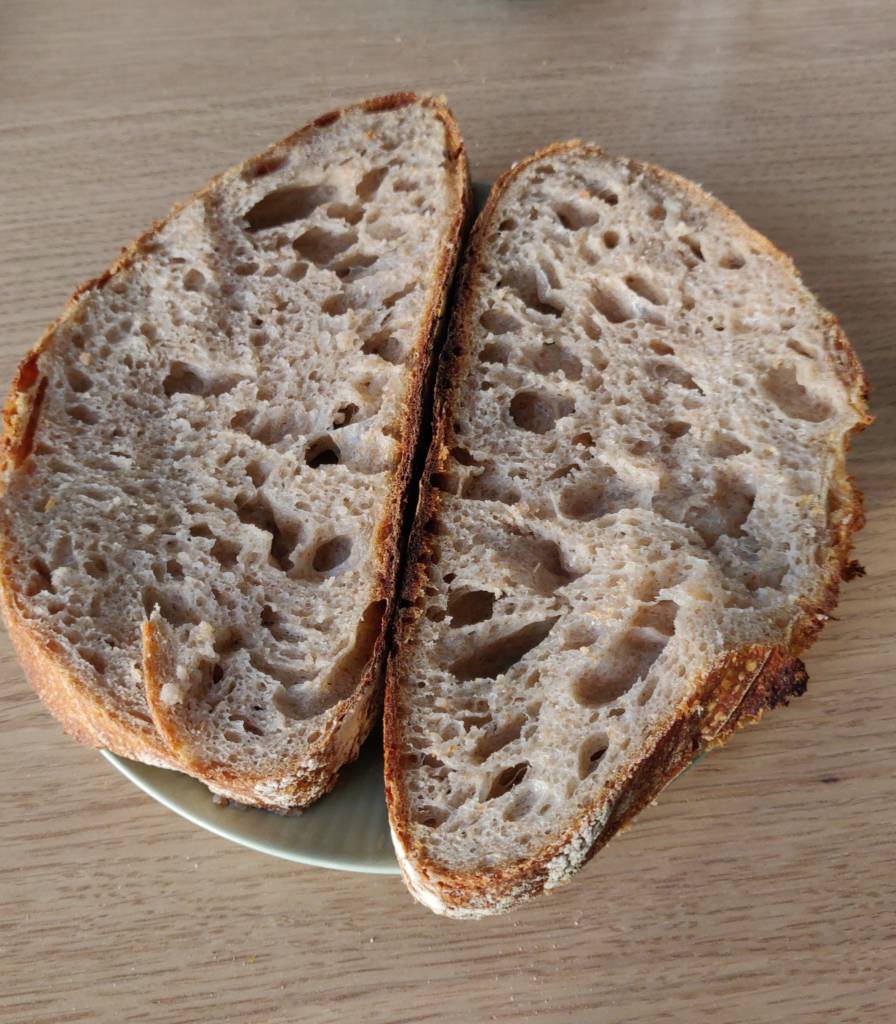
Once the dough is smooth, transfer it back to a bowl. The best bowl to use is a rectangular one with transparent sides, in other words a glass container. With a rectangular container, you can better understand the dough’s increase in volume. I did not have one available during the bake, so I used the one in the photos. It is now time to start the fermentation phase! Look to bulk ferment the dough for 4 to 8 hours.
Bulk fermenting a sourdough bread
Bulk fermenting means that the sourdough starter containing the bacteria and yeasts starts to consume flour enzymes. This leads to gas being released inside the dough increasing its volume. This also helps create the taste in the final bread. The fermenting process depends heavily on environmental factors. A few degrees of difference in the temperature can affect the time required for complete fermentation to differ from three to eight hours!
I started my baking by studying recipes made in the Southern USA. Temperatures there were approximately 25 °C and I was wondering why my doughs never looked the same as theirs. I was using the same time in these processes. You have to learn to analyse your dough to really improve your baking skills!
And that is also why you need to know these factors really well to understand your bread and develop as a baker.
I use a RuuviTag to measure, most importantly, the temperature of its surrounding air. As I live in Finland and I also bake in winter, my average house temperature is 20 °C. This calls for a longer bulk fermentation process, to really develop the dough. During this bake I had just above 20 °C so I bulk fermented for approximately six hours. After making a few breads, you start to notice the effects of temperature and can change your actions accordingly.


As you can see, thanks to -18 °C outside during the previous night, my relative air humidity is too low. I recommend that you take a look at our article explaining why you should pay attention to relative humidity levels in your house. The blog post is Here.
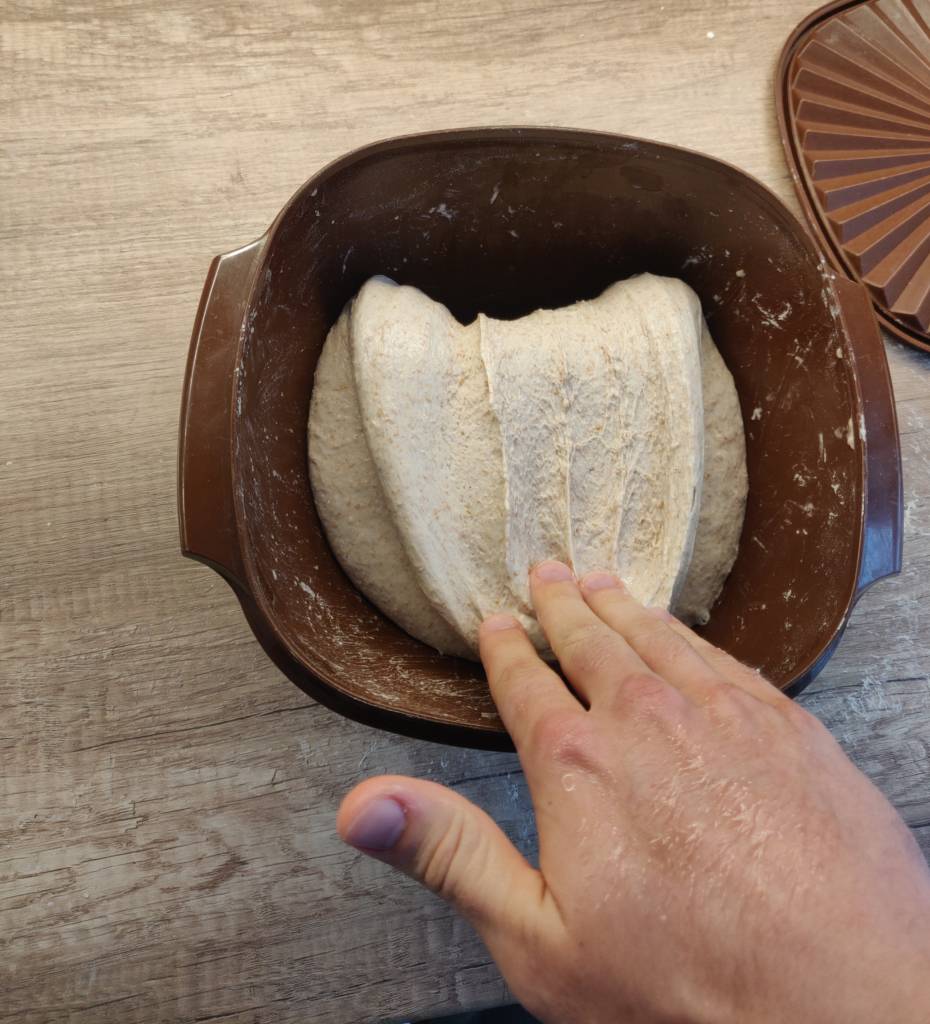
11.30: Stretch and fold
After 30 minutes of bulk fermentation, we need to strengthen the dough. First, we wet our hands with water to prevent them sticking to the dough. Then, grab one side of the dough, pull it up until it nearly tears, and then tuck it to the other side. Repeat this process on every side of the dough. This process stretches the gluten and captures air inside the dough. Repeat this step two more times after thirty minutes have passed.
After stretching the dough, tuck all seams under the dough so that the surface is smooth. Then, cover up the bowl again to prevent the dough from drying out.
How do you know when bulk fermentation is ready?
Fermentation is done when your dough has increased between 1,3x – 1.6x of its original size, there are bubbles on the surface, and the top is a bit curvy. Fermentation time depends mostly on the temperature in which the dough is developing and the amount of sourdough starter that you have in the dough.
16.15 Preshape
After the fermentation process is finished, place the dough gently on a counter. Wet your hands to prevent the dough from sticking. Do NOT use any flour in this step, as it will make the next step much more difficult.
How to preshape a sourdough bread?
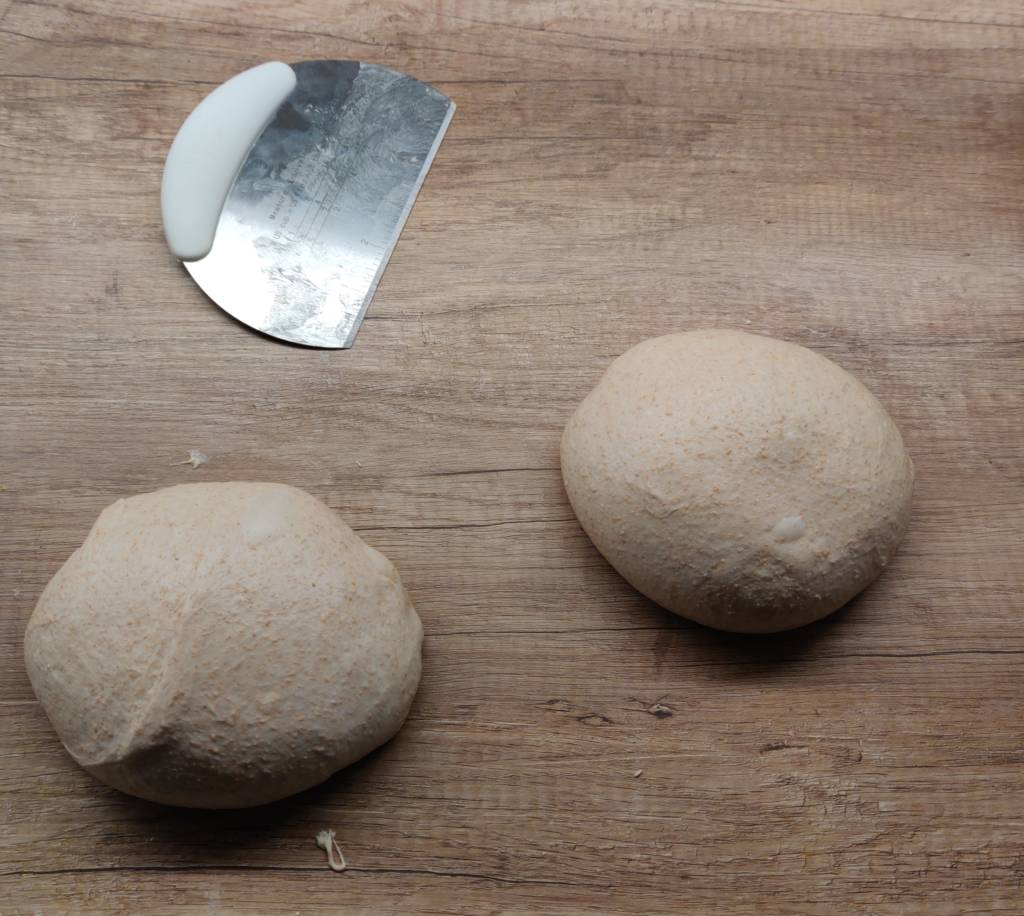
Once the dough is on the counter, cut the dough into two equal pieces. If you opted to do just one loaf, then you are ready to preshape it.
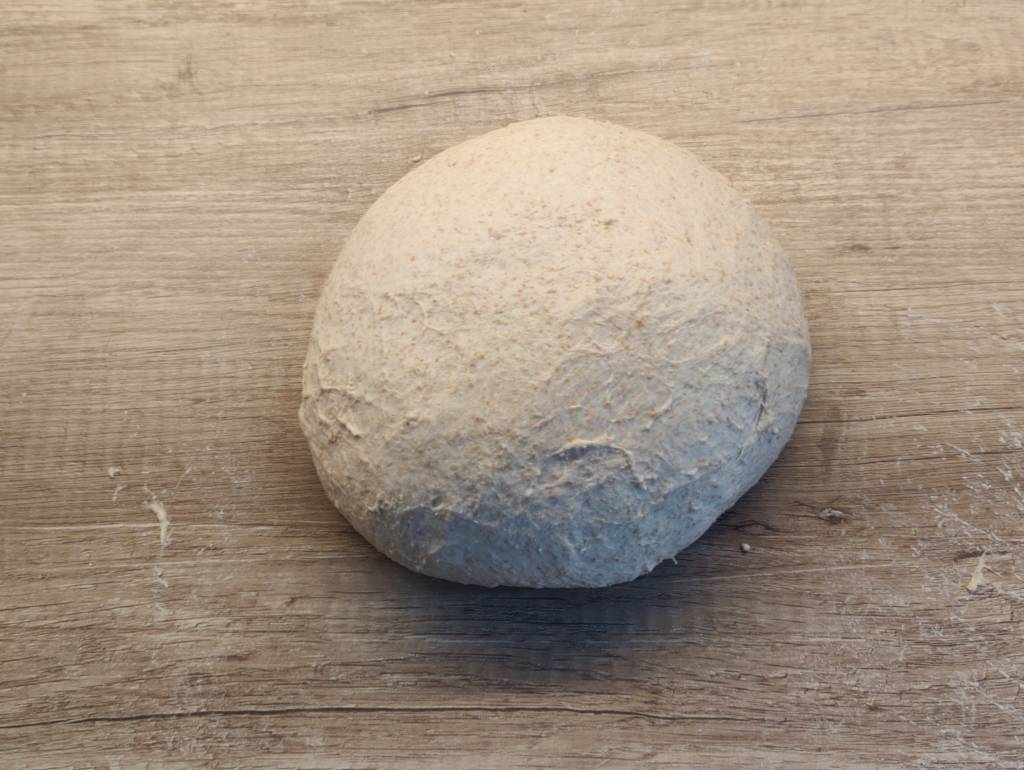
With your hands, pull the dough from the farthest side towards you gently. Then, turn the dough 90 degrees and do the same for the other side. With this technique, you should be able to form a ball.
Let this rough ball sit on the counter for 15 to 25 minutes to help the gluten relax.
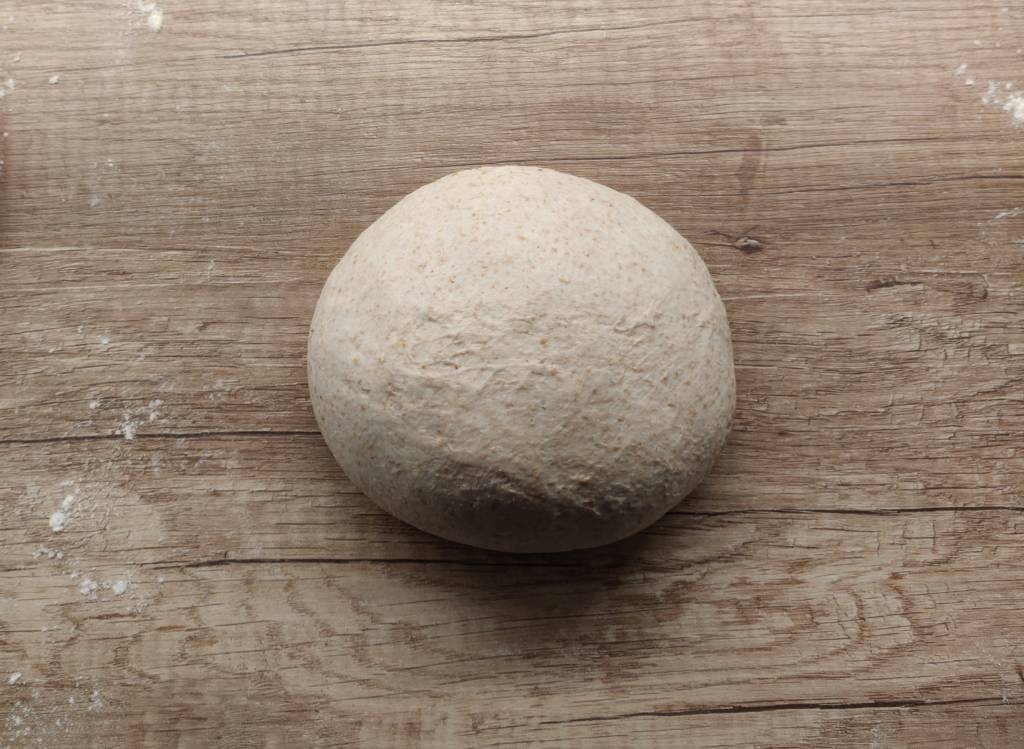
16.45 Shaping
Shaping is one of the important parts of making sourdough bread. It creates tension on the surface of the bread, which will cause a so-called oven spring. More on oven spring later. The gist behind shaping is to stretch the dough in order to make it tense and to give direction for the dough to expand once it goes into an oven.
To start shaping, add some flour on top of the dough. Then turn the dough so that the floured side is on the bottom and the top side is sticky. Then, widen the dough to make a rectangle.
Grab the side nearest to you and pull it a bit back and then fold it into the center of the dough. Then, grab the left-hand side of the bottom corner and pull it apart from the dough. Tuck it to the opposite corner. Do the same for the right-hand side corner. Then start to pick a chunk of dough and stretch it across the whole dough. Repeat this step and after five tucks turn the dough so that the stretched bottom part faces you.
Best way to learn this technique is to watch this video, as it is easier to learn by watching than reading.
Check out this creator’s brilliant video on the subject! How to shape a sourdough bread
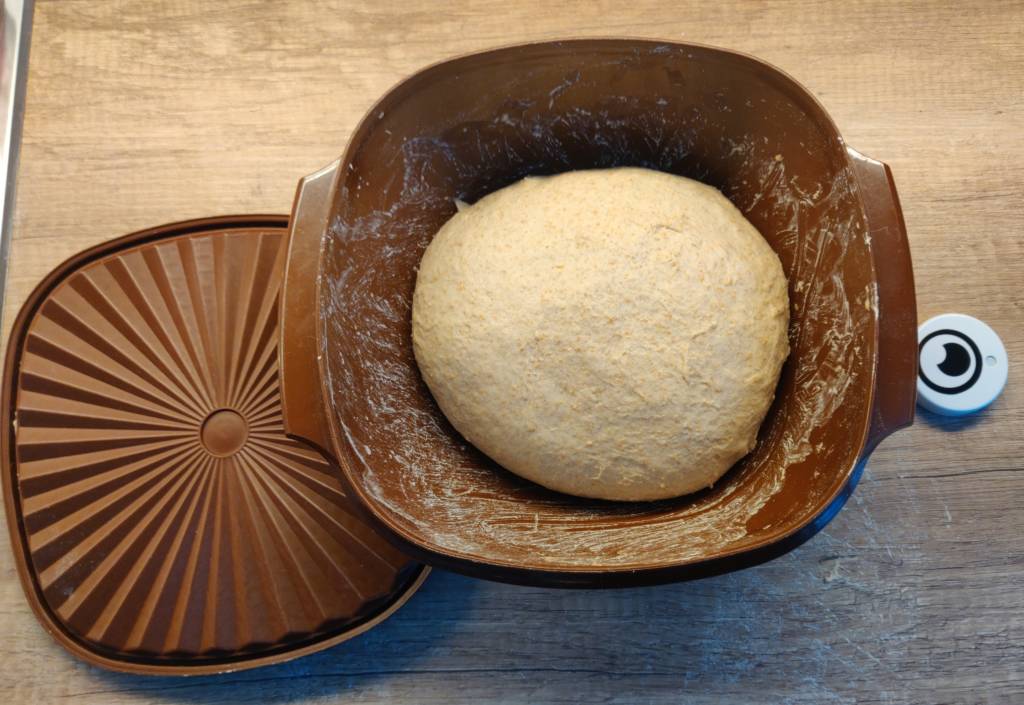
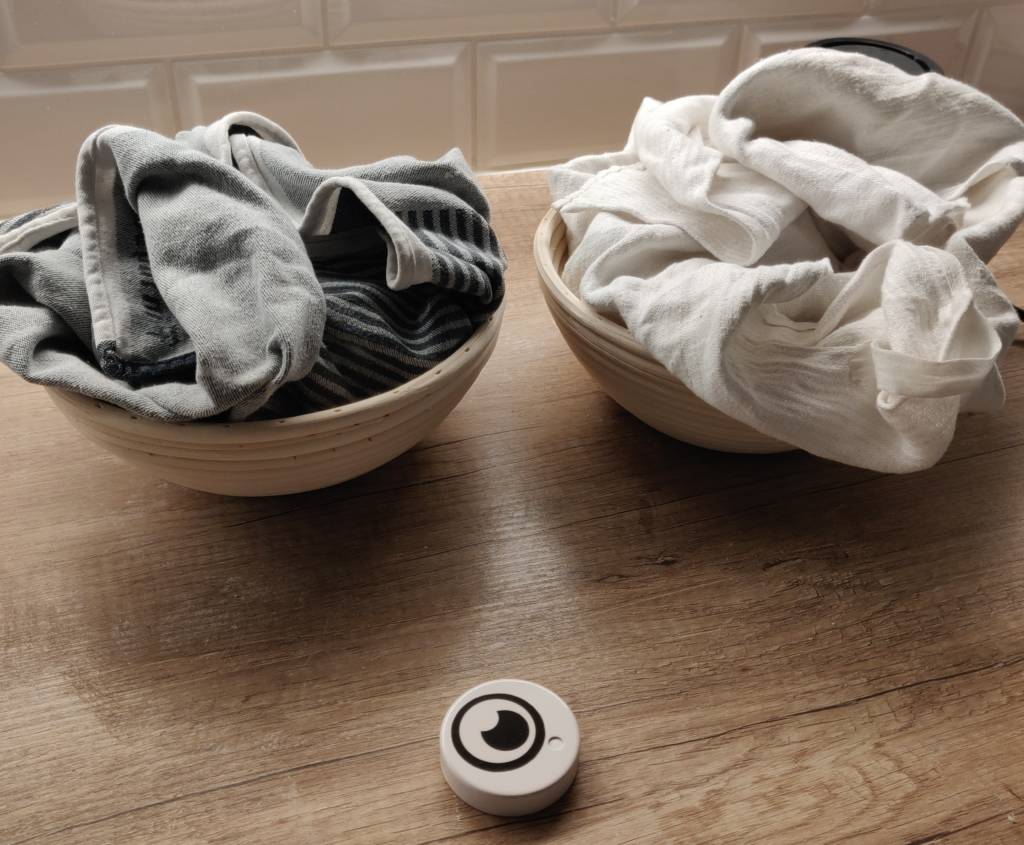
After shaping, place the dough into bannetons and cover with plastic bags. Sprinkle rice flour on the kitchen towel you put your dough on. This will prevent it from sticking and ruining the towel.
If you do not own bannetons, as I did not at the beginning of my baking, use a bowl which is the same size as a banneton. The proofing basket does not make a big difference in the final result. Be creative!

Proofing
After the shaped doughs are in their bannetons, we let them proof before baking them. Proofing is also a step, where the sourdough microorganisms are consuming enzymes and the gluten is developed.
I kept my dough proofing for an hour at room temperature and then transferred them to the fridge. As I know that my fridge’s temperature is below average, I need to keep the dough at room temperature. You can also proof them at room temperature for three to four hours, if you want to bake them the same day. If placed in the fridge, it will take roughly 12 to15 hours of proofing.
Temperature plays a huge role here as well, so I measured it with a RuuviTag, so that I can figure out the correct times that the dough takes to proof. For a morning bake, do as I do here. And if you want to bake the bread the following evening, put the dough directly in the fridge after shaping.
Day 3 – 09.00: Baking time
I woke up to preheat the oven to 250 °C. Currently, I am using a baking stone to make my bread. In my opinion, the best alternative is a dutch oven. It holds moisture better than any other alternative.
In baking, you need steam for the first part. Steam prevents the dough from developing crust, so that the air bubbles inside the dough may expand. By doing this, we receive a beautiful oven spring, as the dough expands before our eyes.
To test whether the proofing is done, you can poke the dough. If the dough springs back to its original shape, then the dough is under proofed. In other words it needs more proofing time. If the poked hole does not return, then the dough is over proofed, and there is nothing you can do anymore. It does not affect the taste, but the oven spring will not be as glamorous as it could have been.
After an hour of preheating, I took my first dough out of the fridge. I unwrapped it from the plastic bag that kept it moist inside the fridge. Then, I placed a large wooden cutting board on top of the banneton, with a parchment paper in between the dough and the board.
Once the cutting board is ready, roll both the banneton and the board upside down. Now, the proofed dough is resting on the cutting board. Grab your sharpest knife or a razor blade, and cut a 1 to 2 cm deep line in the dough. This will allow the dough to expand even more. This step is called scoring the dough.
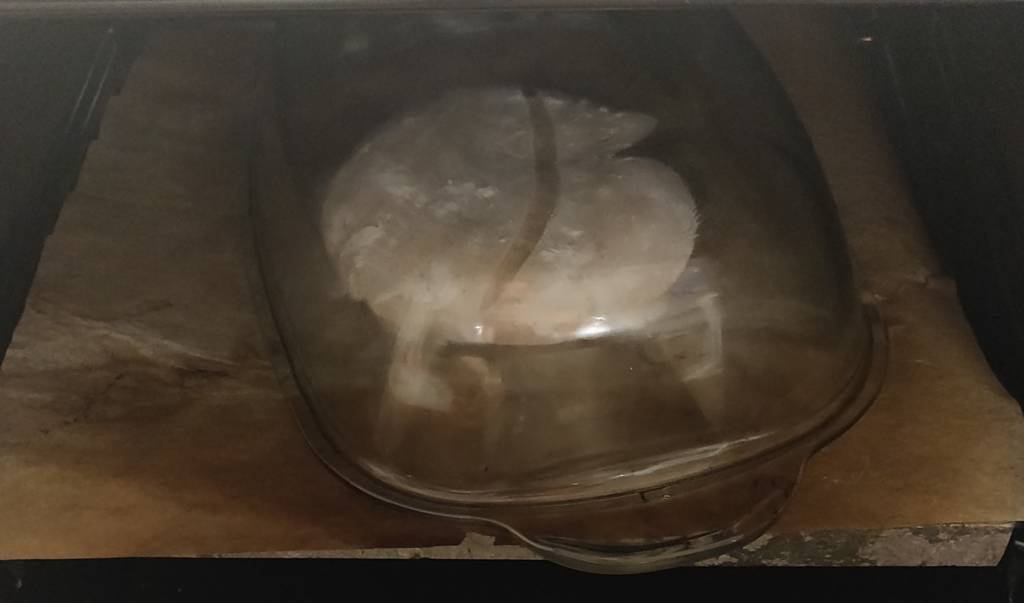
After scoring, place your dough on the baking stone, baking tray or dutch oven, whatever is your choice for baking. Remember to preheat according to the preferred method to ensure that the dough bakes enough. In other words, put the dutch oven or stone in the oven when you are preheating it.
With a baking stone, I use a glass bowl to capture steam. You can also experiment with an upside down baking tray above the dough or with a dutch oven and a lid. The gist is to create a steamy environment for the dough. I placed two ice blocks so they would melt and steam up the whole system.
How do I bake sourdough bread?
Bake the dough in the steam in 250 °C for 25 minutes
After 25 minutes, take out the bowl or the lid to let the steam dissipate. Now you want to achieve a beautiful and delicious crust!
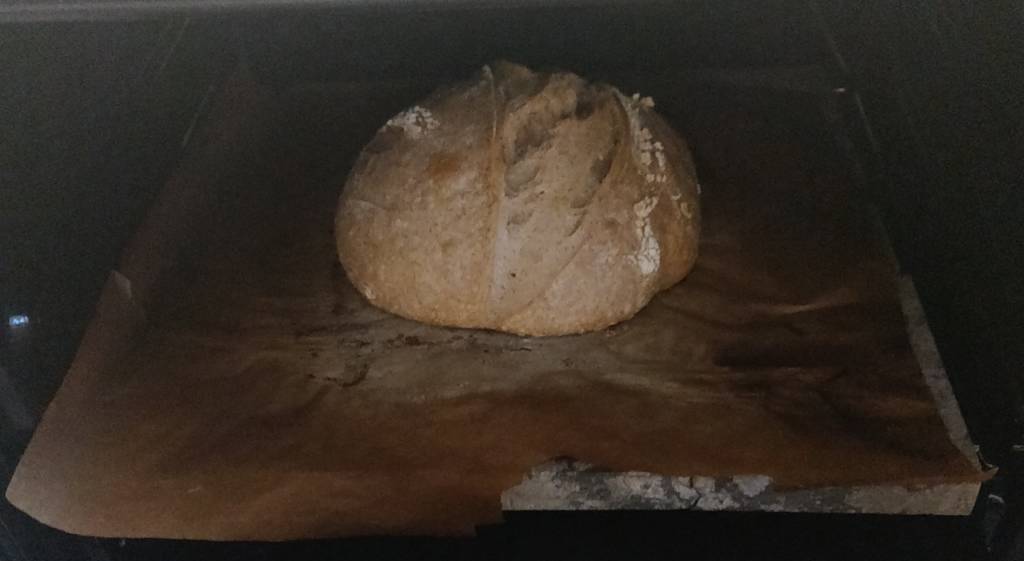
Keep baking the dough without steam in 225 °C for 15 to 20 minutes
When the crust starts to darken, take out the sourdough bread from the oven. Be careful not to burn your hands in the process!
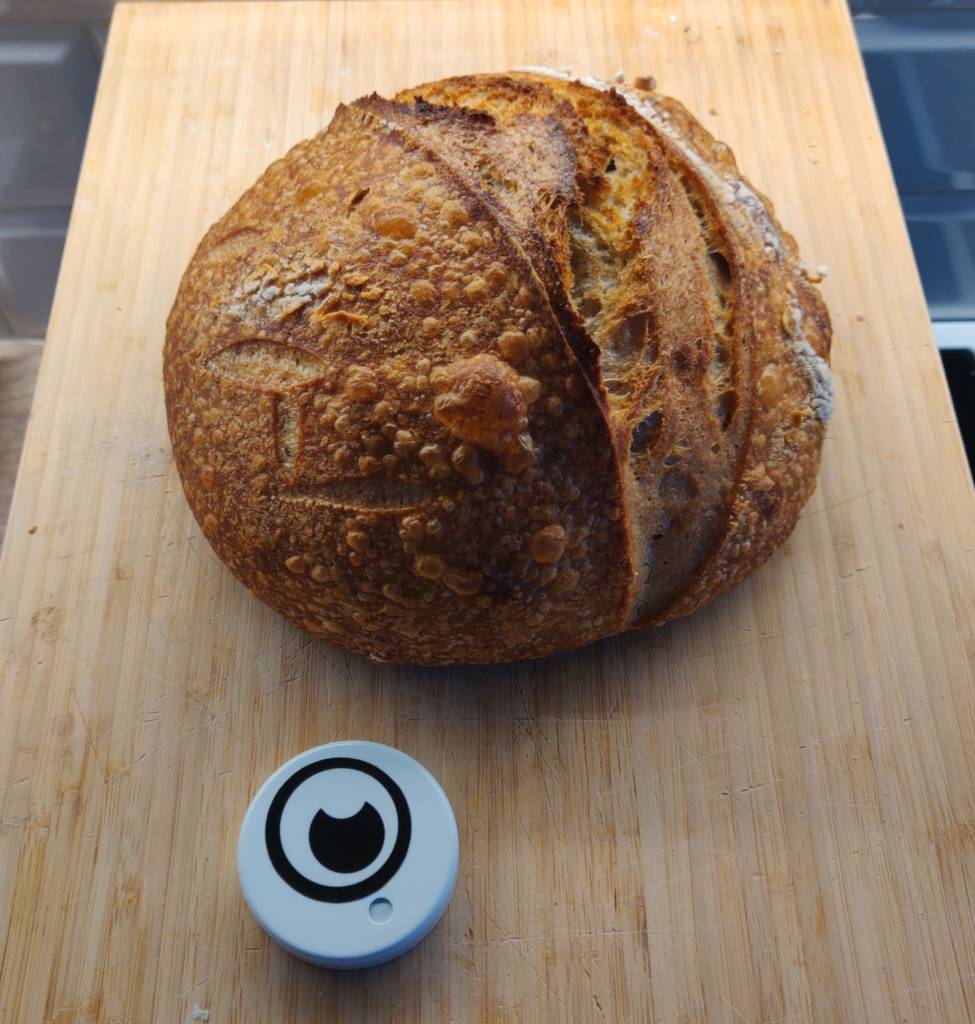
Coming out of the oven, it is super important to let the bread rest for at least an hour and a half. Coming out of the oven, the crumb is still hot and baking. If you cut your bread open too fast, the crumb will stay underbaked. Even though you will be tempted by the wonderful smell, do not cut the sourdough bread open just yet!
Conclusion
Now we have gone through the entire process of baking sourdough bread. At first, it may seem hard and time consuming, but the end result is totally worth it. And, not many of the steps are difficult in execution. You just need to focus on a few important steps to create these beautiful breads.
I encourage you to challenge yourself to bake at least a few of these. With enough fermentation they will taste delicious no matter what you do.
By combining the ancient way of bread making and modern-day digital solutions, you can develop your skills very quickly! With RuuviTag sensors, you can take the guesswork out of the whole process and be more analytical. With the help of this device you will also learn the differences in fermenting times a lot quicker!
Also, if you are interested in baking, check our blog for an amazing homemade pizza recipe!
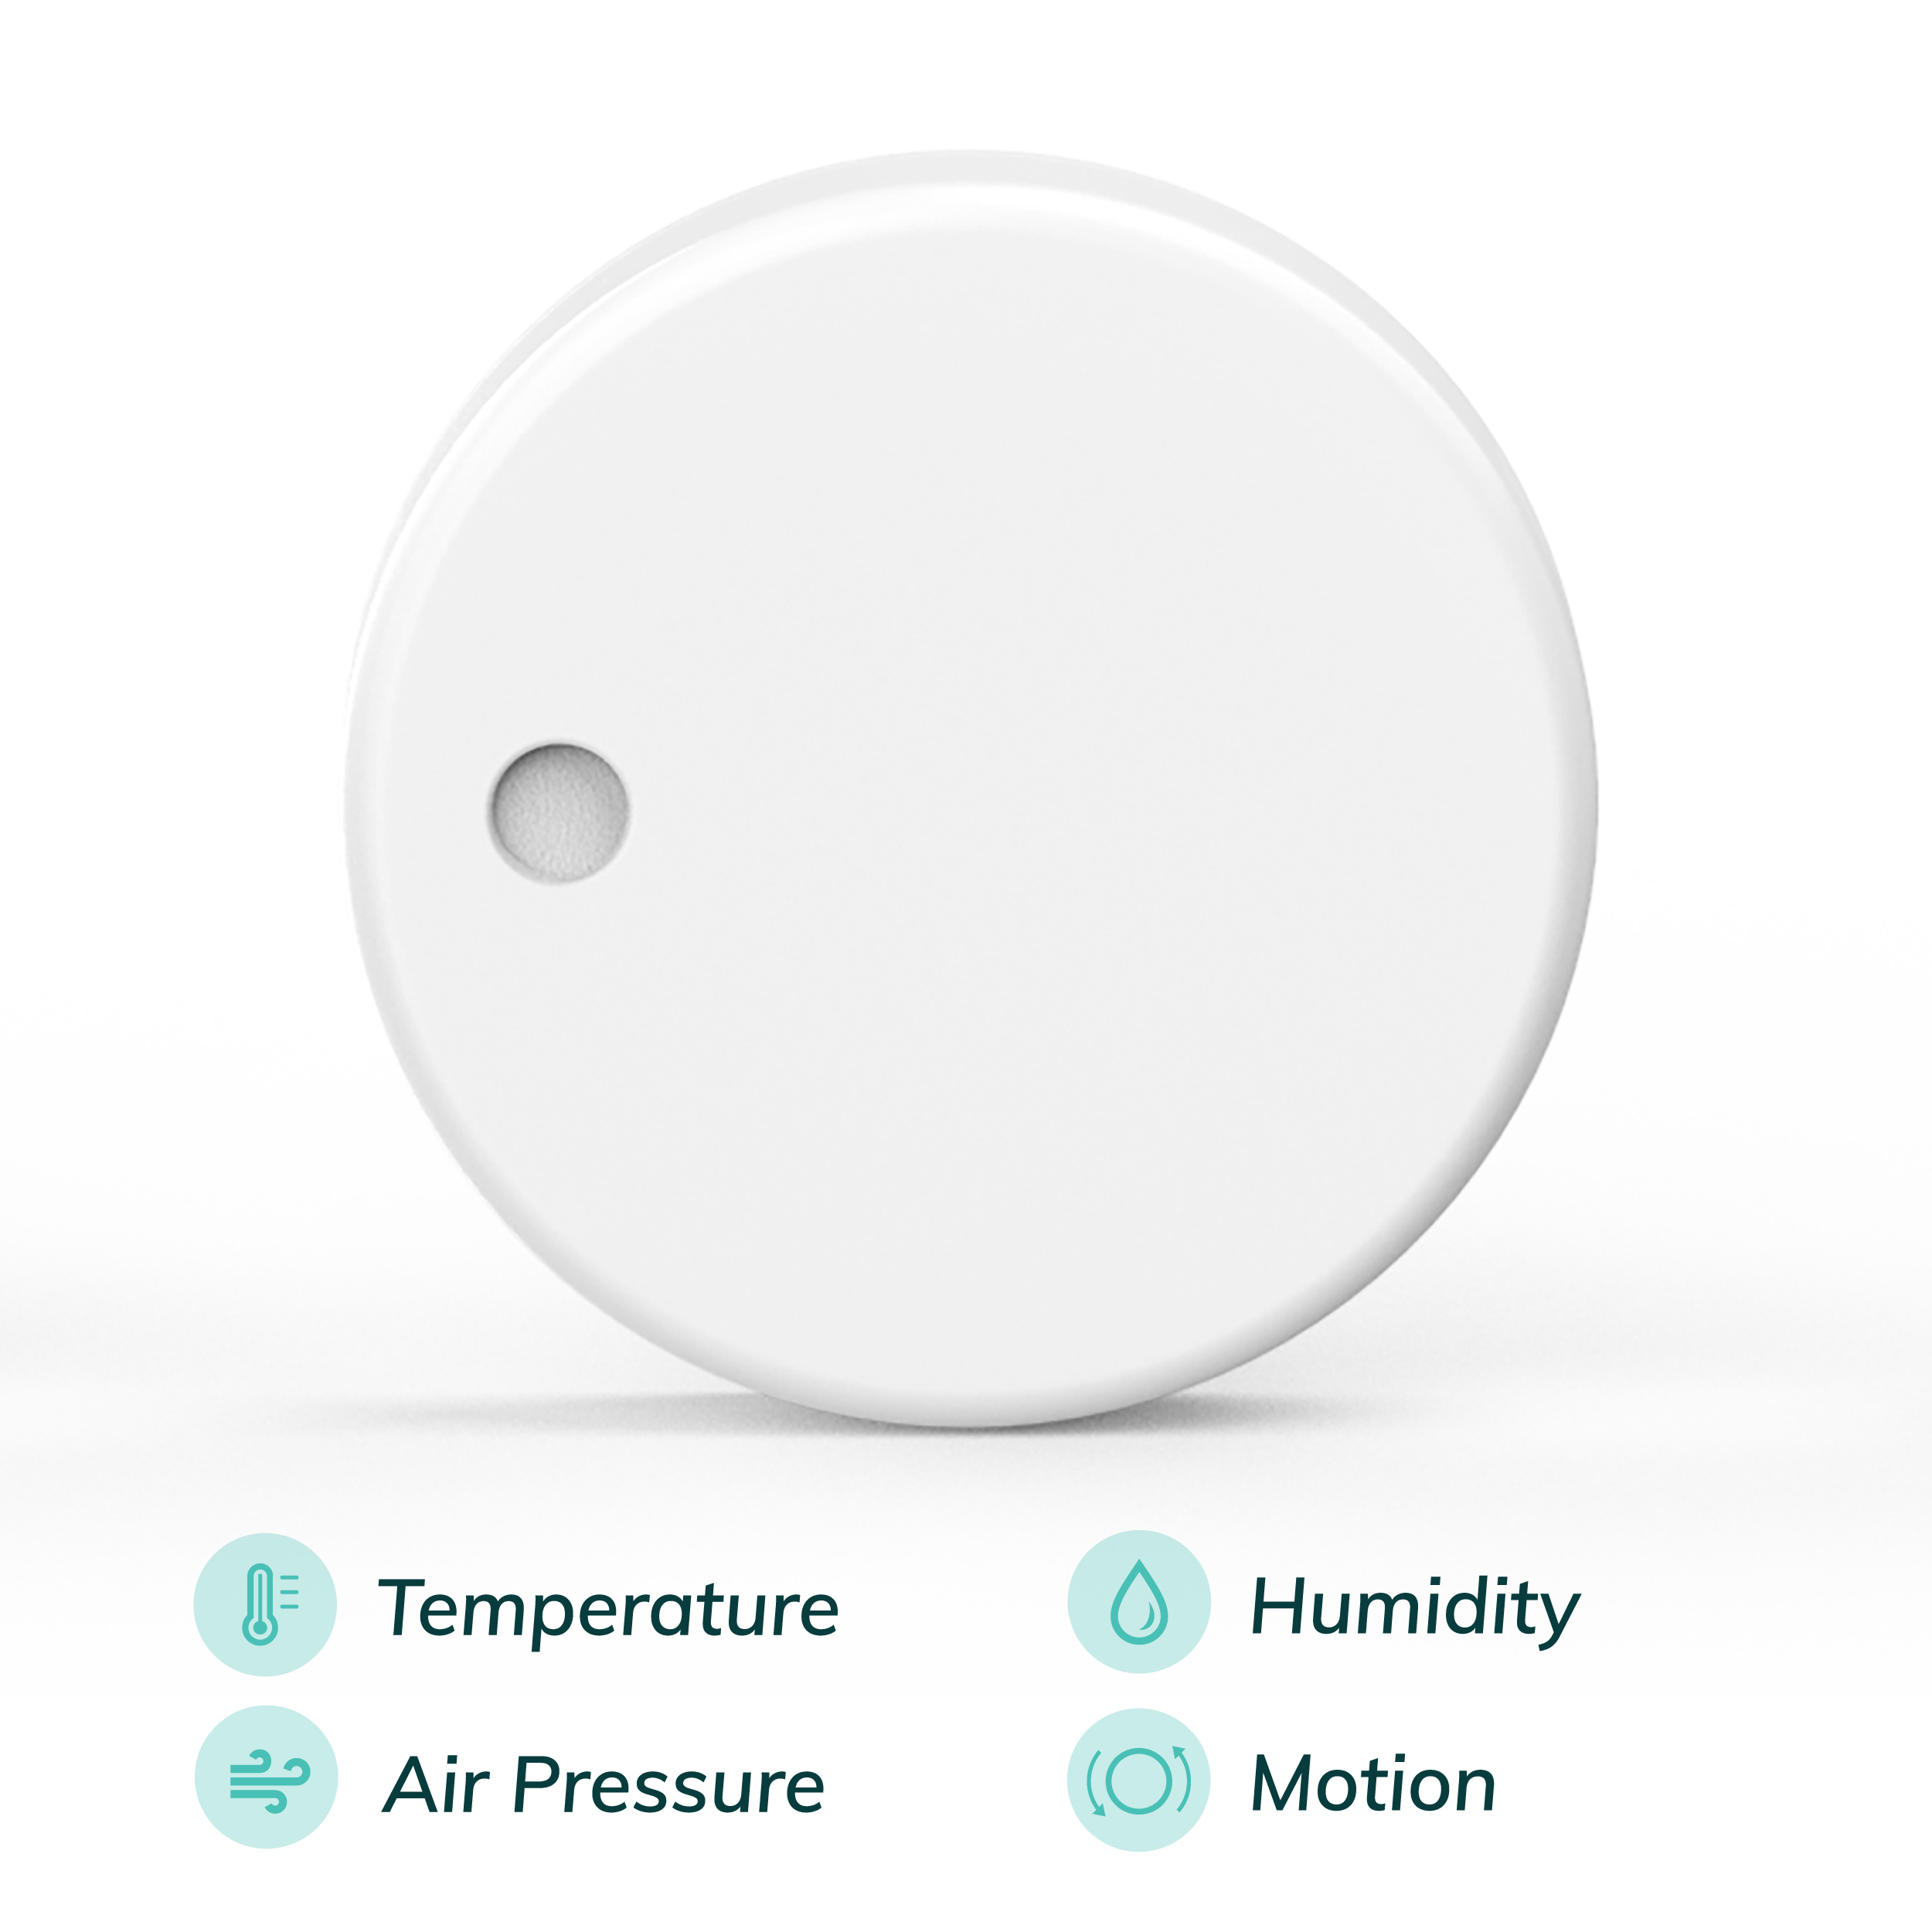


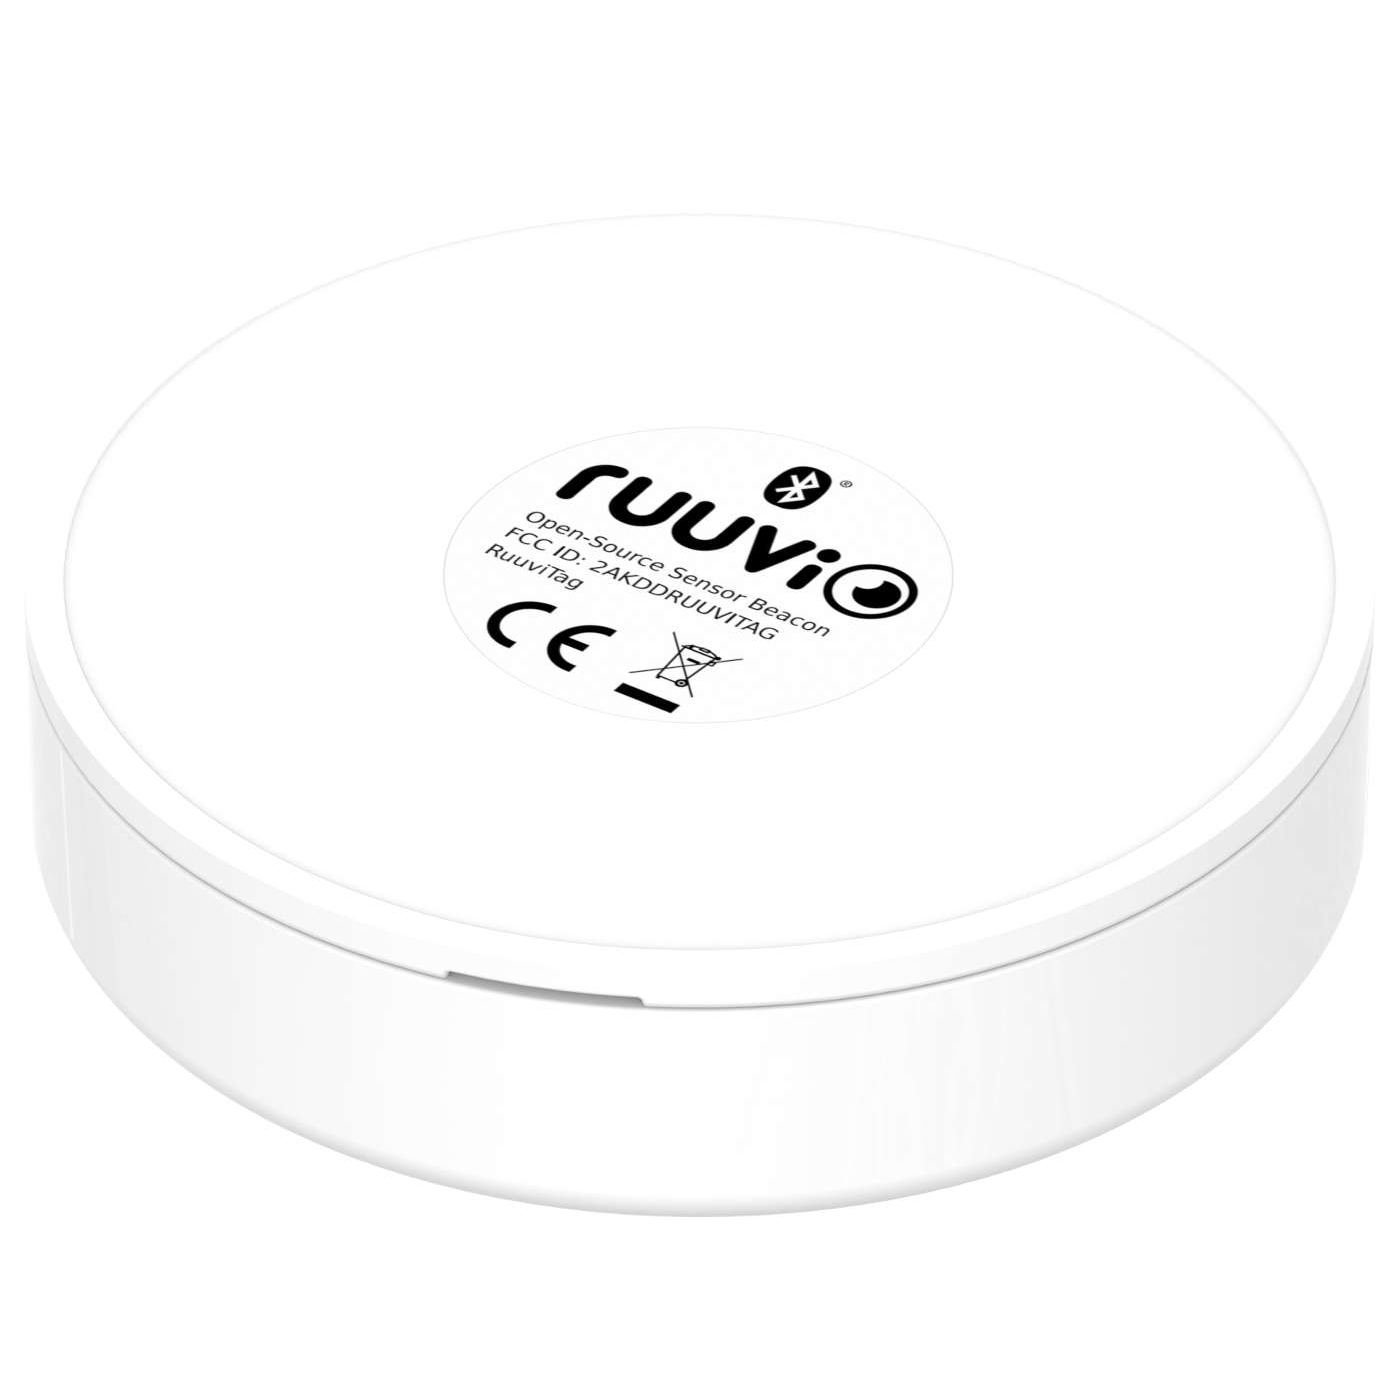

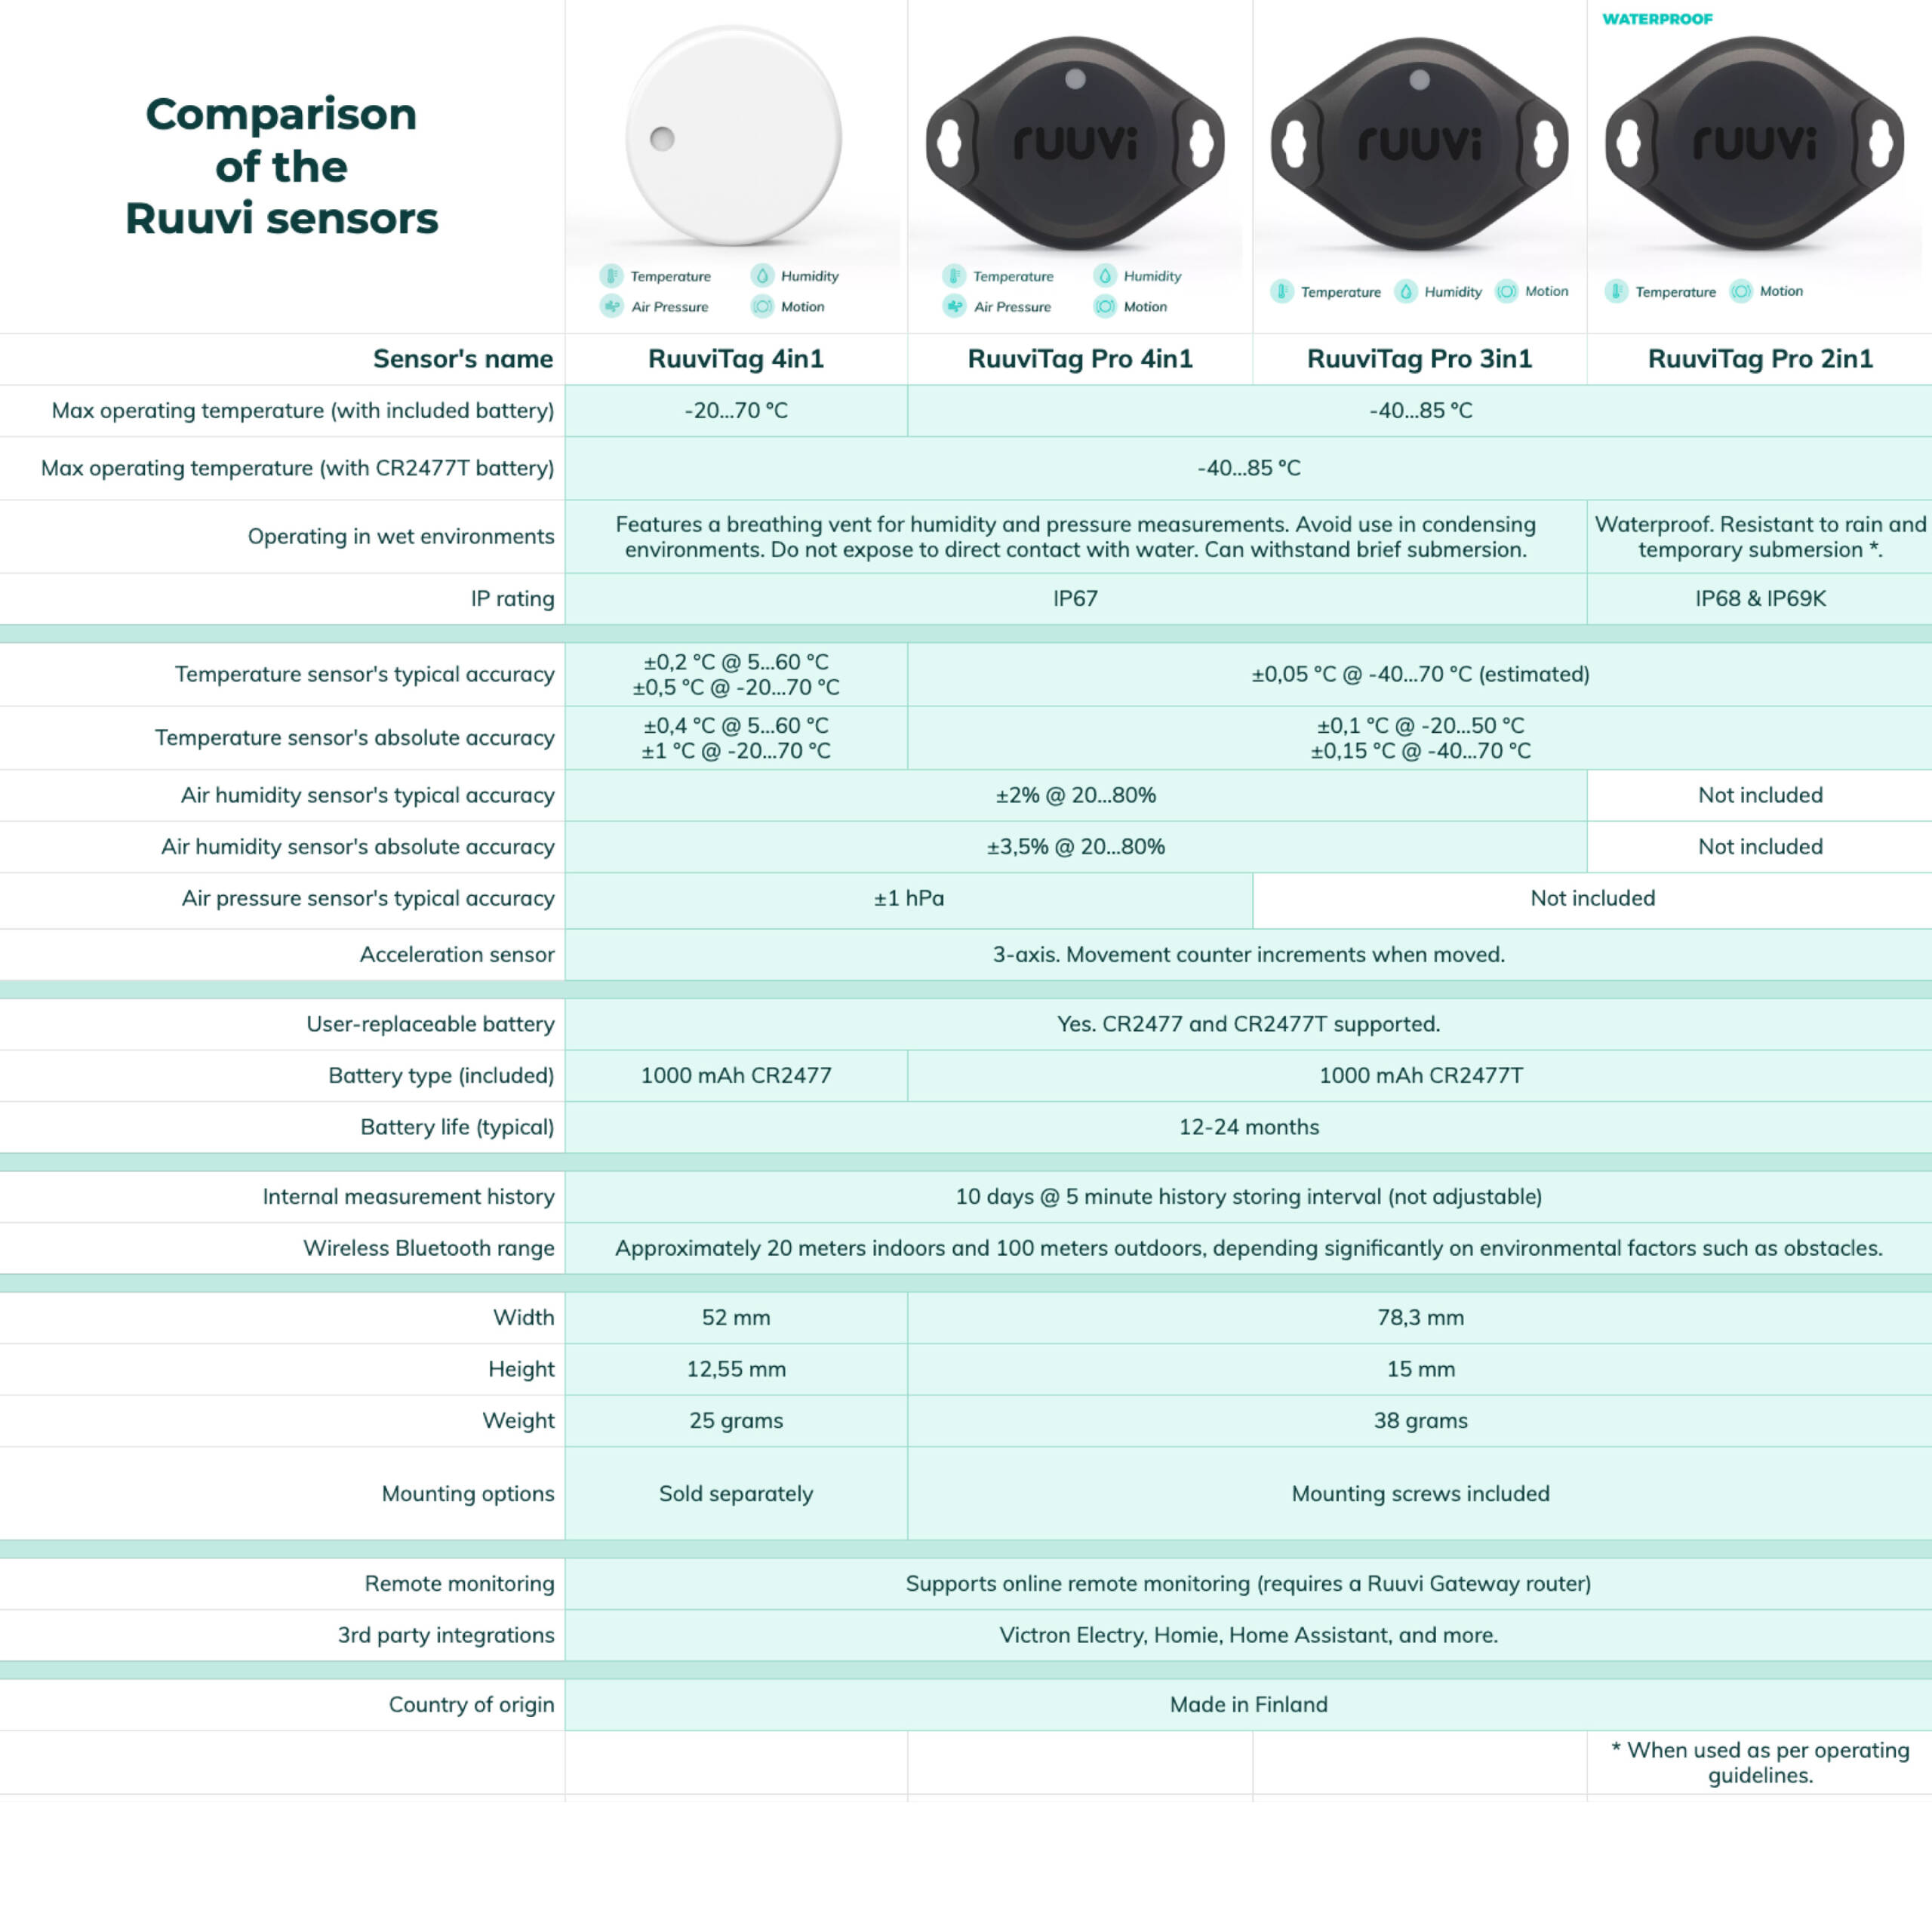

Buy RuuviTag to Monitor And Measure Air Temperature
With accurate measurements, you will be able to master bread making
39,90€
Ruuvi is based in Finland. If you’re an EU consumer, VAT is included. If you’re a non-EU customer, you don't pay VAT. If you're an EU business, insert your VAT ID at checkout.
In stock
RuuviTag Sensor (4in1)
| Quantity | Unit Price(€) |
|---|---|
| 1 | 39,90 |
| 2 | 37,40 |
| 3-5 | 36,90 |
| 6-8 | 35,90 |
| 9-12 | 34,90 |
| 13-25 | 33,90 |
| 26-99 | 32,90 |
Are you looking for bigger quantities? Contact us for pricing.
FAQ
What are the pros and cons of sourdough bread?
Sourdough bread is a super delicious and healthy type of bread. But on the other hand, baking it requires a lot of time.
In what temperature should sourdough bread be baked?
At the beginning, 250°C in a high humidity oven. After 20 minutes, drop the temperature to 225°C and remove the moisture.
Is sourdough bread difficult to make?
With some practice, making sourdough is not that difficult. A few steps require more attention to the detail than the others. But development is what makes sourdough baking so addicting.
What does fermenting mean?
Fermenting refers to any food developing with natural yeasts and bacteria over time. In sourdough, the wheat dough receives its sourness from this step.