Ruuvi Gateway provides a simple way to transmit Bluetooth LE data from your location to a tailored HTTP or MQTT server solution. In this article, we focus on how to configure MQTT on your Ruuvi Gateway and what benefits MQTT can offer for your IoT environment.
What is MQTT?
Message Queuing Telemetry Transport (MQTT) is a lightweight and efficient messaging protocol specially designed with low-bandwidth, high-latency, or unreliable networks in mind. MQTT is well-suited for resource-constrained devices with limited processing power and memory, and is widely used in IoT scenarios due to its lightweight nature and efficient communication model. It enables devices with different capabilities to exchange information seamlessly, making it a preferred choice for smart homes, industrial automation, and other IoT deployments.
MQTT operates on a publish/subscribe messaging pattern. In this model, devices (clients) communicate through a central hub called the broker. Clients can publish messages on specific topics, and other clients interested in those topics receive the messages. This effectively enhances scalability and flexibility in communication.
The protocol allows setting Quality of Service (QoS) levels according to network reliability and application requirements, and it also supports the concept of retained messages, which ensures that the last known good value for a topic is always available to new subscribers.
Get started with MQTT in Ruuvi Gateway
Ruuvi Gateway can send data to multiple targets simultaneously including Ruuvi Cloud, HTTP(S) and MQTT(S) servers, and these can be easily customised for your specific needs using Ruuvi Gateway Setup Wizard.
It’s important to note that Ruuvi Gateway has the ability to listen to any Bluetooth LE advertisements from its surroundings, a feature that can be configured on the Bluetooth Scanning page in the Ruuvi Gateway Setup Wizard, and it’s possible to forward this data to HTTP(S) and/or MQTT(S) targets. For example, you could use Ruuvi Gateway to listen and relay data from sensors or other Bluetooth LE devices that are not manufactured by Ruuvi. This opens a whole world of possibilities for building IoT solutions using Ruuvi Gateway routers. Conversely, Ruuvi Cloud exclusively accepts Ruuvi sensor data that is compatible with Ruuvi Cloud.
To access the MQTT settings, choose Use Ruuvi Cloud and/or a custom server under Advanced Settings on Cloud Options page in Ruuvi Gateway Setup Wizard to get started.
Set up your target URL and data related settings
MQTT in Ruuvi Gateway supports sending data to SSL-secured or non-secured addresses. When you choose a transport protocol the URL prefix and port will be configured for your preferred choice automatically.
Fill in details for username and password if your setup is configured to use authentication. In certain cases, such as with AWS, using a client name may be also required.
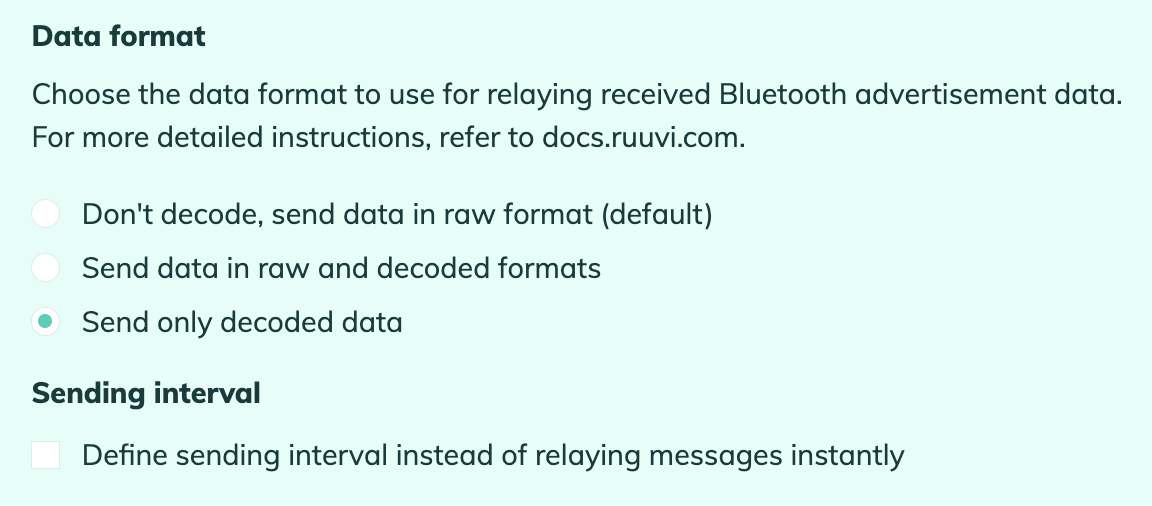
Ruuvi Gateway sends raw data as default for the MQTT(S) target, but you are also able to choose between decoded data or both. Check from your MQTT broker documentation which is the best option for you.
You may also want to set up a sending interval according to your preference; by default, Ruuvi Gateway sends received data immediately after it’s received. In some cases, especially if your Ruuvi Gateway installation location has low-bandwidth internet access or you want to restrict data usage to a certain limit, it may be beneficial to adjust this setting.
Topic prefixes and retained messages
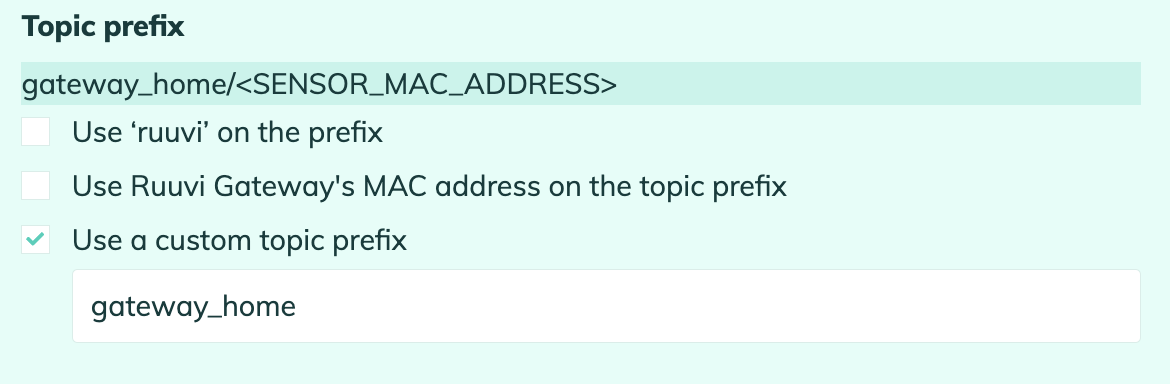
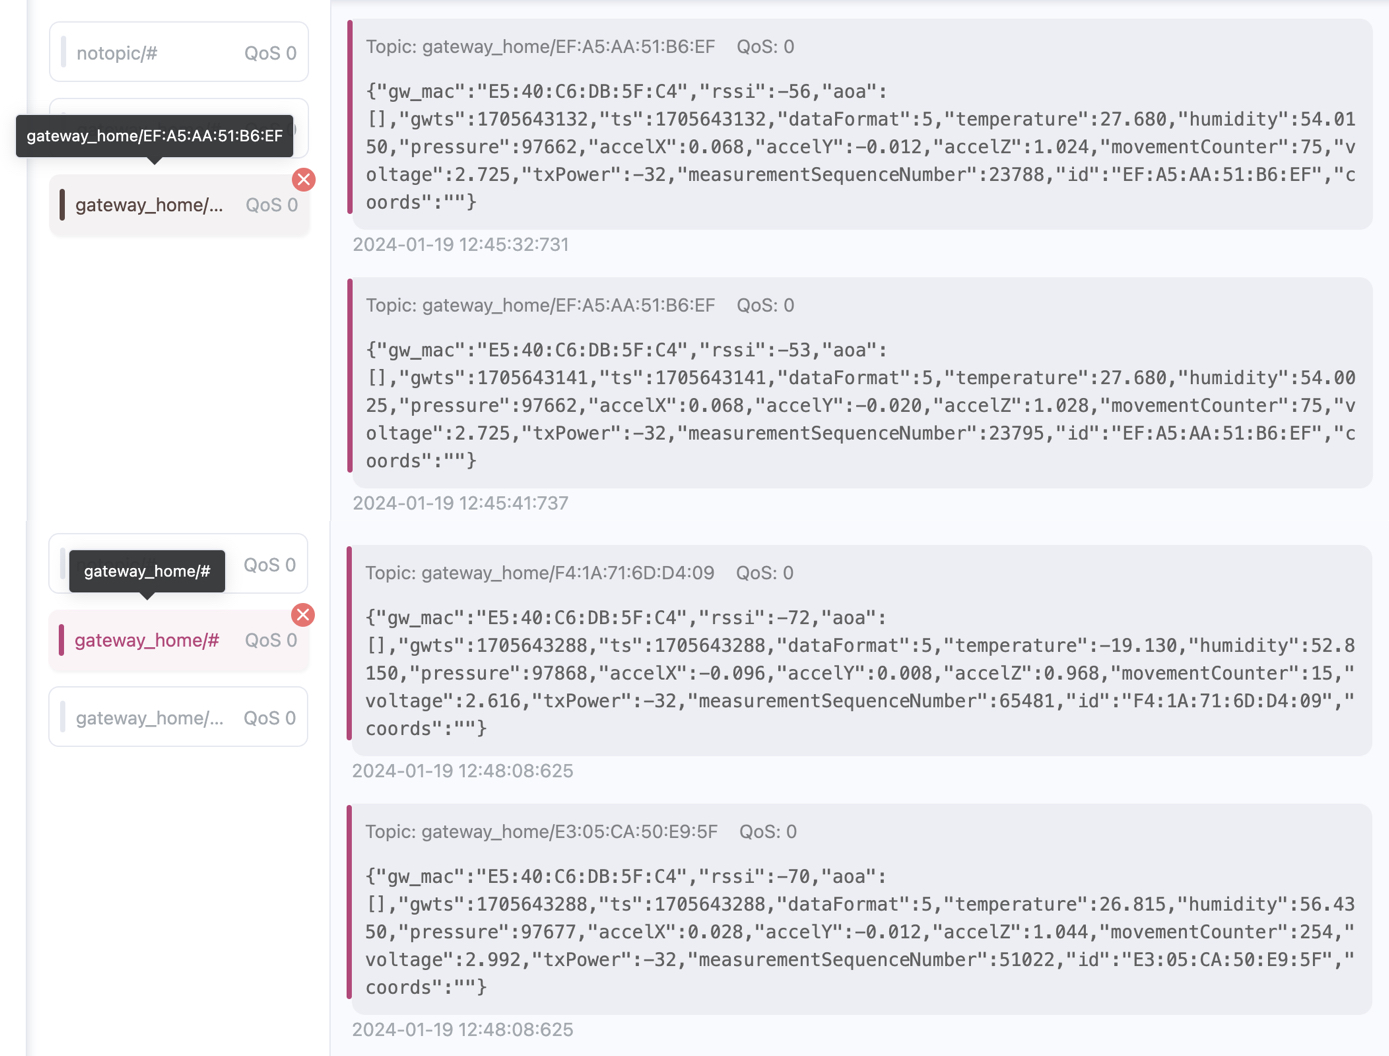
Topic prefixes in MQTT allow you to “earmark” messages that are sent from your Ruuvi Gateway to a MQTT broker. When using your MQTT client to read messages from a broker, you can subscribe to specific topics. This will keep data collection tidy and easily manageable.
Retained messages are messages saved as the “last known good” message for a certain topic on the broker. These messages get sent to a client as soon as the client subscribes to a specific topic. In Ruuvi Gateway, retained messages are enabled by default and are used to report online/offline status of your Ruuvi Gateway router. You can also choose to disable this feature.
Security through SSL Certificates
As an added layer of security, you are also able to use SSL certificates (client certificate, private key, server certificate) with MQTT. This feature enables a secure and validated communication channel between the client and server. Opting for a server SSL certificate provides independence from public Certificate Authorities (CAs) and allows customisation when using a self-signed certificate with your MQTT server.
Your private key and SSL certificates can easily be uploaded in the Setup Wizard using the upload buttons under SSL certificate.
Should I use MQTT alongside Ruuvi Cloud?
Ruuvi Cloud together with Ruuvi Gateway is a comprehensive remote monitoring solution designed to address a wide range of individual and business needs.
The inclusion of MQTT in Ruuvi Gateway provides an excellent means to broaden the possibilities for collecting and reprocessing data transmitted from your Ruuvi solution. If your current IoT environment incorporates an existing MQTT solution, configuring MQTT in Ruuvi Gateway could prove advantageous.
Conclusion
The Ruuvi Gateway offers a simple means to transmit your data to third-party solutions utilizing MQTT. With the user-friendly Ruuvi Gateway Setup Wizard, you can effortlessly set up the relay of your data to a personalized MQTT solution in just a few steps.