When you first power up your Ruuvi Gateway a Wi-Fi hotspot will be automatically enabled and visible under your devices Wi-Fi connections, when there is no previously saved user configuration found. Choose the hotspot from your Wi-Fi connections list to connect to it.
Wi-Fi hotspot: Configure Ruuvi GatewayRuuvi Gateway can also be reconfigured at any time by enabling its Wi-Fi hotspot and by choosing the hotspot from your Wi-Fi connections list to connect to it. To enable the Wi-Fi hotspot, locate the pinhole button underneath the power connector on your Ruuvi Gateway device and press the button briefly with a paperclip.
On mobile devices The Ruuvi Gateway setup wizard will be typically available in a captive portal, in a similar manner when you would connect to a hotel Wi-Fi hotspot.
In this guide we will show how to access the Ruuvi Gateway setup wizard by using Wi-Fi hotspot connection on multiple platforms. This guide will not show how to open the Ruuvi Gateway setup wizard using a local Ethernet connection.
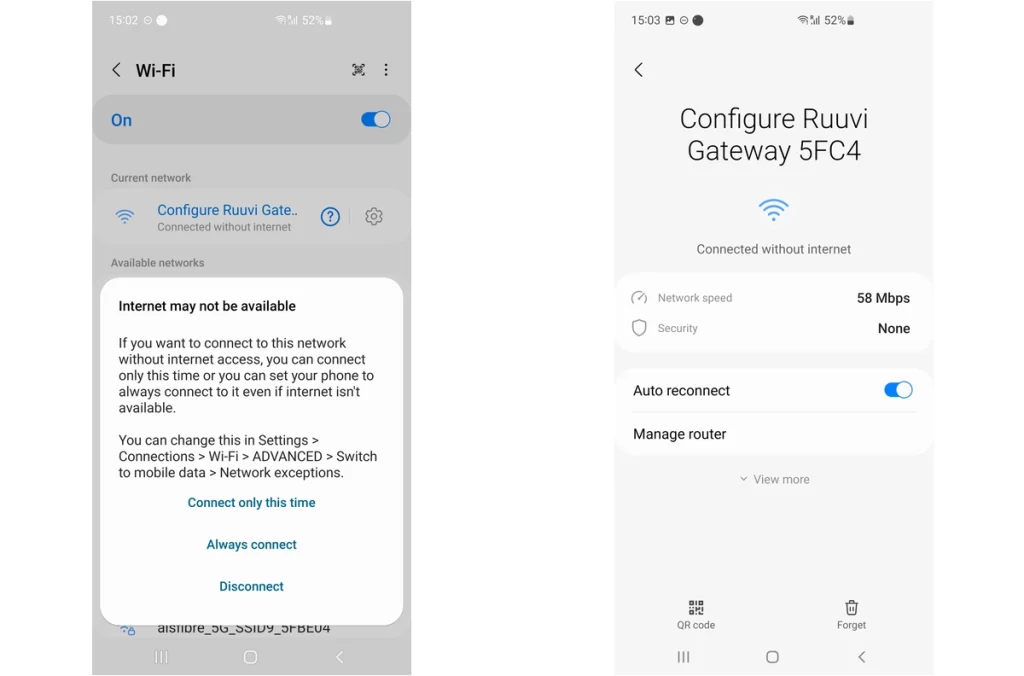
Access the Ruuvi Gateway setup wizard using an Android device
When you connect to your Ruuvi Gateway Wi-Fi hotspot on your Android mobile device, you will first be shown a popup about Internet connection not available. Choose Connect only this time. Next, you will either
1. See a captive portal window open on your mobile device screen automatically
or
2. Need to manually choose Manage Router under Ruuvi Gateway Wi-Fi settings after connecting to the hotspot in order to make the captive portal window open on your mobile device screen.
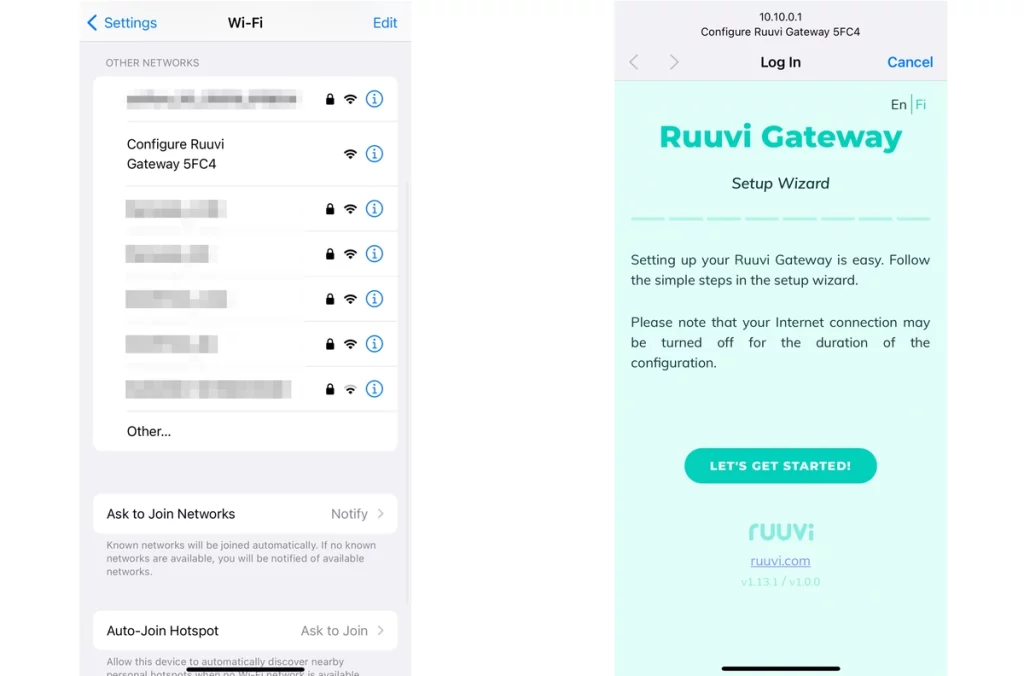
Access the Ruuvi Gateway setup wizard using an iOS device
When you connect to your Ruuvi Gateway Wi-Fi hotspot on your iOS mobile device, a captive portal window will open on your iOS mobile device screen automatically.
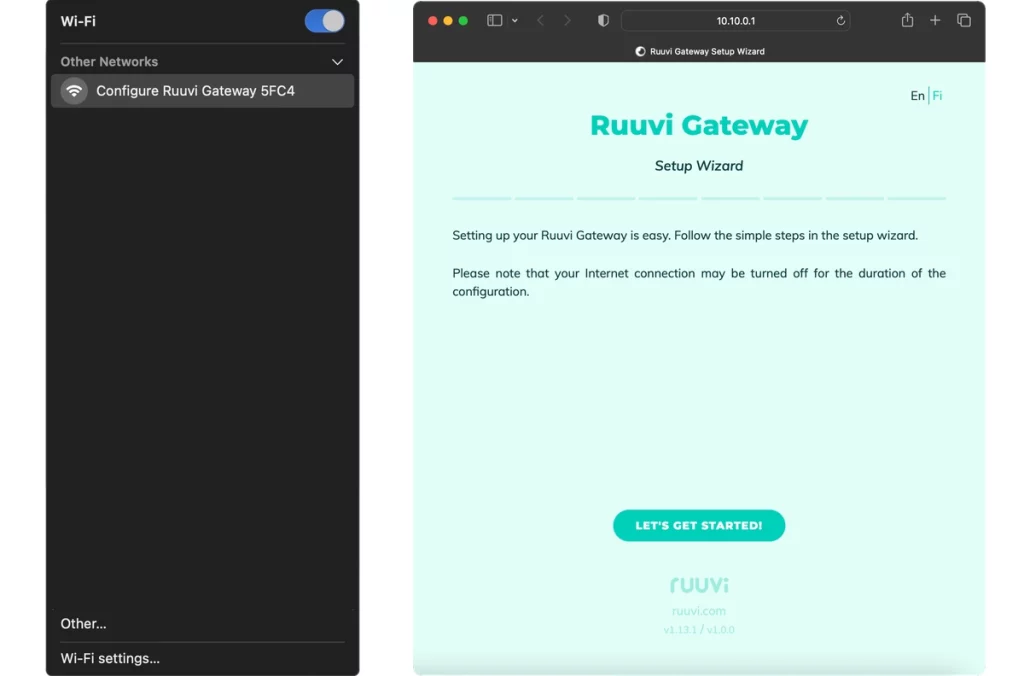
Access the Ruuvi Gateway setup wizard using a computer running latest macOS
After connecting to your Ruuvi Gateway Wi-Fi hotspot on your macOS desktop computer running macOS operating system, such as macOS Ventura, you will need to use your browser in order to access the Ruuvi Gateway setup wizard.
1. Open your web browser
2. In address bar type 10.10.0.1 and press enter
3. Ruuvi Gateway setup wizard page will be opened
Access the Ruuvi Gateway setup wizard using a computer running older macOS
After connecting to your Ruuvi Gateway Wi-Fi hotspot on your macOS desktop computer running an older macOS operating system, such as macOS Catalina, a captive portal window will open on your screen automatically.
However, in some cases, after connecting to your Ruuvi Gateway Wi-Fi hotspot, you will need to use your browser in order to access the Ruuvi Gateway setup wizard.
1. Open your web browser
2. In address bar type 10.10.0.1 and press enter
3. Ruuvi Gateway setup wizard page will be opened
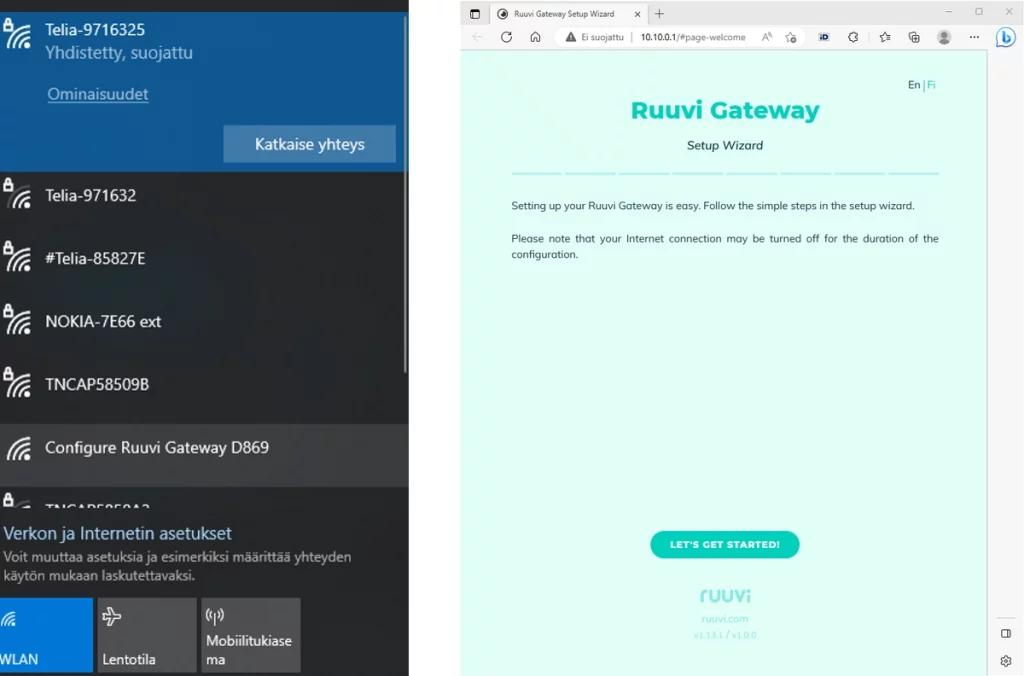
Access the Ruuvi Gateway setup wizard using a computer running latest Windows OS
After connecting to your Ruuvi Gateway Wi-Fi hotspot on your Windows desktop computer running Windows operating system, such as Windows 11, you will need to use your browser in order to access the Ruuvi Gateway setup wizard.
1. Open your web browser
2. In address bar type 10.10.0.1 and press enter
3. Ruuvi Gateway setup wizard page will be opened