Video (RuuviTag): RuuviTag Quick Start
Video (RuuviTag Pro): RuuviTag Pro Quick Start
1. Remove the plastic strip sticking out of the device
The device will power up automatically. Make sure the enclosure is fully closed.
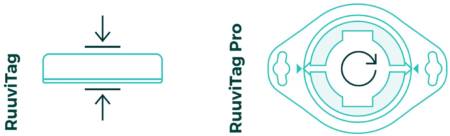
RuuviTag: Check that the sealing is in its groove and close the enclosure.
RuuviTag Pro: Turn the bottom lid until the device is fully closed.
2. Install the free Ruuvi Station mobile app and log in
Add your sensor to the app and claim the ownership on sensor setting page. The realtime measurement data starts to update automatically.
Download Ruuvi Station: Android | iOS
Read more: Ruuvi Station Quick Start
3. That’s it!
Customise the sensor to your liking by renaming it and selecting a custom background image. Now you can also configure alarms.
Exploring the measurement history
The sensor stores historical data to its own memory with 5 minute intervals. You can synchronise the last 10 days of data to the app. If you own a Ruuvi Gateway, created especially for remote monitoring, the data of your sensors is stored continuously to the cloud. You can explore the cloud history also on station.ruuvi.com
Warnings
Keep away from children. Risk of suffocation. Contains a lithium battery. Don’t leave in direct contact with water (excluding RuuviTag Pro 2in1). Read the full manuals before using.
Terms, conditions, and warranty info: ruuvi.com/terms