Building Ruuvi Firmware started as a hobby on the side of a day job for me. As one might expect, code built in Saturday-long sprints has a distinct characteristic of doing exactly one thing and being a pain to refactor into anything else afterwards.
After I officially joined Ruuvi team as a partner and started to work full time with the firmware project, it took one more year to get to this point when I’m finally starting to feel satisfied about the current state of the Ruuvi Firmware.
It does one thing, and it does it very well.
Community and Custom Requirements
Our ever-growing community has build a myriad of libraries, applications and projects around the RuuviTag. Now we have a solid foundation and experience to build new features and improve on.
As our partner network grows, so does the number of customization requests. Someone wants a special sticker for the tag, someone else wants to have their own dataformat and someone wants to run Ruuvi Firmware on their own board or on top of their own radio stack.
At a glance it might seem that customizing firmware would be a long project with every case being special. However, if we take a broader view it turns out that most of the projects are really only about configuration and choices: which sensor we have for temperature? How is it connected? How often it should be sampled? At what rate and format the data should be sent? Which radio stack should be used?
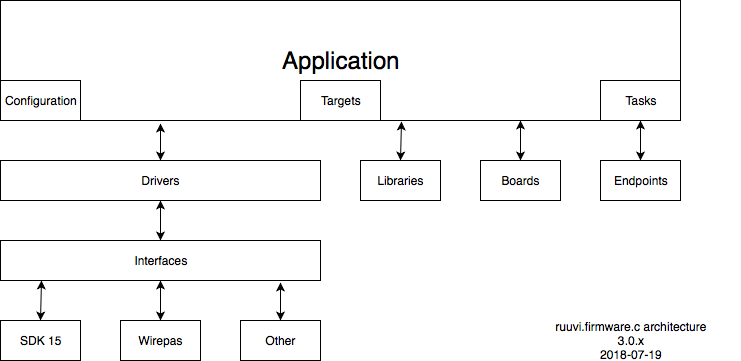
This leads to the future of Ruuvi Firmware development with a goal of easy portability and customization. First we identify the components of the design which can be reused across different projects: such as the SDK being used, board definition files and drivers. Then we make each of these their own git repository, so that user can keep on building and updating their application without worrying about any breaking changes in future versions of the components.

In the upcoming parts of this blog we’ll rebuild the Ruuvi Firmware 1.x and 2.x functionality on top of the Nordic Semiconductor’s nRF5 SDK 15 using SEGGER Embedded Studio. In the end the code built here will be a part for the next Ruuvi Product.
The code of each part will be available at https://github.com/ruuvi/ruuvi.firmware.c .
Versioning will be 3.part.patch-alpha, for example you can already check out the code as it is at the time of writing by checking out the release 3.0.3-alpha. The order of parts might change along the way, each part will have updated table of contents. We’re also open to changing the order of parts and contents based on your feedback.
Follow the Firmware Blog Series
If you wish to follow the tutorials, you’ll need at the very least SEGGER Embedded Studio and some RuuviTags or other Nordic Semiconductor nRF52832 boards and a way to connect to them with wires. Personally I’ll be using the Ruuvi DevKit, of course. Additionally I’m using Nordic Semiconductor’s Power Profiler Kit to verify the power consumption along the way.
Participate the Project
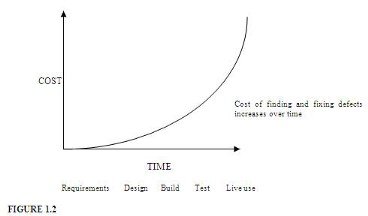
We would also like to welcome everyone to participate in this project. We want to write software which makes it easy for others to build their applications. All input on what works, what does not work, what is needed and what is unnecessary for your use cases will help us to support better the users’ requirements. It is also a well-known fact that the sooner errors are caught the less impact they have, this applies to both design and code. Please join our Slack and forums for closer collaboration and help us build better code for everyone!
Schedule
Target rate for the posts is one per week. However, life happens and every now and then a part might be more complicated to do than originally expected, or I might not be available for writing the post.
