The Ruuvi Gateway router enables users to collect measurement history and metrics via dedicated endpoints using the polling mode when connected to a local network. Access to these local endpoints can be easily configured in the Ruuvi Gateway settings, allowing you to also use various authentication methods for specific use cases.
In this guide, we will show you how to configure access to endpoints and use cURL to collect and save measurement data.
More examples for using polling mode can be found here.
What is polling?
Polling is a process in which a computer or controlling device waits for an external device to check its readiness or state. Polling mode can be utilized by servers, nodes, and various applications to retrieve values and trigger actions upon receiving input.
With the Ruuvi Gateway, polling can be used to fetch measurement data and metrics information from dedicated API endpoints provided by the Gateway. This allows for secure and reliable data collection without the need for data to leave the local network.
The metrics endpoint provides access to detailed internal information about the current status of the Ruuvi Gateway, which can be valuable for network administrators.
What is cURL?
cURL is a command-line tool used to transfer data to or from a server, using various protocols such as HTTP, FTP, and SMTP. It is commonly used for tasks like sending HTTP requests, downloading files, and interacting with APIs, making it a powerful tool for developers and system administrators to automate and test network interactions.
cURL offers an easy way to collect and save measurement data from Ruuvi Gateway with few simple parameters.
Access to Ruuvi Gateway router endpoints
By default, your Ruuvi Gateway router’s history and metrics endpoints are enabled but are only accessible within the local area network when the correct access rights are configured.
You can configure these settings on the Remote Access Settings page in the Gateway setup wizard.
Available options are:
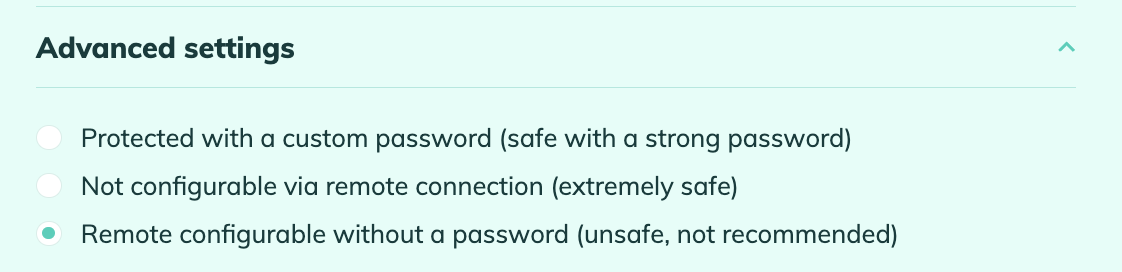
Password protected with the default password
Protected with a custom password
Not configurable via remote connection
Remote configurable without a password
When “Remote configurable without a password” is selected, these endpoints can be accessed without authentication. For the options “Password protected” or “Not configurable via remote connection,” it is recommended to configure API access using a bearer token.
When using API key (bearer token), you will be able to choose between these two options:
Read-only access (to retrieve data in polling mode via the /history endpoint)
Read-write access (to read any data or change the configuration)
In our examples, we will show a couple of the configurations mentioned above, but you can easily set up your preferred method in the Ruuvi Gateway setup wizard.
Stuff you will need
Few things are needed in order to get polling working for you.
Install cURL
Since I’m using a MacOS computer, I already have cURL installed on my system. If this is not the case for you, download and install it from here.
Find Ruuvi Gateway local client name in Terminal
Next, find the local name of our Ruuvi Gateway router, which will be later used in our bash script. Local name is specific to MacOS, if you are using Windows, use a local IP address assigned to your Ruuvi Gateway instead.
In Mac OS Terminal, type
dns-sd -B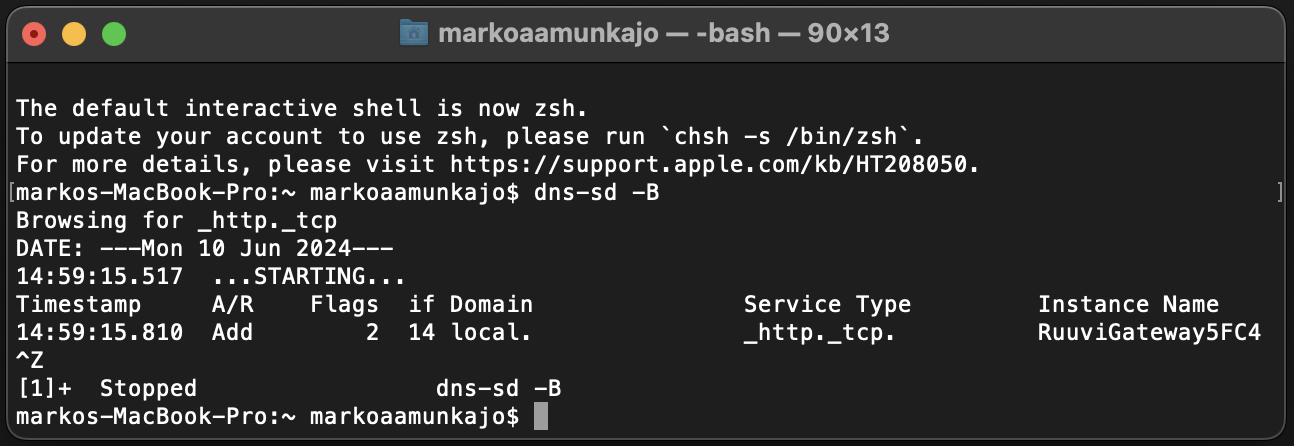
Create a folder to save scripts and logs
Since during the process we will create some bash scripts and save logs, we will first create a new folder called Ruuvi under our Downloads folder and then go to this folder, where we will later save our files.
In Mac OS Terminal, type
mkdir /Users/[yourusername]/Downloads/Ruuvi/
cd /Users/[yourusername]/Downloads/Ruuvi/
Example 1: Read measurement data with 60 second interval using cURL (no authentication)
In this first example, we will simply collect sensor measurement data from the Ruuvi Gateway /history endpoint with a 60 second interval without authentication. This is safe for data collection within a local area network, such as your home and can be easily set up for fast data collection using a Terminal window.
Configure Ruuvi Gateway router to allow API access without authentication
To begin, we want to configure Ruuvi Gateway endpoints to be accessible in the local area network without authentication. To do this, open Ruuvi Gateway Setup Wizard, go to Remote Access Settings page and set “Remote configurable without a password”.
Once changed, tap Next until configuration is completed. The Ruuvi Gateway Setup Wizard can be closed.
Create a bash script and make it executable
Next, open a text editor with blank page and write the following lines replacing your Gateway local name between the [] brackets. If you are using Windows, use your Gateway local IP address instead.
#!/bin/bash

while true
do
curl http://[yourgateway.local]/history
sleep 60
done
Save this file to your Ruuvi folder with filename example1.sh
Finally, let’s make this bash file executable using Terminal
cd /Users/[yourusername]/Downloads/Ruuvi/
chmod +x example1.sh
Run the script in Terminal
Now we can run this script in same Terminal window with following command
./example1.shThat’s it! Measurement data is being read from your Gateway’s /history endpoint and printed to Terminal window with 60 seconds interval.

Example 2: Collect measurement data to a .json file using cURL (bearer authentication)
In our second example, we will collect sensor measurement data from the Ruuvi Gateway’s /history endpoint when access to the Gateway Web UI is password-protected and reading endpoint is authenticated via a bearer token. We will then save the collected measurements to a .json file.
Configure Ruuvi Gateway router to be protected with password but use API key (bearer token) for authentication
First, we want to password protect access to Ruuvi Gateway Web UI but also configure the endpoints to be readable using a bearer token.
To do this, open Ruuvi Gateway Setup Wizard, go to the Remote Access Settings page and set “Password protected with the default password, then set the “Enable read-only access to “/history” using API key” as enabled under Advanced settings.
A unique key will be generated for you automatically.

Copy and paste this key to your text editor before tap on Next until your configuration is saved.
Create a bash script and make it executable
Next, open a blank page in text editor and write the following lines replacing your Gateway local name and bearer token between the [] brackets. If you are on Windows, use your local Gateway IP address instead.
#!/bin/bash

while true
do
curl http://[yourgateway.local]/history -H "Authorization: Bearer [yourbearertoken]" -o history.json
sleep 60
done
Save this file to your Ruuvi folder with filename example2.sh
Finally, let’s make this bash file executable using Terminal
cd /Users/[yourusername]/Downloads/Ruuvi/
chmod +x example2.sh
Run the script in Terminal
Now we can run this script in same Terminal window with following command
./example2.shThat’s it! Measurement data is being read from your Gateway’s /history endpoint using API key and saved to a history.json file located in the Ruuvi folder using a 60 seconds interval.


Alternative methods of collecting measurement data from Ruuvi Gateway
Polling is just one way to collect measurement data from your Ruuvi Gateway. If you want to use a specific server to collect measurement data, Ruuvi Gateway also offers an easy way to relay data to a HTTP(S) or MQTT(S) server.
However, polling can be a straightforward way to collect measurements from your Ruuvi Gateway router within your Local Area Network using just your Terminal window, without the need to configure a complicated server for the task.