The Ruuvi Gateway router seamlessly integrates with Ruuvi sensor products right out of the box, ensuring optimal and easy setup especially when bundled with Ruuvi Cloud subscription.
However, as mentioned in this article, Ruuvi Gateway can take the center stage in a more complex IoT environment, consisting of sensor products not manufactured by Ruuvi. This support article outlines the configuration process of the Ruuvi Gateway to transmit Bluetooth LE advertisements from third-party sensors and configuring a simple HTTP/HTTPS server running Python.
It’s also possible to utilize an MQTT server target to receive data from third-party sensors. Refer to our support article if you are looking to configure an MQTT target instead. Please be aware that Ruuvi Cloud does not support third-party sensor data.
Listen to third-party Bluetooth LE advertisements with Ruuvi Gateway
Your Ruuvi Gateway comes with a built-in capability to listen to any Bluetooth LE compatible broadcasts, simplifying the expansion of your setup to include both Ruuvi and non-Ruuvi beacon devices. Combined with the capability to transmit advertisement data to HTTP(S) and/or MQTT(S) servers, this broadens the horizons for utilizing the Ruuvi Gateway as a gateway component within your IoT ecosystem.

Let’s activate this feature using the Ruuvi Gateway setup wizard. First, locate the pinhole button underneath the power connector on your Ruuvi Gateway device and press the button briefly with a paperclip to activate the built-in Wi-Fi hotspot. Once the hotspot is active, connect to it on your device by selecting Configure Ruuvi Gateway XXXX from the available Wi-Fi networks. A detailed tutorial to connect to Ruuvi Gateway Wi-Fi hotspot and open Ruuvi Gateway setup wizard on your device can be found here.
In the setup wizard, choose Next until you reach the Cloud Options page and select Use Ruuvi Cloud and/or a custom server and configure other advanced settings under Advanced. You can skip configuring HTTP(S) and MQTT(S) at this time and simply tap Next twice to reach the Bluetooth Scanning page.
Next, locate the Listen to all Bluetooth beacon messages (not just Ruuvi sensors) option under Advanced settings and select this option to enable the Ruuvi Gateway to listen to all Bluetooth Low Energy advertisements within its proximity, not just Ruuvi sensors.

Select protocol and channels
Following that, proceed to select Listen to 1 MBit/s advertisements from the list of available protocols. By default, channels 37, 38, and 39 are selected; you can leave both of these settings unchanged. Select Next to finish configuration.
Configure your HTTP(S) server using Python
In the next steps, we will set up Python and configure it to run as a HTTP(S) server in our local network using a Mac computer.
If Python is not yet installed on your Mac, download and install it from here:
https://www.python.org/downloads/
Ruuvi Gateway uses POST requests to send data to a HTTP server. In order for the Python HTTP server to work with POST commands, we will need to download a script from our Ruuvi GitHub repository:
https://github.com/ruuvi/ruuvi.gwui.html/blob/master/scripts/http_server_auth.py
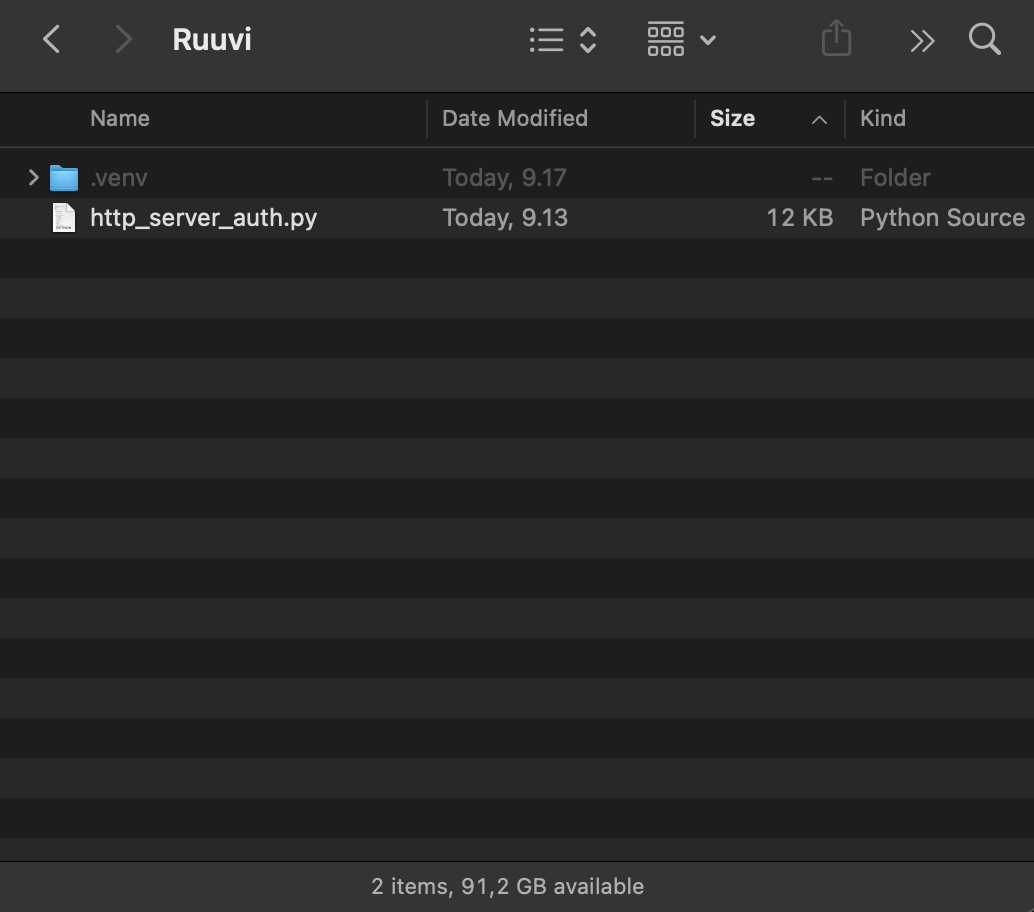
Create a new folder with the name Ruuvi, then download the above file and move it into this newly created folder. In my case I created the folder inside my Downloads.
Next, open Terminal from your Mac Applications -> Utilities.
Create and run virtual environment, update pip and install pycryptodome
- Go to the Ruuvi folder in Terminal
cd /Users/[yourusername]/Downloads/Ruuvi/- Create venv
python3 -m venv .venvAfter this step, you may want to check that the .venv folder was indeed created. In Finder, locate and open the Ruuvi folder. Press Command+Shift+Dot. Your hidden files will become visible and the .venv folder should be there.
- Activate venv
source scripts/.venv/bin/activate- Upgrade pip (optional)
pip3 install --upgrade pip- Install pycryptodome
pip3 install pycryptodomeNow we are ready to start our Python server. You can run either a HTTP or HTTPS server, simply follow either Option 1 or Option 2 according to your preference.
Option 1: Run a HTTP server
- Go to the Ruuvi folder in Terminal
cd /Users/[yourusername]/Downloads/Ruuvi/- Start the HTTP server
python3 http_server_auth.py --port 8001Option 2: Generate SSL certificates and run a HTTPS server
In order to generate certificates, we will need to know the hostname and client name.
To find these, let’s do the following
In Mac OS Terminal, type
hostnameIn my case hostname is `markos-MacBook-Pro.local`
Client name, which is your Ruuvi Gateway router’s local network name used in Mac OS can be found as follows:
In Mac OS Terminal, type
dns-sd -BIn my case the instance name is RuuviGateway5FC4.local
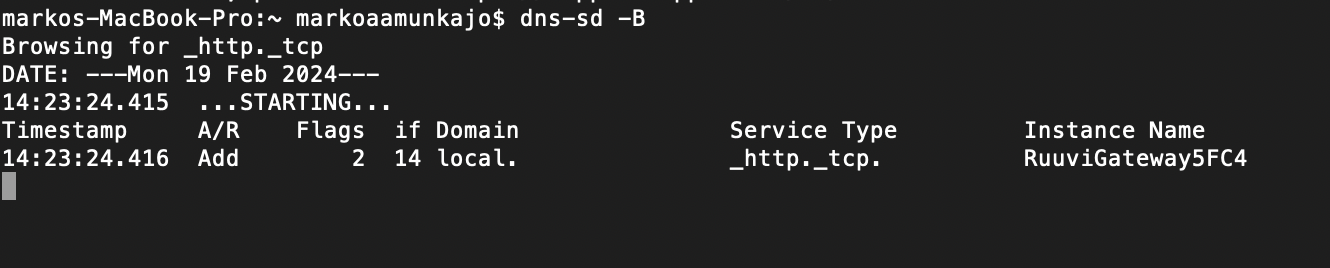
In my case the instance name is RuuviGateway5FC4.local
Next, let’s generate the required SSL certificates to be used on both client and server side. We will use the OpenSSL command for this in the Terminal window. Notice that the certificate files will be generated in the folder where my Terminal is currently pointing. In my case this is the folder User/username/Downloads/Ruuvi/
- Go to the Ruuvi folder in Terminal
cd /Users/[yourusername]/Downloads/Ruuvi/Generate server certificates (SSL)
First, let’s generate 2048-bit self-signed server certificates. Follow the below steps in order.
- Generate a private key
openssl genrsa -out server_key.pem 2048- Create a Certificate Signing Request (CSR)
openssl req -new -key server_key.pem -out server_csr.pem- Generate the client self-signed certificate
openssl x509 -req -in server_csr.pem -signkey server_key.pem -out server_cert.pem -days 365In order to generate the certificate in step 3, a few additional questions will be asked and required. Others can be skipped. I filled in:
Country name (2 letter code): `FI`
Common name: `markos-MacBook-Pro.local`
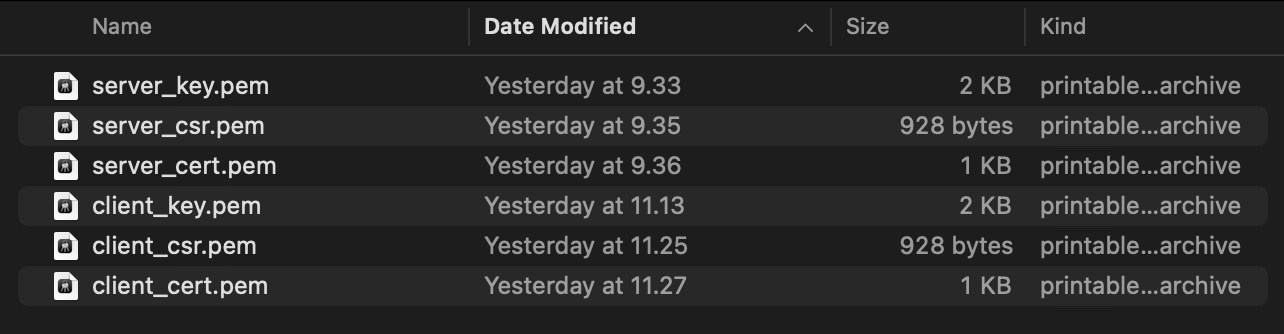
After these steps are completed, the server side certificate files are found in the Ruuvi folder.
Generate client certificates (SSL)
Next, generate a certificate and a private key for the client (2048-bit RSA key). Follow the below steps in order.
- Generate a private key
openssl genrsa -out client_key.pem 2048- Create a Certificate Signing Request (CSR)
openssl req -new -key client_key.pem -out client_csr.pem- Generate the client certificate
openssl x509 -req -in client_csr.pem -signkey client_key.pem -out client_cert.pem -days 365In order to generate the certificate in step 3, a few additional questions will be asked and required. Others can be skipped. I filled in:
Country name (2 letter code): `FI`
Common name: `RuuviGateway5FC4.local`
After these steps are completed, the client side certificate files are found in the Ruuvi folder.
Run the HTTPS server
- Go to the Ruuvi folder in Terminal
cd /Users/[yourusername]/Downloads/Ruuvi/- Start the HTTPS server with the following command:
python3 http_server_auth.py --port 8001 --ssl_cert=./server_cert.pem --ssl_key=./server_key.pem --ca_cert=./client_cert.pemSet up Ruuvi Gateway to relay advertisement data to a HTTP server
Ruuvi Gateway can relay third-party sensor data to HTTP(S) and/or MQTT(S) servers. This time, we will configure and use a HTTP(S) server target. If you are looking for a guide on how to configure MQTT target, it can be found here.
To begin the configuration, locate the pinhole button underneath the power connector on your Ruuvi Gateway device and press the button briefly with a paperclip to activate the built-in Wi-Fi hotspot. Once the hotspot is active, connect to it on your device by selecting Configure Ruuvi Gateway XXXX from the available Wi-Fi networks.
Once the setup wizard is opened, tap on Next until you reach the Cloud Options page. Once there, select Use Ruuvi Cloud and/or a custom server and configure other advanced settings, choose Next and on the Custom Server page, activate the HTTP(S) option. This will enable us to configure the HTTP settings.
Next, we need to locate the IP address or local hostname for the computer that is running as a localhost.
Either
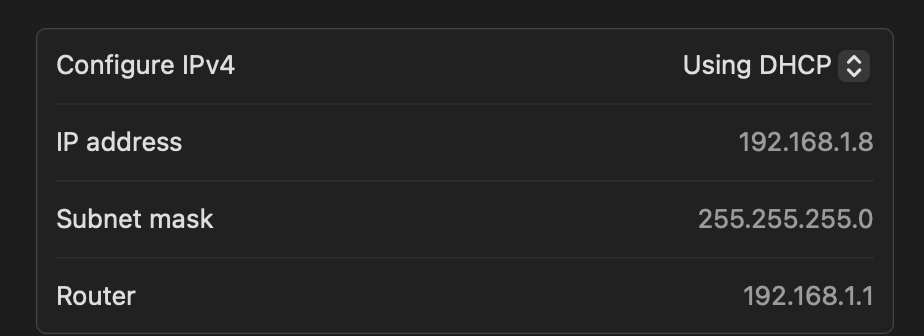
Check IP from Mac OS settings -> Network.
In my Wi-Fi connection, the IP shows 192.168.1.8.
Or
Alternatively when using Mac computers, you can also use a local hostname instead. To find your hostname,
In Mac OS Terminal, type
hostnameIn my case hostname is `markos-MacBook-Pro.local`
In the Ruuvi Gateway setup wizard, let’s now add the server target depending on your previously selected option (HTTP or HTTPS server).
Set HTTP server configuration in Ruuvi Gateway setup wizard (option 1)
HTTP server will be a straightforward configuration, since there aren’t many parameters to know.
- Add the URL address for the computer that is running your HTTP server. In my case I will use the local hostname. The port was previously defined when configuring the HTTP server.
- Data format for our third-party sensor is not known and cannot be decoded by Ruuvi Gateway, so sending in raw format is the only option.
- Sending interval is set to 10 seconds at this time to get frequent updates.
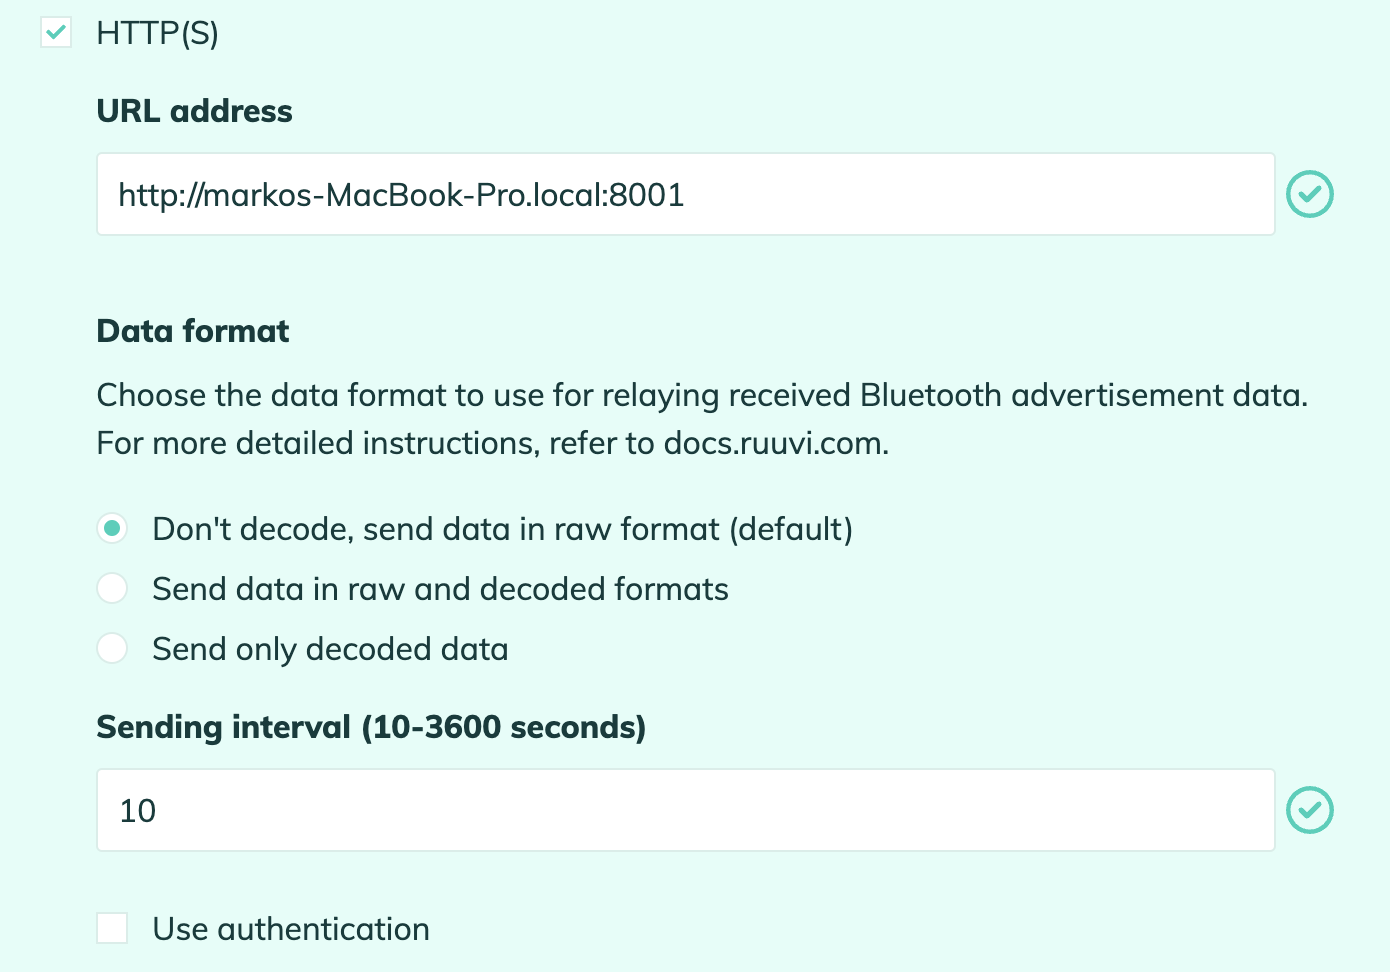
- Proceed to check the configuration with the Check button. If no errors appear, tap on Next until you reach the last page confirming that setup has finished.
Set HTTPS server configuration in Ruuvi Gateway setup wizard (option 2)
Configuring a HTTPS server requires one more step with SSL certificates, but is also quite straightforward.
1. Add the URL address for the computer that is running your HTTPS server.
In my case I will use the local hostname. The port was previously defined when configuring the HTTPS server.
2. Data format for our third-party sensor is not known and cannot be decoded by Ruuvi Gateway, so sending in raw format is the only option.
3. Sending interval is set to 10 seconds at this time to get frequent updates.
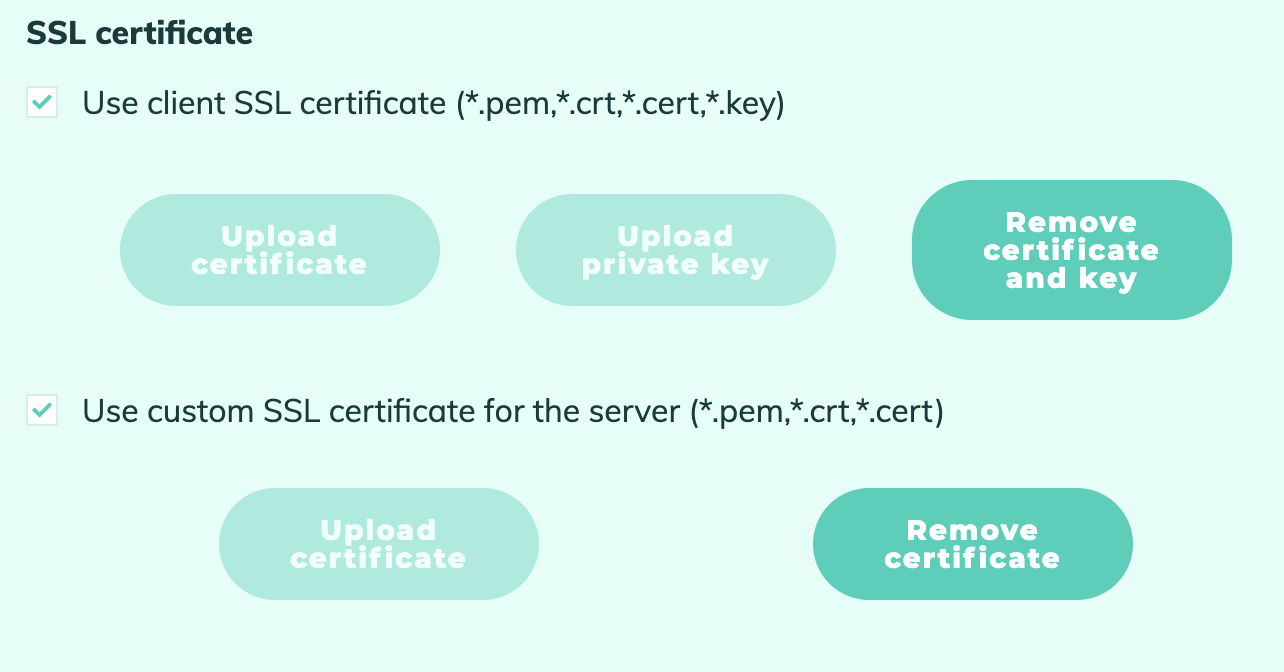
4. Below the sending interval setting, you will find the SSL certificate options. Select use for both client and custom SSL certificate options. In my case I uploaded a client certificate and key for client SSL certificate and server certificate for custom SSL.
5. Proceed to check the configuration with the Check button. If no errors appear, tap on Next until you reach the last page confirming that setup has finished.
Testing the configuration
Now that the server and Ruuvi Gateway have been configured, it’s time to finally check if sensor data is being sent from Ruuvi Gateway and received by the HTTP(S) server.
Write down the IP address that was assigned to your Ruuvi Gateway from the last page of the Ruuvi Gateway setup wizard. In my case this IP is 192.168.1.8.
Next, open the following page in a browser window.
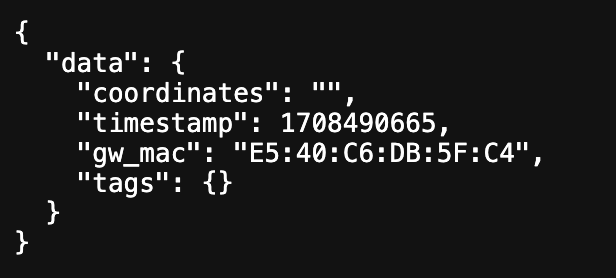
http://[yourgatewayip]/historyThis page reports all sensors that Ruuvi Gateway is currently sending. This data should contain details about your third-party sensor.
Third-party sensor data is being sent out from Ruuvi Gateway.
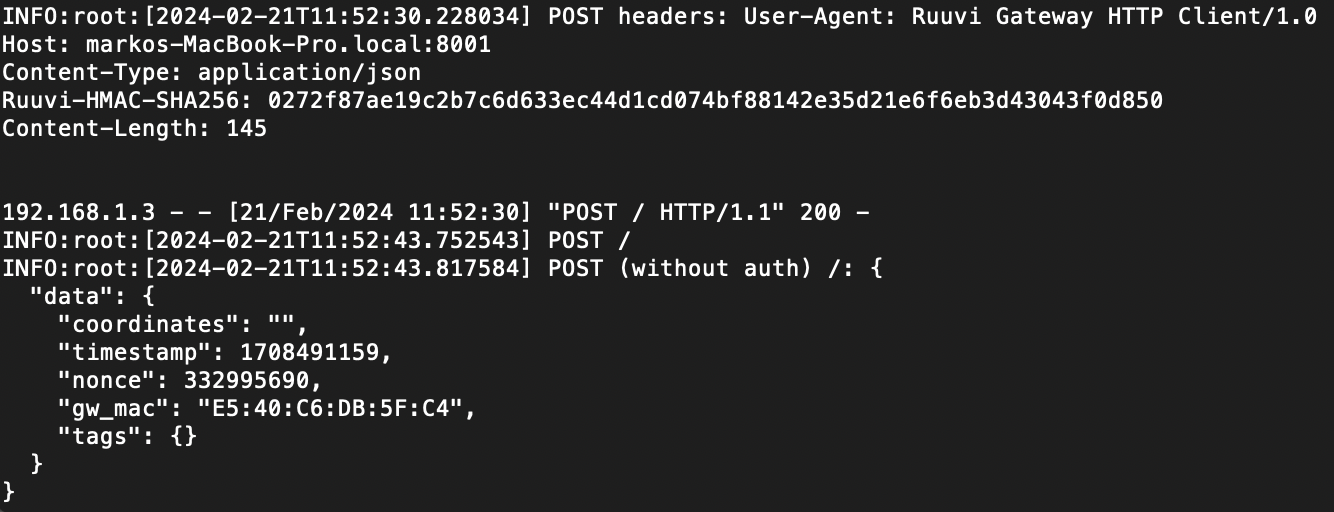
Lastly, let’s check that the same data is received on the HTTP(S) server side. To do this, simply a brief look at the MacOS Terminal that is running the Python server confirms that this sensor data is indeed received.
Conclusion
In this How To article, we explored the seamless integration of third-party sensor data with the Ruuvi Gateway router, extending its functionality beyond Ruuvi sensor products.
By configuring the Ruuvi Gateway to listen to Bluetooth LE advertisements from non-Ruuvi sensors and setting up a HTTP(S) server, users can efficiently relay and process data within their IoT ecosystem.